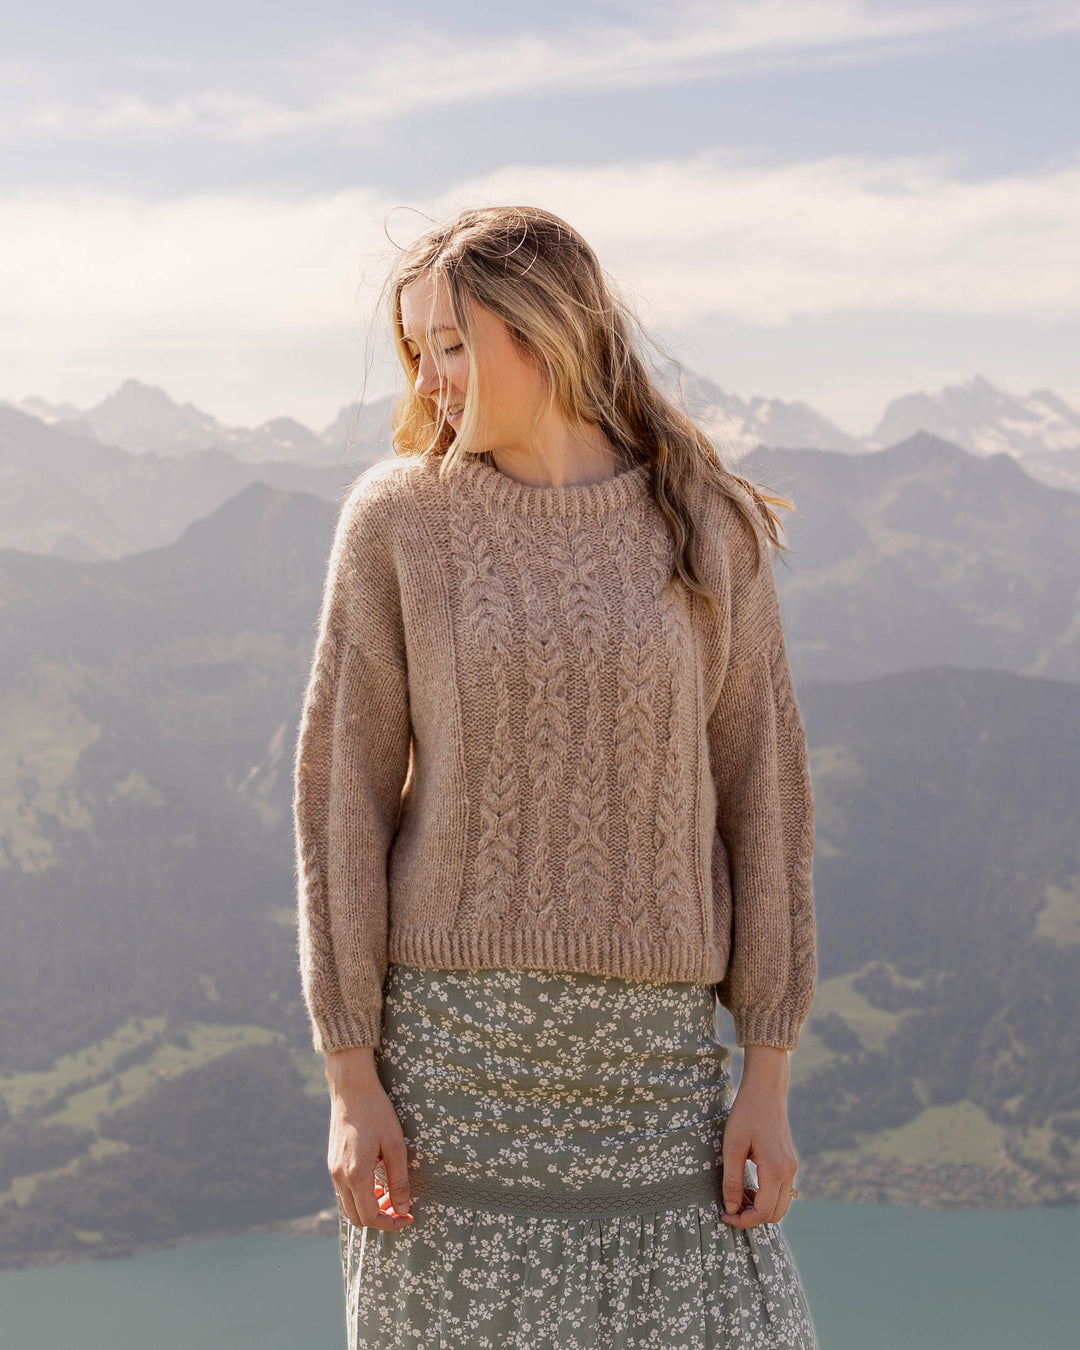
Asher Skirt Knitting Pattern


Hello Lovelies! It's been a minute since I've shared a pattern with you -- but I think you will be so this latest design -- the Asher Skirt!
I've had this design written down and all ready to go for the longest time. When I started working with this yarn from Lion Brand I knew that it was going to be perfect for the skirt.
What I love about this skirt is that it brings the beauty of hand-knit items into your wardrobe in a fun and unique way. If you've been reading for a while, you know that I love to integrate hand-knit goods in unexpected ways!
Another thing I love is that this skirt can be styled for all seasons and is easily customizable to any length and size. I see this skirt working with a cute pair of boots and sweater for fall. I see it looking wonderful under a jacket with leggings for winter. And I know it would look amazing with a blouse and sandals or sneakers for spring/summer!


Asher Skirt
Kaitlin Blasing
Pattern Description: This beautiful skirt brings the beauty of hand-knit items into your wardrobe in a fun and unique way. This skirt can be styled for all seasons and is easily customizable to any length and size.
Skill Level: Beginner +
To knit this skirt, you will need to know how to knit, purl, the provisional cast on technique, some simple shaping, and feel confident with keeping track of patterns.
Materials:
- 3 (3, 3, 3, 4, 4, 4, 4) skeins Lion Brand Jeans Yarn in Top Stitch (note: more balls of yarn will be needed for longer skirts).
- Size US 6 29” or longer circular needle
- 7/8” waistband elastic
- Tapestry needle to weave in ends
- Sewing machine or needle and thread to close waistband elastic
Gauge:
22 stitches and 30 rows = 4” in stockinette stitch
Dimensions:
2XS, (XS, S, M, L, XL, 2X, 3X)
Finished Hip Measurement: 30.5, (33, 35.5, 38, 42, 46, 51, 54.75).
Finished Length: 16”. You may easily make your skirt longer or shorter depending on your preferences. If you want to make it a bit longer, be sure to buy an extra ball of yarn. For skirts much longer, you may need 2 additional balls of yarn.
Help Choosing Size: Choose a size based on your hip measurement at the point where you want your skirt to sit. From this number, choose a size that is closest to the dimensions for the ‘finished hip measurement’ without going over that measurement. For example, if your hip measurement is 34” where you want your skirt to sit, you will make a size S.
Note: Pattern is written for smallest size with changes for larger sizes in parentheses. When only one number is given, it applies to all sizes. To help keep track of your point in the pattern you may highlight or circle all numbers corresponding to your size before you begin.
Abbreviations:
Beg = beginning
BO = bind off
CO = cast on
K = knit
M1R = make one right. Pick up the bar between the stitch you just knit and the one you are about to knit with your left needle from back to front, knit through the front.
M1L = make one left. Pick up the bar between the stitch you just knit and the one you are about to knit with your left needle from front to back, knit through the back.
Stst = stockinette stitch
Notes: This pattern will be worked in one piece, in the round, starting from the waistband down.
PATTERN INSTRUCTIONS
Cast on 168, (182, 196, 210, 231, 252, 280, 301) sts using the provisional cast on method. Join to work in round. Place marker to denote beginning/end of each round.
Waistband:
Work 2” even in stst.
Now, take your waistband elastic and cut it so that it fits comfortably around your waist where you want the skirt to sit. Sew the waistband elastic closed either with a needle and thread or a sewing machine if you have one.
On the next round, you will work a foldover hem with the waistband elastic in the center of the hem. To do this, you will lift the first stitch from the provisional cast on around the elastic piece from the back and up onto your left hand needle. Be sure you are lifting the stitch and putting it on your needle so that the right-side of the work (the smooth knit stitches) are facing you and the purls are in the center of the hem. Then, you will knit the stitch just lifted from the provisional CO and the next stitch together. Repeat this for each consecutive stitch until all stitches have been worked. You will now have your foldover hem!
For help working a foldover you may watch this YouTube tutorial for a double brim (same technique, without elastic): https://youtu.be/Et8gYQtoM_g
Body of the Skirt
Row 1: k 24, ( 26, 28, 30, 33, 36, 40, 43), PM. Rep from * to end of round.
2: *k to M, M1R, SM, sl1, M1L. Rep from * to end of round. [182, (196, 210, 224, 245, 266, 294, 315) sts].
3: knit.
4: *k to M, SM, sl1. Rep from * to end of round.
5: knit.
6: as round 4.
7: knit.
8: *k to M, M1R, SM sl1. Rep from * to end of round. [189, (203, 217, 231, 252, 273, 301, 322) sts].
9: knit.
10: as round 4.
11: knit.
12: as round 4.
13: knit.
14: *k to M, SM, sl1, M1L. Rep from * to end of round. [196, (210, 224, 238, 259, 280, 308, 329) sts].
Repeat rounds 3-14 seven more times. This will create a skirt that is about 16” long. Depending on your preferences, you may repeat rounds 3-14 more/less times to add more/less length to your skirt. Be sure to have extra yarn on hand if you would like your skirt longer.
Bottom Hem
On the next row, remove all markers except the marker that denotes beginning/end of rounds.
Work 9 rows in garter stitch. (Note: since you are working in the round, you will need to knit one round, purl one round).
BO in knit.
Finishing
Weave in all ends. To block, soak in warm water and lay flat to dry. Be sure to straighten the slipped stitch detailing so that it lies in a flat line while drying.
Enjoy!