Iris stitch tee crochet pattern main image, tee shown on a model standing in front of water looking off to the side. Tee is a white lace crocheted top with simple details

Iris Stitch Tee Crochet Pattern

Introducing: the Iris Tee crochet pattern and video tutorial! A simple lace crochet t-shirt

The Iris Stitch Tee crochet pattern is a simple lace top with delicate details. Originally Lovely Cria yarn showcases the elegant drape of this beautiful crochet motif. 

Although technically an intermediate level crochet pattern, the accompanying video tutorial for the Iris Stitch Tee makes this crochet pattern suitable for adventurous beginners looking to make their first garment.

Iris Lace tee crochet pattern main image, shown with the model looking at the camera gently smiling.  She is faced forward wearing a blue skirt with this tee.  The top has a lace crochet stitch detailing and a relaxed fit

The Iris Stitch Tee crochet pattern is available for free (shown below), and as a printable PDF on Ravelry and Etsy.

Click here to jump ahead to the free crochet pattern or continue reading to learn a bit about the design and some pointers to help you out!

**please note, some links may be affiliate links which will allow me to make a small commission on products purchased through my referral. This does not influence my opinion or the price of the item that you are purchasing in any way.

The Design

Lately I’ve been gravitating towards simple crochet stitches that don’t take much concentration. The lace stitch for this tee is the perfect laid-back stitch because you are working into chain spaces, not actual stitches! This means for the majority of the pattern you don’t need to count or pay much attention to what you are doing.

Another thing I really love about this tee is that it doesn’t have much shaping, its pretty simple and allows the beauty of the crochet stitches to stand out. The baby alpaca yarn means it drapes so nicely across your body – I think it comes together for a truly stunning piece!

Close-up detail image of the Iris lace tee, model is looking downward and off to the side to showcase the shoulder seam and sleeve detailing

Yarn

This tee was truly designed around Originally Lovely Cria yarn. I knew I wanted to showcase the unique properties of the baby alpaca fiber by making a relaxed lace top. This stitch then seemed like the perfect fit!

Iris Stitch Tee Crochet Pattern

© ORIGINALLY LOVELY 2022

This pattern and photographs of this garment are property of Kaitlin Barthold of Originally Lovely. This pattern, photos, and design are subject to copyright and are for personal use only. All commercial use is strictly prohibited. You may not reproduce or distribute this pattern under any circumstances.

The free version of this pattern must be viewed from the webpage.

Iris stitch tee crochet pattern main image, tee shown on a model standing in front of water looking off to the side. Tee is a white lace crocheted top with simple details

Follow along with the Iris Stitch Tee Video Tutorial

Shop the printable, ad-free PDF on Ravelry

Shop the printable, ad-free PDF on Etsy

Skill Level

Intermediate

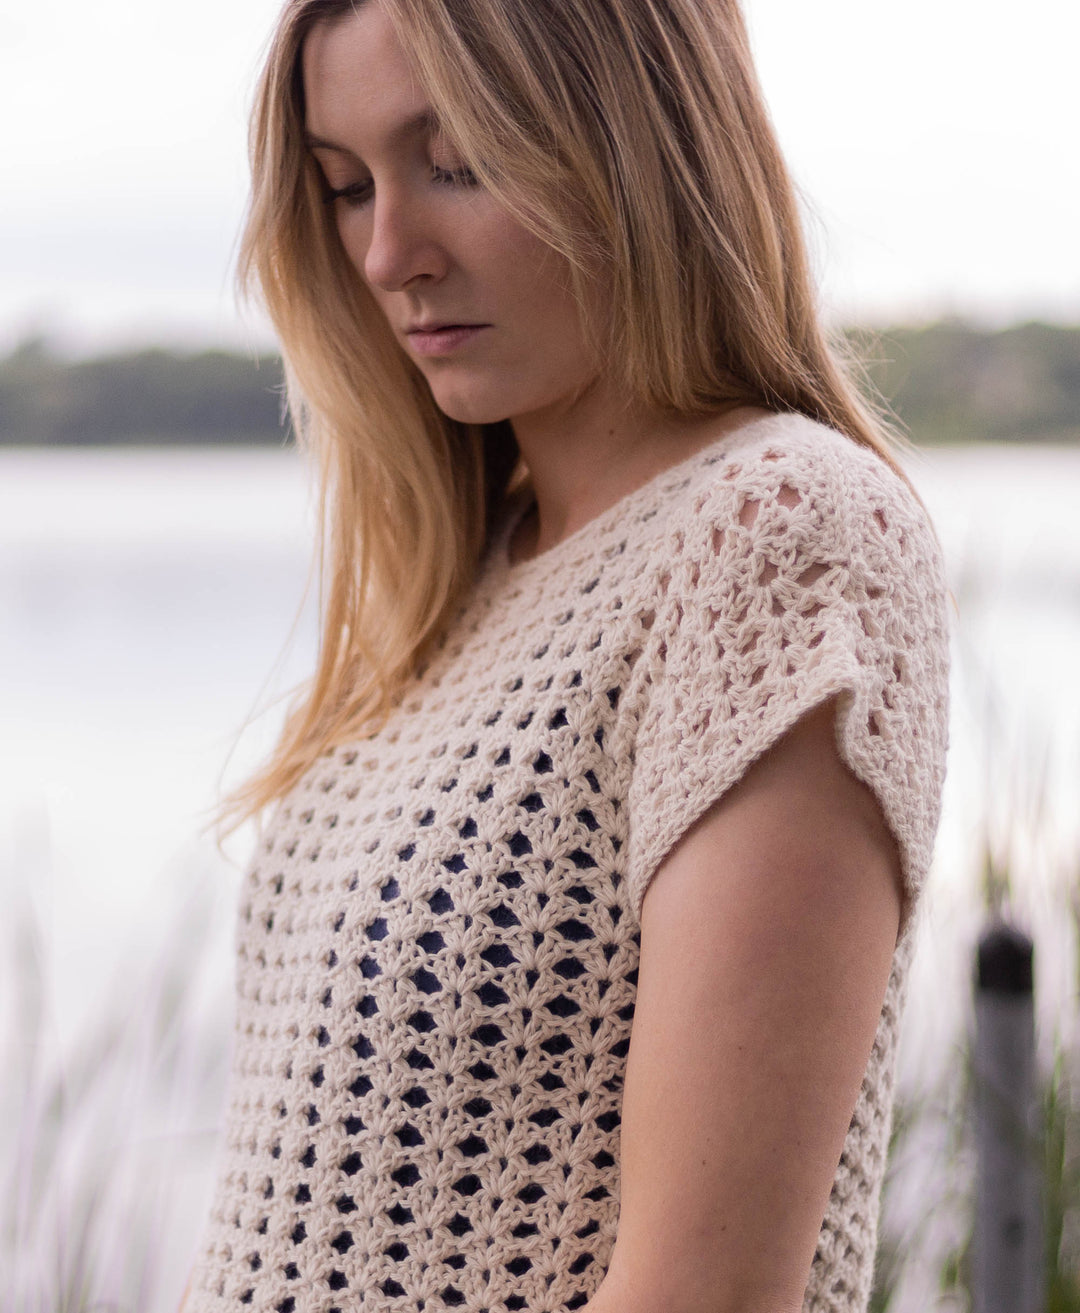
For this pattern, you will use the following skills: Foundation Single Crochet, Double Crochet, Chain Stitch, Working in the round, working flat, and some simple shaping. 

As mentioned before, although this is technically an intermediate level crochet pattern, the accompanying video tutorial makes the Iris Stitch Tee suitable for adventurous beginners looking to crochet their first garment.

Materials

  • 5, (6, 7, 8, 9), (10, 10, 11, 12) balls / 545, (654, 763, 872, 981), (1090, 1090, 1199, 1199) yards Originally Lovely Cria Yarn – shown in Ecru
Detail image of Originally Lovely Cria Yarn. This image shows the green Forest color of Cria.
Originally Lovely Yarn

CRIA

Cria is a lovely light worsted weight yarn made out of 100% baby alpaca. This yarn creates stunning tops with its silk-like drape and elegant halo!

Gauge

3.5 iris clusters wide and 7 iris clusters tall = 4 in (10 cm)

The combination of this yarn and iris stitch creates a stretchy fabric with generous drape.  To get the most accurate gauge calculation, be sure to measure gently while laying flat and avoid over stretching your work.  

Please note: Always remember to gauge swatch especially when substituting yarn in a pattern! Small changes in gauge can lead to large changes in the finished garment so assure a proper fit with the proper gauge!

Iris Stitch Crochet Chart

Iris Stitch Crochet Chart

Notes

This tee will be worked from the bottom, up.  You will begin by working in the round to shape the body, then separate to crochet the front and the back and join at the shoulders.  To finish, you will add the sleeves and the neckline.  

Please note, although worked in the round, you will ‘turn’ your work at the end of each round, almost as if you were crocheting flat.  This will assure that the tee won’t twist while working and that the body of the tee will have the same texture as the front/back pieces, which are worked flat.   

Unless otherwise noted, turning chains WILL count as first stitch.  

Video Tutorial

A full, start-to-finish video tutorial is available for this crochet pattern: https://youtu.be/W1fl5Hw-q9M

Choosing Yarn

As I mentioned earlier, this tshirt was designed using Originally Lovely Cria yarn. This yarn has excellent drape and a gentle halo.

If substituting yarn, be sure to choose a light worsted weight yarn that is able to meet gauge.

Please note: Yarn weight and yardage requirements are estimates. Using yarn of different fiber composition, ply, gauge, and any modifications will lead to differences in yarn usage. 

Finished Dimensions

XSSMLXL2X3X4X5X
Finished Bust Circumference31″36″40″45″49″54″58″63″67″
Width15.5″18″20″22.5″24.5″27″29″31.5″33.5″
Total Length21.5″22.5″22.5″22.5″22.5″23.5″23.5″23.25″23.25″
Body Length14.5″14.5″14.5″13.5″13.5″13.5″13.5″12.25″12.25″
Armhole Depth7″8″8″9″9″10″10″11″11″

XS (S, M, L, XL) (2X, 3X, 4X, 5X)

Pattern is written for smallest size with changes for larger sizes in parenthesis. When only one number is given, it applies to all sizes. To keep track of your size, you may highlight or circle all numbers for your chosen size before you begin.

Help Choosing Size

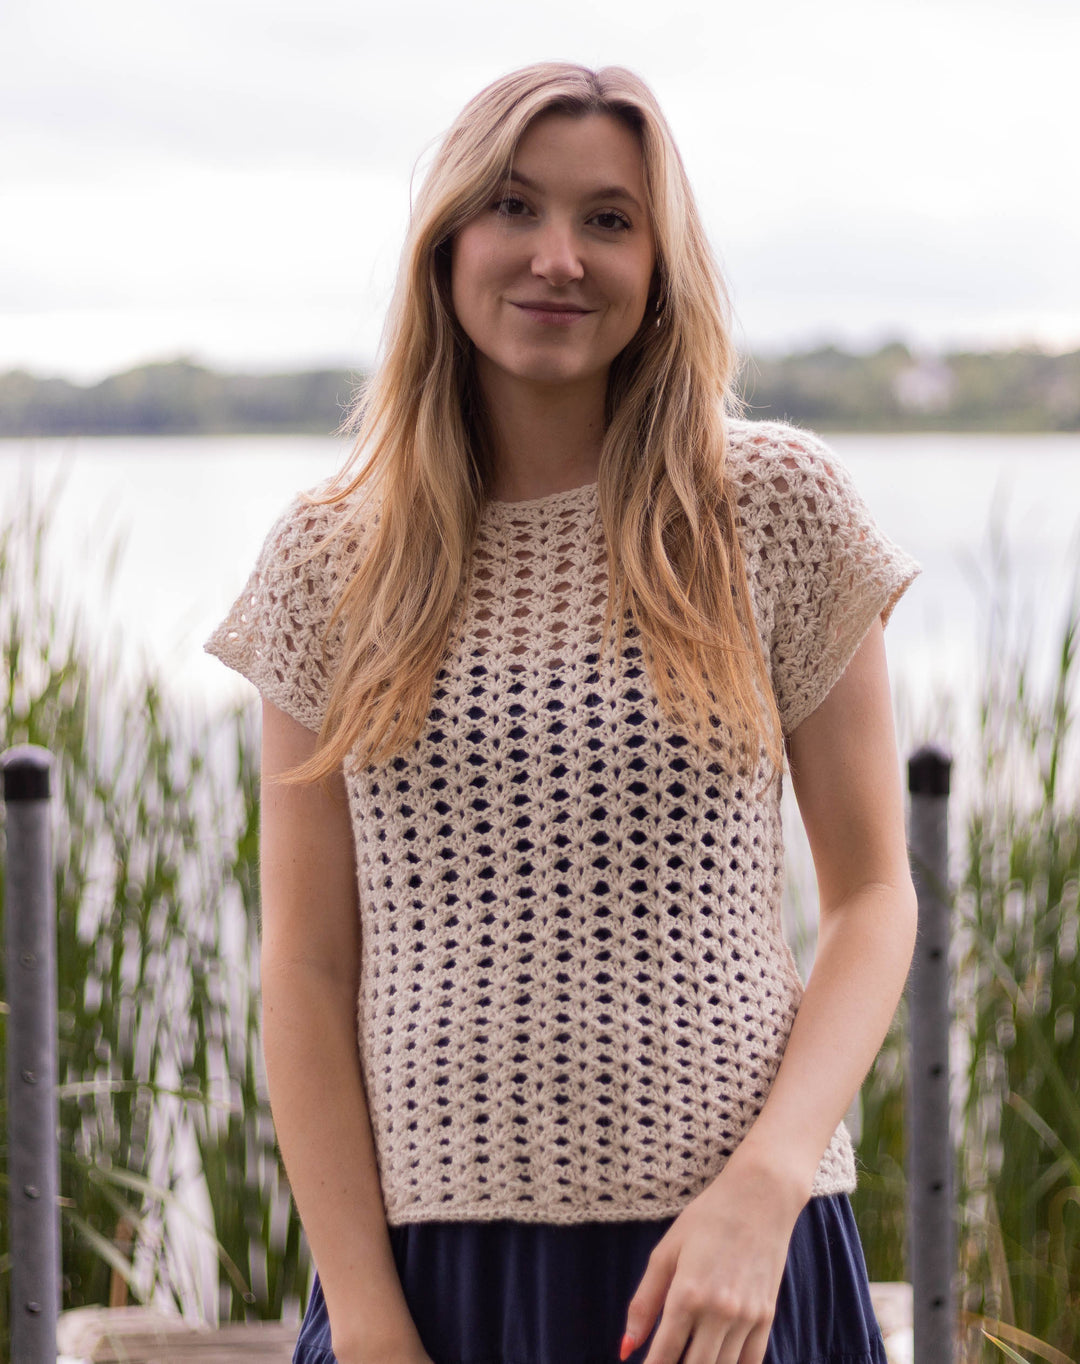
This top is designed to be worn with 2-6” of positive ease at the bust. For example, if your bust circumference is 46 inches at the widest point, you would make a size XL.  

Model is 6’ tall, has a 36” bust, and is wearing a size M with 4” of positive ease. 

Please note, top length can be easily customized in the pattern while the width cannot. Because of this, it is more important to choose a size based on your bust circumference and modify length if necessary.  

Iris Stitch Tee Crochet Pattern - relaxed fit on a model made a perfect top for maternity wear.
The relaxed fit of this tee made for a perfect maternity top. I simply sized up from my normal size and am able to wear it comfortably!

Abbreviations

This pattern is written using U.S. English Terminology

[ ] = work instructions in brackets as many times as directed

( ) = work instructions in parenthesis as many times as directed

* = repeat following the asterisk as many times as directed

Beg = beginning

BLO = back loop only, work into the back loop only of the stitch

Ch = chain stitch

Ch sp = chain space

DC = double crochet

2DC = double crochet stitches in the same stitch

HDC = half double crochet

Rd = round

SC = single crochet

Sk = skip  

Slst = slipped stitch

Sp = space

St = stitch

Sts = stitches

Resources

The following resources may be useful if you have questions, come across a new technique, or need additional guidance.  

  • The video tutorial is always a great place to start for the fastest answer to any questions. Timestamps for specific parts of the pattern are linked in the pinned comment on the video.
  • For additional questions that cannot be answered in the video, please comment below or email support@originallylovely.com
Iris Stitch Tee being worn on a model standing on a dock in front of water. Tee is white with lace detailing throughout and has a gentle relaxed fit.

Iris Stitch Tee Crochet Pattern Instructions

Foundation SC 112, (128, 144, 160, 176), (192, 208, 224, 240) sts.  Slst with 1st st to join.  

Round 1 (RS):  Ch1 (does not count as first st), SCBLO around.  Slst with 1st SC to join.  

2 (RS):  ch3, 2DC in st right next to ch3, * SK3, (2DC, ch1, 2DC).  Rep from * to last 3, sk3, DC in same st as 1st DCs, slst, in ch3 sp to join.  Ch3 & turn.   [140, (160, 180, 200, 220) (240, 260, 280, 300) sts].

3 (WS):  2DC in gap sp below ch3, * sk4, (2DC, ch1, 2DC) in ch sp.  Rep from * to last 4, sk4, DC in 1st st worked, slst in ch3 gap sp to join.  Ch3 & turn.  

Repeat round 3  23 (23, 23, 21, 21) (21, 21, 19, 19) more times, you will now have 25 (25, 25, 23, 23) (23, 23, 21, 21) iris stitch cluster rounds total.  

NOTE:  You may work more or less at this point to make your top longer or shorter.  Be sure to end with a right-side round. 

Back

You will now begin working back and forth in flat rows across the first 13 (15, 17, 19, 21) (23, 25, 27, 29) iris clusters to shape the back.  

Row 1 (WS):  * sk4, (2DC, ch1, 2DC) in ch sp.  Rep from * 12 (14, 16, 18, 20) (22, 24, 26, 28) more times, sk1, DC.  Ch2 & turn.  [66, (76, 86, 96, 106), (116, 126, 136, 146) sts].

2 (RS):  sk3, (2DC, ch1, 2DC) in ch sp, * sk4, (2DC, ch1, 2DC) in ch sp.  Rep from * until last 2, sk1, DC.  Ch2 & turn.  

Repeat row 2  7 (9, 9, 11, 11) (13, 13, 15, 15) more times, you will now have 9 (11, 11, 13, 13) (15, 15, 17, 17) stitch cluster rows worked flat to shape back. 

Back Right Shoulder

You will now shape the back right shoulder by working a shortened row along the back.  

1 (RS):  * sk3, (2DC, ch1, 2DC) in ch sp.  Rep from * 2 (3, 4, 5, 6) (6, 7, 8, 9) more times, sk4, 2DC in ch sp.  Ch1 & turn.  [17 (22, 27, 32, 37) (37, 42, 47, 52) sts].

2 (WS):  (ch1 does not count as 1st st), HDC in 1st st, *HDC, SC, slst, SC, HDC.  Rep from * across.  Break yarn leaving a tail to weave in, pull through to secure and set aside. 

Close-up detail image of the Iris lace tee, model is looking downward and off to the side to showcase the shoulder seam and sleeve detailing

Back Left Shoulder

You will now shape the back left shoulder by working a shortened row along the remaining back stitches.  

1 (RS):  with right side facing and beginning 4 (5, 6, 7, 8) (8, 9, 10, 11) clusters away from the end of the row, pull up a loop in the chain space, ch2, DC in same ch sp, * sk4, (2DC, ch1, 2DC) in ch sp.  Rep from * 2 (3, 4, 5, 6) (6, 7, 8, 9) more times, sk1, DC.  Ch1 & turn.  [17 (22, 27, 32, 37) (37, 42, 47, 52) sts].

2 (WS):  (ch 1 does not count as 1st st), HDC in 1st st, *HDC, SC, slst, SC, HDC.  Rep from * across to last st, HDC in ch2 sp.  Break yarn leaving a tail to weave in, pull through to secure and set aside. 

Front

You will now begin working back and forth in flat rows across 13 (15, 17, 19, 21) (23, 25, 27, 29) of the remaining 15 (17, 19, 21, 23) (25, 27, 29, 31) iris clusters to shape the front.  One iris cluster will be left unworked on either side to account for the underarms.  

Row 1 (WS):  with WS facing and beginning 1 cluster away from underarm, in 1st DC of cluster, pull up a loop, ch2, sk1, (2DC, ch1, 2DC) in ch sp, * sk4, (2DC, ch1, 2DC).  Rep from * 11 (13, 15, 17, 19) (21, 23, 25, 27) more times, sk1, DC.  Ch2 & turn.  [66, (76, 86, 96, 106), (116, 126, 136, 146) sts].

2 (RS):  sk3, (2DC, ch1, 2DC) in ch sp, * sk4, (2DC, ch1, 2DC) in ch sp.  Rep from * to final 2, sk1, DC.  Ch2 & turn.  

Repeat row 2  5 (7, 7,9, 9) (11, 11, 13, 13) more times, you will now have 7 (9, 9, 11, 11) (13, 13, 15, 15) rows of iris clusters worked flat to shape front. 

Front Left Shoulder

You will now shape the front left shoulder by working a shortened row along the front stitches.  

1 (RS):  sk3, (2DC, ch1, 2DC) in ch sp, * sk4, (2DC, ch1, 2DC) in ch sp.  Rep from * 2 (3, 4, 5, 6) (6, 7, 8, 9) more times, sk4, 2DC in ch sp.  Ch2 & turn.   [22 (27, 32, 37, 42) (42, 47, 52, 57) sts].

2 (WS):  * sk4, (2DC, ch1, 2DC) in ch sp.  Rep from * to last 2 sts, sk1, DC.  Ch2 & turn.  [21 (26, 31, 36, 41) (41, 46, 51, 56) sts].

3 (RS):  sk3, (2DC, ch1, 2DC) in ch sp, * sk4, (2DC, ch1, 2DC) in ch sp.  Rep from * 1 (2, 3, 4, 5) (5, 6, 7, 8) more times, sk4, 2DC in ch sp.  Ch1 & turn.  [17 (22, 27, 32, 37) (37, 42, 47, 52) sts].

4 (WS):  (ch 1 does not count as 1st st), SC in 1st st, HDC, *HDC, SC, slst, SC, HDC.  Rep from * across. Ch1 & turn.

Shoulder Join

Adjust work so that remaining stitches for Front Left Shoulder are situated on top of the stitches for Back Left Shoulder.  Work a slipped stitch join to seam together these two pieces as follows:

Insert your hook into the back loop only on the first stitch for Front Left Shoulder, insert your hook then into the back loop only of the first stitch for Back Left Shoulder (the BLO is the strand closest to you).  You now have 3 loops on your hook, YO and pull through all three of these loops to work your first slipped stitch.  

Repeat across until all stitches for the left shoulder have been joined.  Break yarn leaving a tail to weave in and pull through to secure.  

Iris stitch tee shown on model sitting down on a wood dock with her legs pulled up next to her. Tee is relaxed fitting with nice drape that shows off the lace stitches beautifully

Front Right Shoulder

1 (RS):  with right side facing and beginning 5 (6, 7, 8, 9) (9, 10, 11, 12) clusters away from the end of this row, pull up a loop, ch2, DC in same ch sp, * sk4, (2DC, ch1, 2DC) in ch sp.  Rep from *  to last 2 sts, sk1, DC in last st.  Ch2 & turn.  [23 (28, 33, 38, 43) (43, 48, 53, 58) sts].

2 (WS):  sk3, (2DC, ch1, 2DC) in ch sp, * sk4, (2DC, ch1, 2DC) in ch sp.  Rep front *  to last 2, sk1, DC in ch2 sp.  Ch2 & turn.  [21 (26, 31, 36, 41) (41, 46, 51, 56) sts].

3 (RS):  sk3, 2DC in ch sp, * sk4, (2DC, ch1, 2DC) in ch sp.  Rep from * to last 2, sk1, DC.  Ch1 & turn.  [18 (23, 28, 33, 38) (38, 43, 48, 53) sts].

4 (WS):  (ch 1 does not count as 1st st) HDC, * HDC, SC, slst, SC, HDC.  Rep from * to last st, sk last st.  Ch1 & turn.  [17 (22, 27, 32, 37) (37, 42, 47, 52) sts].

Slip Stitch Join front right shoulder with back right shoulder as done for left shoulder. 

Neckline

1 (RS):  

Back of Neckline:  beginning at the right side of the back neckline, pull up a loop in the ch sp of the half iris cluster on the very edge, ch1, * SC, HDC, HDC, SC, slst.  Rep from * acoss back of neckline ending with a SC before the final ch sp.  [29 (29, 29, 29, 29) (39, 39, 39, 39) sts].

Left Side:  SC 3 up side of neckline to shoulder seam, SC in shoulder seam, SC 9 down to front of neckline.  [13 sts].

Front: in first st right next to ch sp, * SC, HDC, HDC, SC, slst.  Rep from * across front of neckline ending with a SC before the final ch sp.  [19 (19, 19, 19, 19) (29, 29, 29, 29) sts].

Right Side:  SC 9 up to shoulder seam, SC in shoulder seam, SC 3 down to beg or neckline.  Slst to join.  [13 sts].

You will now have 74 (74, 74, 74, 74) (94, 94, 94, 94) sts total for neckline.  

2 (RS):  ch1 (doesn’t count as first st), slst blo in each st around being careful not to work too tight.  Slst to join.  Break yarn and pull through to secure.

Iris Lace T-shirt being worn by a pregnant model. Tee is pulled up slightly and draping over her belly.  Photo shows the drape of the yarn well.

Sleeves

To shape the sleeves, you will be crocheting into the turning chain or the final DC worked for the front and back pieces (these will be referred to as ‘edge stitches’) along either side of the arm opening. 

1 (RS):  beginning at the underarm iris cluster with RS facing, insert your hook into the ch sp, pull up a loop.  Ch3, 2DC in ch sp, [2DC, ch1, 2DC] into first edge st, sk next edge st, *[2DC, ch1, 2DC] into next edge st, sk next edge st.  Rep from * up armhole opening to shoulder seam, [2DC, ch1, 2DC] into shoulder seam, *sk next edge st, [2DC, ch1, 2DC] into next edge st.  Rep from * to underarm, DC into underarm iris cluster, slst in ch3 gap sp to join.  Ch3 & turn.  [12 (14, 14, 16, 16) (18, 18, 20, 20) iris clusters around armhole opening].

2 (WS):  2DC in gap sp below ch3, * sk4, (2DC, ch1, 2DC) in ch sp.  Rep from * to last 4, sk4, DC in 1st st worked, slst in ch3 gap sp to join.  Ch3 & turn.  

3-4:  as round 2.  On the final round, ch1 & turn.  

NOTE:  You may work more or less at this point to make your top longer or shorter.  Be sure to end with a wrong-side round. 

5 (RS):  * SC, HDC, HCD, SC, slst, SC, HDC.  Rep from * to end of rd.  Slst with 1st st to join, ch1.  Do not turn.

6 (RS):  slst blo in each st around being careful not to work too tight.  Slst to join.  Break yarn and pull through to secure. 

Repeat for second sleeve. 

Finishing

Weave in all ends to secure.

Block by gently soaking in lukewarm water and lay flat to dry.

Because the lace stitch is stretchy, be careful not to overstretch as you block your tee.  

Enjoy!

Originally Lovely Cria Yarn - all colors shown stacked together in a box to display the color palette

I hope that you’ve enjoyed this crochet pattern and love your new lace Iris Stitch Tee!

For questions, please comment below or email support@originallylovely.com

I’d love to see your finished work! Share on social media using the hashtag #originallylovely or by tagging @originally.lovely and @originally.lovely.yarn on Instagram!

Looking for more crochet patterns? We have something for everyone! Here are a few favorites:

Golden Hour Sun Dress

A show stopping crochet dress with simple lace details.

Maria Top

The coolest, summer top crocheted in the iconic granny stitch! Make using one color or many for endless possibilities.

Granny Square Cardigan

Forever a favorite. A modernized version of the classic & colorful cardigans we all know and love.

Similar Posts

One Comment

Leave a Reply

Your email address will not be published. Required fields are marked *