Seaside Sun Hat Crochet Pattern
Introducing: the Seaside Sun Hat -- free crochet pattern
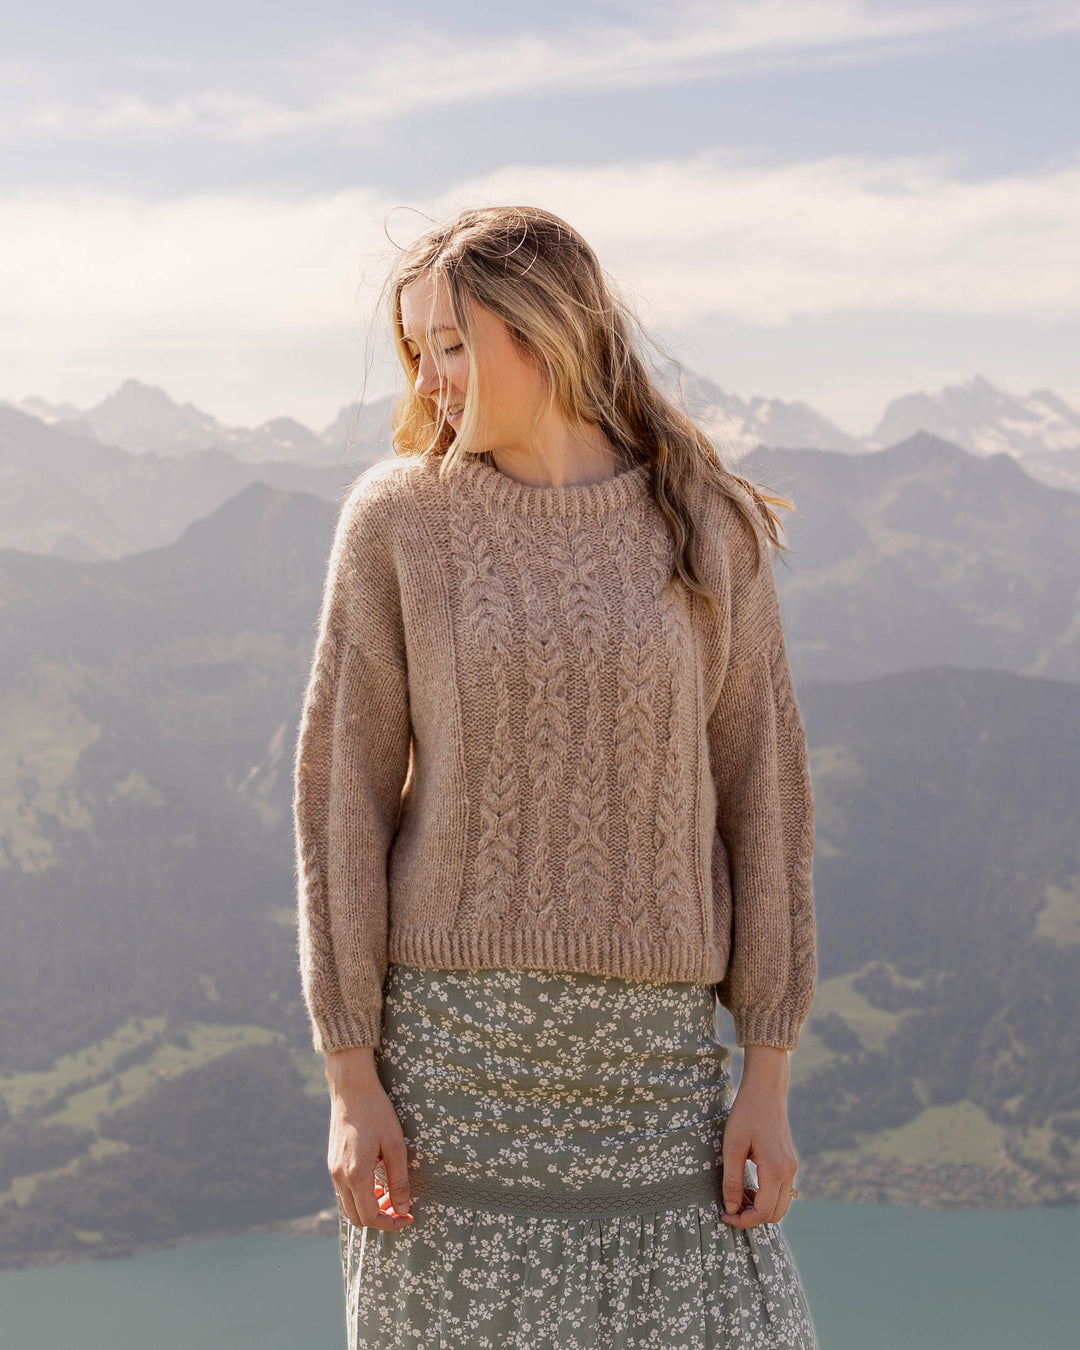
Protect yourself from the sun in style with the Seaside Sun Hat crochet pattern! The relaxed, wide brim of this hat protects your face from the sun and transitions nicely into a stylish evening accessory.
Simple shaping and details make this set a great project for beginners.

Seaside Sun Hat Crochet Pattern
To purchase an ad-free, printable PDF of the Seaside Sun Hat on Ravelry, CLICK HERE
To purchase an ad-free, printable PDF of the Seaside Sun Hat on Etsy, CLICK HERE
Skill Level
Easy +
Materials
- 2 skeins / 372 yards (340 meters) Lion Brand 24/7 Cotton (shown in Coffee Beans)
- Size 3.0 mm crochet hook
- Removable stitch markers
- Tapestry Needle to weave in ends
- Optional: fabric stiffener for the brim.
Notes
This hat will be constructed in the round from the top, down. You will first work the top of the hat, shape the dome, and then finally work the brim.
- Unless otherwise noted, hat will be worked in a spiral without joining rounds.
- If there is a chain st/sts at the beg of a round, it will count as the first st of that round.
- If a round is states [SC, inc] around. This means you will rep SC, inc, SC, inc, SC, inc … until the round is completed.
- At the end of each round, place a marker in the st you have just worked. This will denote the final st of each round. When you come to this st on the next rd, remove M and replace in final st of round.
Finished Dimensions
This pattern creates an adult sized hat that measures 21.5” around the head.
Gauge
18 stitches and 20 rows = 4” in single crochet
Abbreviations
This pattern is written using U.S. English terminology.
[ ] = work instructions in brackets as many times as directed
Beg = beginning
Cable st = (cable stitch, also denoted as 3-dc cross over) skip the next st, DC in the next 2 sts, working over the 2DCs, YO and insert hook into the skipped st, pull up a loop to the height of the DC sts, YO and pull through 2 loops, YO and pull through final 2 loops. This will create a long DC that stretches around the first 2DC sts worked.
Cable dec = (cable stitch decrease) skip the next st, work a DC in the next st until 2 loops remain, keeping these 2 loops on your hook, work another DC into the next st, YO, pull through 2 loops, YO, pull through all three loops on hook. Then, work a long DC in to the skipped st as done in a normal cable st. (one stitch decreased).
Ch = chain stitch
DC = double crochet
Inc = (increase) Work 2 single crochet stitches into the next st to increase
M = marker
MR = magic ring
PM = place marker
Rd = round
SC = single crochet
SC3tog = (single crochet 3 together) pull up one loop in e ach of the next 3 sts, YO and pull through all 4 loops on your hook. (2 stitches decreased).
Slst = slipped stitch
St = stitch
Sts = stitches
Seaside Sun Hat Crochet Pattern Instructions
Round 1: SC 6 in MR, PM in last SC worked. [6 sts]
2: inc around. PM in final st worked. [12 sts].
3: [SC, inc] around. [18 sts].
4: [SC 2, inc] around. [24 sts].
5: [SC 3, inc] around. [30 sts].
6: [SC 4, inc] around. [36 sts].
7: [SC 5, inc] around. [42 sts].
8: [SC 6, inc] around. [48 sts].
9: [SC 7, inc] around. [54 sts].
10: [SC 8, inc] around. [60 sts].
11: [SC 9, inc] around. [66 sts].
12: [SC 10, inc] around. [72 sts].
13: SC around.
14: [SC 11, inc] around. [78 sts].
15: SC around.
16: [SC 12, inc] around. [84 sts].
17: SC around.
18: [SC 13, inc] around. [90 sts].
19: SC around.
20: [SC 14, inc] around. [96 sts].
21-24: SC around. On the last rd, slst to join.
25: ch3, DC, DC in the st behind these 2 st s (the final st of last rd), cable st around. Slst with ch3 to join.
26: ch2, SC around. Slst with ch2 to join.
27: as 25. Ch2 (this is the first st of the next rd).
28-34: as 21-27.
35: SC around. Slst to join.
Brim:
36: ch1, slst around. Slst to join.
The increases over the brim will be staggered so they blend in better. This means, the beg/end point of each round will change each time. Place M at the final st worked of each round as done before.
37: ch1, SC 14, inc, [SC 15, inc] around, SC 8. [102 sts ].
38: [inc, SC 16] around, SC 9. [108 sts].
39: [inc, SC 17] around, SC 9. [114 sts].
40: [inc, SC 18] around, SC 10. [120 st s].
41: [inc, SC 19] around, SC 10. [126 sts].
42: [inc, SC 20] around, SC 11. [132 sts].
43: [inc, SC 21] around, SC 11. [138 sts].
44: [inc, SC 22] around, SC 12. [144 st s].
45: [inc, SC 23] around, SC 12. [150 sts].
46: [inc, SC 24] around, SC 13. [156 st s].
47: [inc, SC 25] around, SC 13. [162 sts ].
48: [inc, SC 26] around, SC 14. [168 st s].
49: [inc, SC 27] around, SC 14. [174 st s].
50: [inc, SC 28] around, SC 15. [180 sts].
51: [inc, SC 29] around, SC 15. [186 sts].
52: [inc, SC 30] around, SC 16. [192 st s].
53: [inc, SC 31] around, SC 16. [198 sts].
54: [inc, SC 32] around, SC 17. Slst to join. [204 sts].
55: ch3, DC, DC in the st behind these 2 st s (the final st of last rd), cable st around. Slst with ch3 to join.
56: ch2, SC 32, inc, [ SC 33, inc] around, slst to join. [210 sts].
57: slst in each st ar ound to finish.
Cut yarn leaving a tail to weave in.
Finishing
Weave in all ends. Steam block so that the brim of the hat lays flat. If desired, you may spray fabric starch or stiffener on the brim to help the hat hold its shape.
Enjoy!