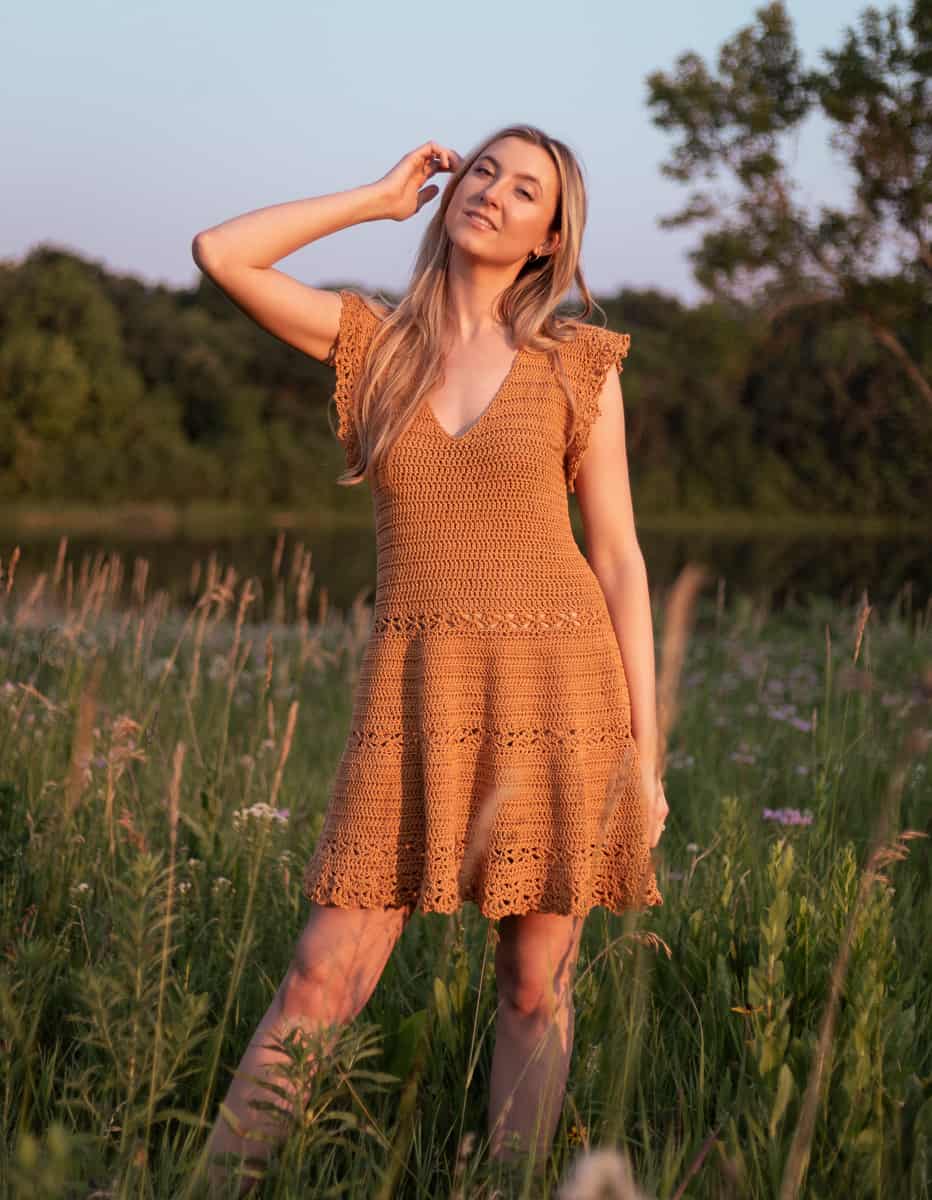
Golden Hour Sun Dress Crochet Pattern
Introducing: the Golden Hour Sun Dress -- free crochet pattern
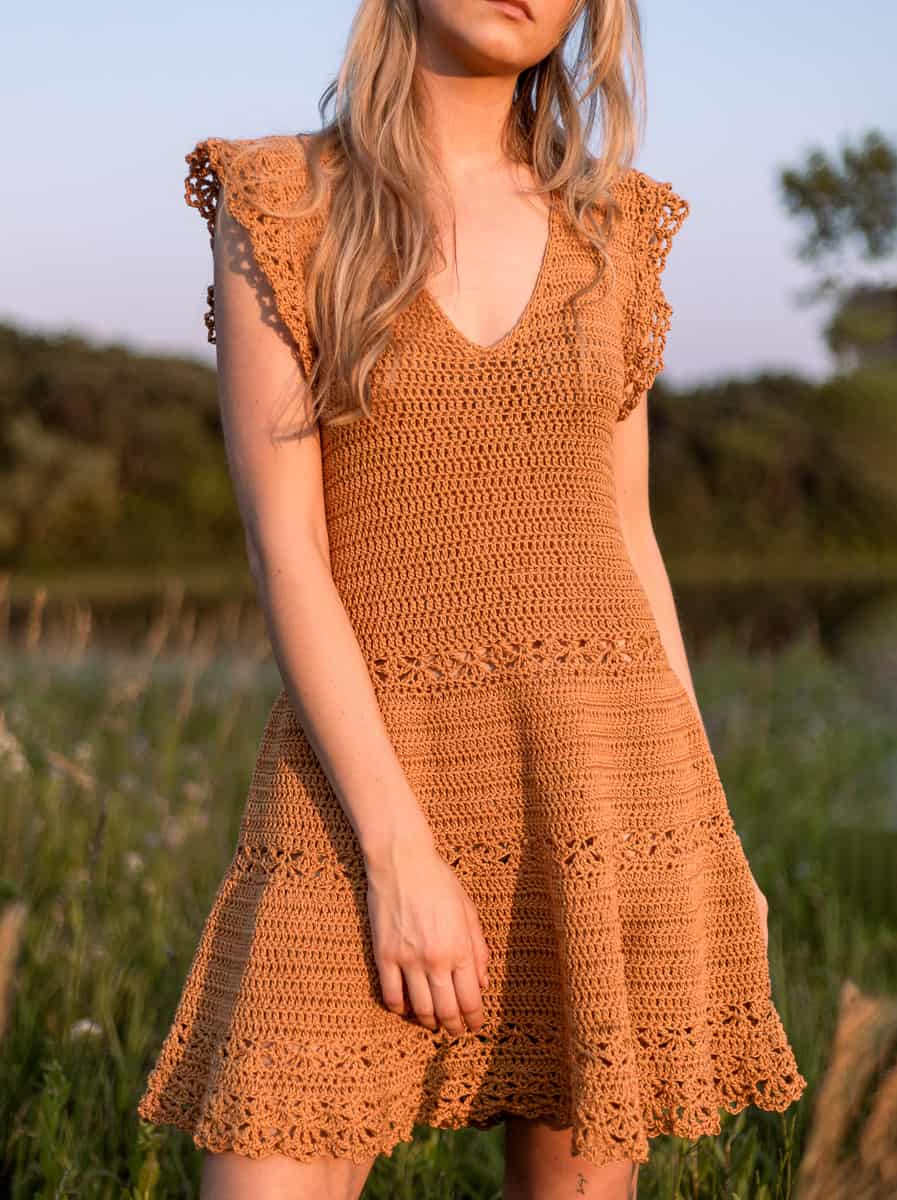
The Golden Hour Sun Dress crochet pattern evokes feelings of bright summer sunsets and floral blooms. Beautiful lace detailing along the skirt and sleeves elevate an otherwise simple, double crocheted dress. This sundress is uniquely constructed by working the bodice flat before shaping the skirt in the round.

Golden Hour Sun Dress Crochet Pattern
Skill Level
Intermediate
Materials
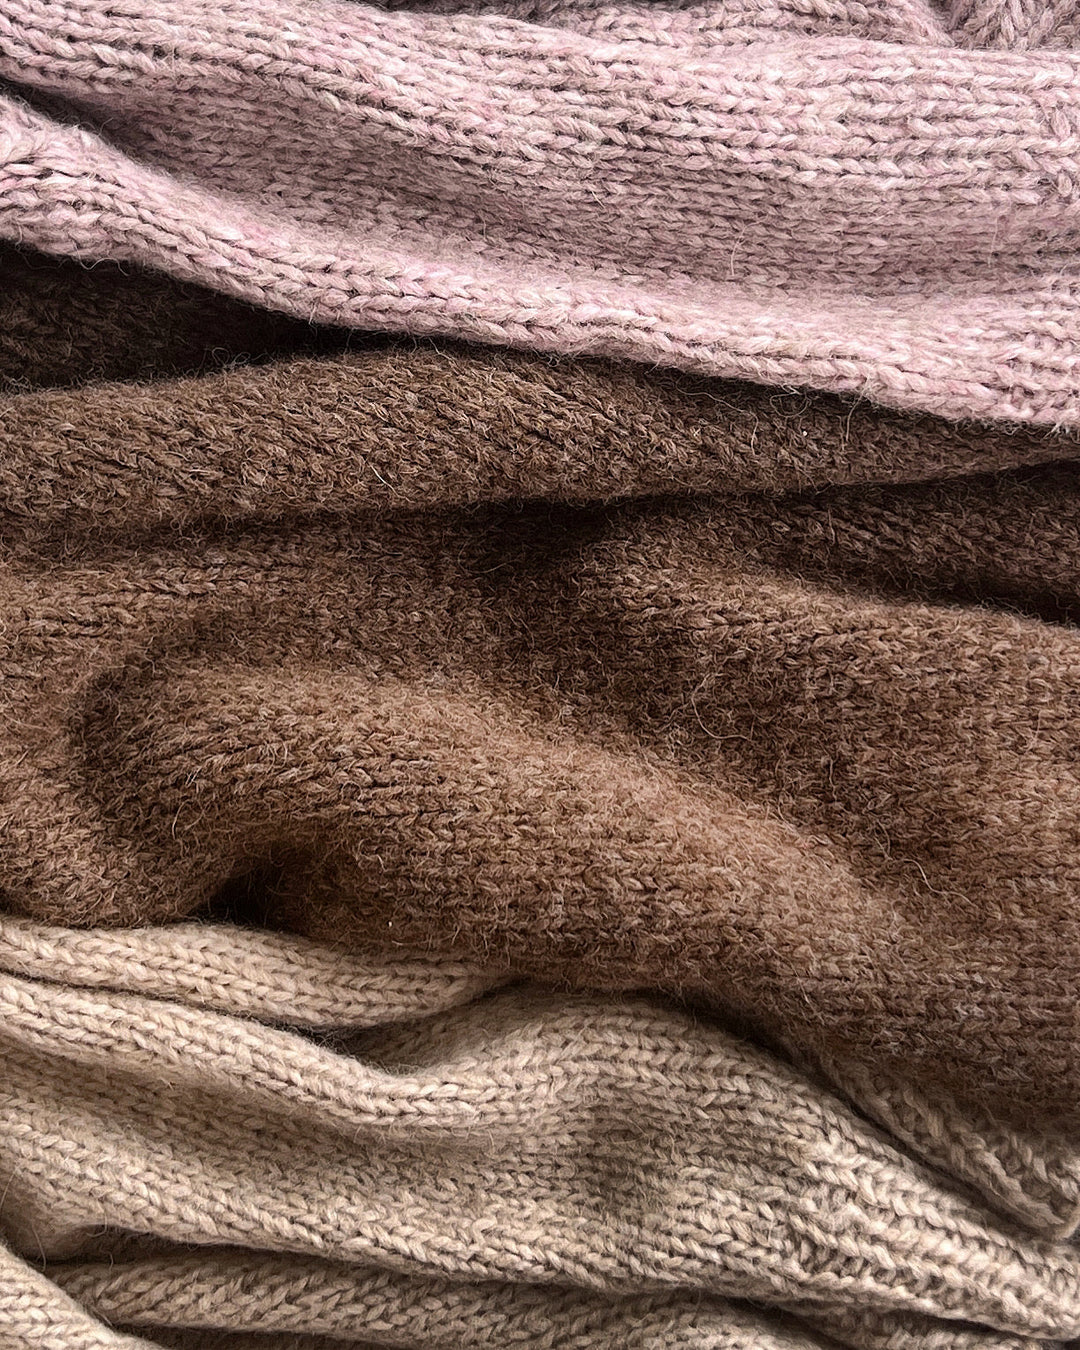
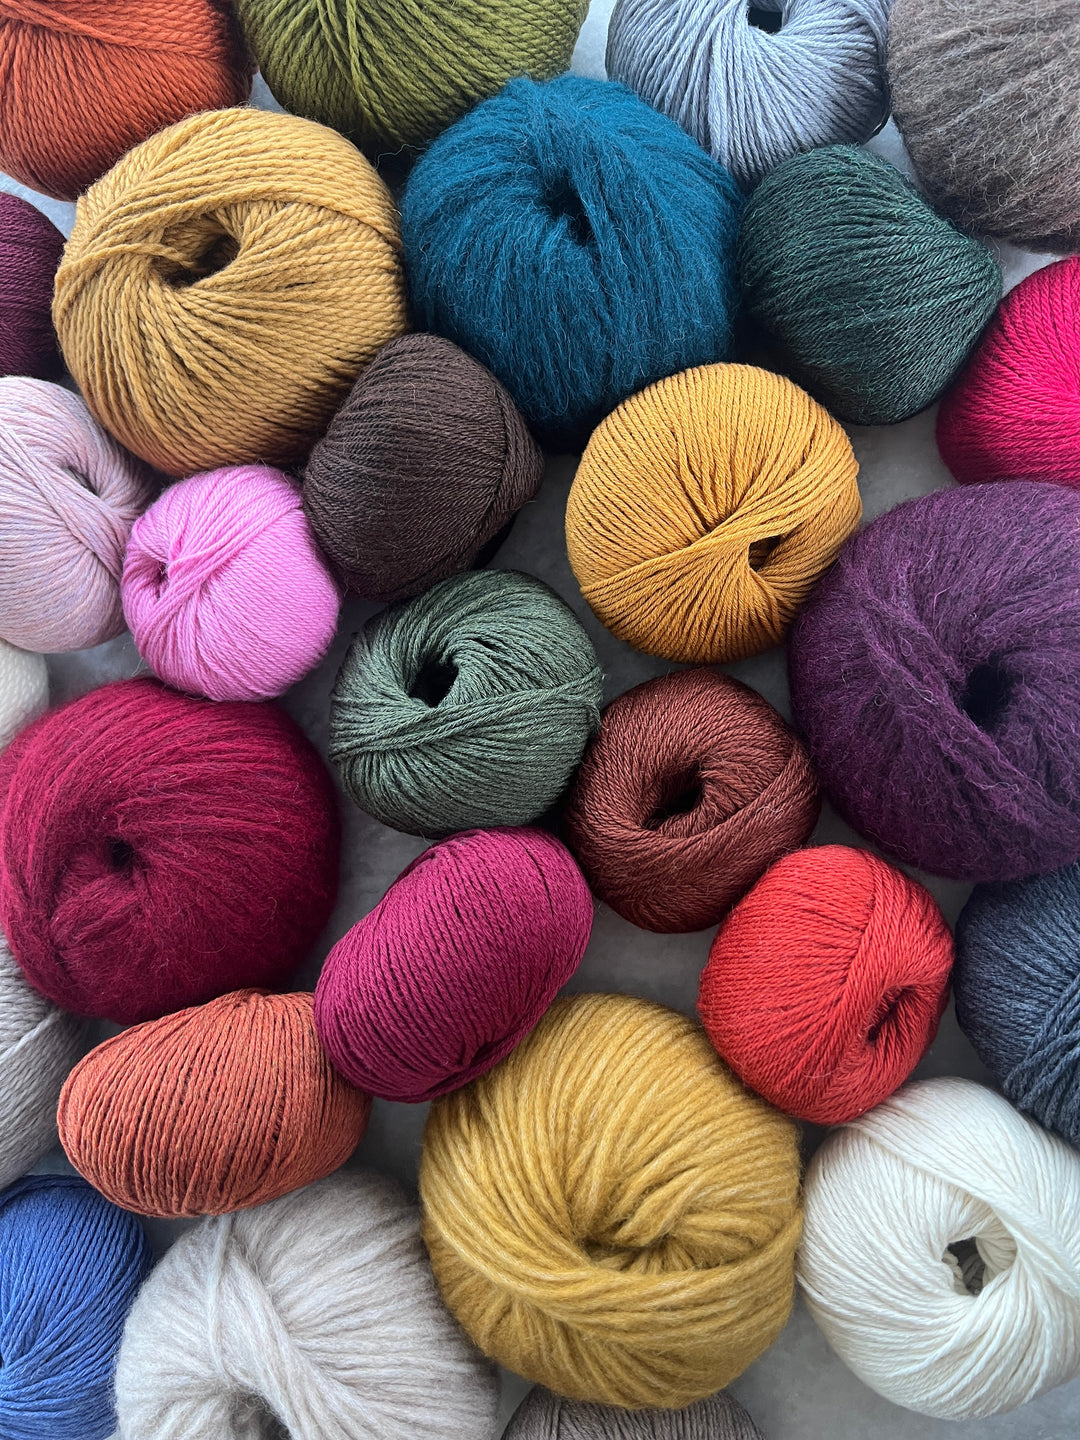
- 7, (7, 8, 9, 10), (10, 11, 12, 13) skeins / 1302, (1302, 1488, 1674, 1860), (1860, 2046, 2232, 2418) yards Lion Brand 24/7 Cotton Yarn (shown in Camel)
- Size US G-6 (4.00 mm) crochet hook >> shop my favorite affordable hook set HERE
- Removable Stitch Marker
- Tapestry Needle to weave in ends
Gauge:
14 sts and 8 rows = 4” in double crochet
Finished Dimensions:
| XS | S | M | L | XL | 2X | 3X | 4X | 5X | |
| Bust | 30.75 | 34.25 | 37.73 | 41 | 44.5 | 48 | 51.5 | 55 | 58.25 |
| Length | 36 | 36 | 36 | 37 | 37 | 37 | 38 | 38 | 38 |
| Armhole Depth | 10 | 10 | 10 | 11 | 11 | 11 | 12 | 12 | 12 |
XS, (S, M, L, XL), (2X, 3X, 4X, 5X)
Pattern is written for smallest size with changes for larger sizes in parenthesis. When only one number is given, it applies to all sizes. To keep track of your size, you may highlight or circle all numbers for your chosen size before you begin.
Help Choosing Size:
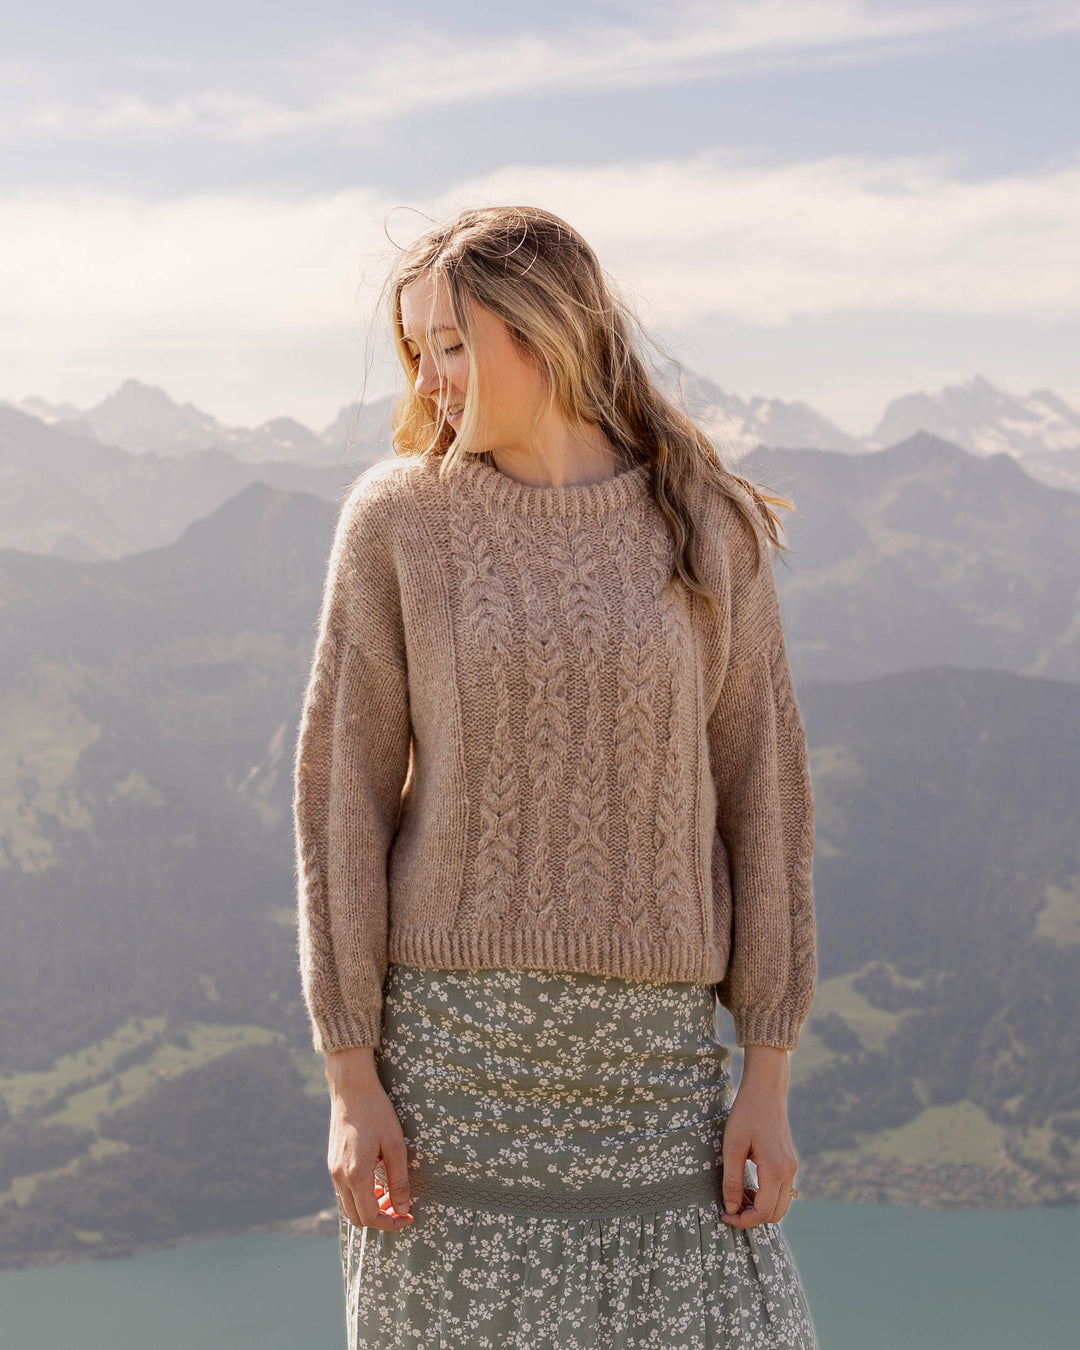
This dress is designed to be worn with 0-4” of positive ease at the bust. Model is 6” tall, has a 33” bust, and is wearing a size small with 1.25” of positive ease. For best fit, choose a size that is 0-4” larger than your corresponding bust measurement. Alternatively, if you prefer the dress to fit more snugly around your waist with negative ease at your bust, choose a size that is closest to your waist measurement.
Notes:
- Turning chains do NOT count as the first stitch.
- Throughout this entire pattern, stitches will be worked into both loops.
- When working in the round, you will chain and turn at the end of each round to avoid visible seams
- Modifications for length will be noted in the pattern.
Construction Notes:
This sun dress crochet pattern is constructed by first working the bodice and then the skirt. Bodice will be worked flat beginning at the bottom front and working up towards the neckline, separating to shape each shoulder, and joining together to work down the back. You will then join both ends of the bodice to work in the round. From this point, the skirt will be worked in the round, downwards. Neckline and sleeves will then be crocheted at the end and seams will be worked on either side of the bodice to finish.
Abbreviations:
This pattern is written using U.S. English terminology.
[ ] = work instructions in brackets as many times as directed
( ) = work instructions in parenthesis as many times as directed
Beg = beginning
Ch = chain stitch
Chsp = chain space
DC = double crochet
DC2tog = double crochet 2 stitches together
Inc = (increase) Work 2 double crochet stitches into the next st to increase
M = marker
MR = magic ring
PM = place marker
Rd = round
SC = single crochet
SC2tog = single crochet 2 stitches together
Sk = skip
Slst = slipped stitch
Sp = space
St = stitch
Sts = stitches
TR = treble crochet
Golden Hour Sun Dress Crochet Pattern
Bodice:
Ch 56, (62, 68, 74, 80), (86, 92, 98, 104).
Set Up Row: In 3rd ch from hook and working into the bar behind chains, DC, DC in each ch across. Ch2 & turn. [54, (60, 66, 72, 78), (84, 90, 96, 102) sts].
Rows 2-18: DC in each st across. Ch2 & turn.
Left Front:
You will now work back and forth across the first 27, (30, 33, 36, 39), (42, 45, 48, 51) stitches of the next row to shape the left front.
19: slst in the next 3 (3, 3, 4, 4) (4, 5, 5, 5) sts, DC in each of the next 22 (25, 28, 30, 33) (36, 38, 41, 44) sts, DC2tog. Ch2 & turn.
The slipped sts will be left for the underarm. The DC sts are now the row you will be working across. [23, (26, 29, 31, 34), (37, 39, 42, 45) sts].
20: DC2tog, DC in each st across. Ch2 & turn. [22, (25, 28, 30, 33), (36, 38, 41, 44) sts].
21: DC in each st to last 2, DC2tog. Ch2 & turn. [21, (24, 27, 29, 32), (35, 37, 40, 43) sts].
22: DC2tog, DC in each st across. Ch2 & turn. [20, (23, 26, 28, 31), (34, 36, 39, 42) sts].
Repeat rows 21-22 2 more times. [16, (19, 22, 24, 27), (30, 32, 35, 38) sts].
23: DC in each st across. Ch2 & turn.
24: DC2tog, DC in each st across. Ch2 & turn. [15, (18, 21, 23, 26), (29, 31, 34, 37) sts].
Repeat rows 23-24 3, (3, 3, 4, 4), (4, 5, 5, 5) more times. [12, (15, 18, 19, 22), (25, 26, 29, 32) sts].
25-26: DC in each st across. Ch2 & turn.
27: DC in each st to last st, inc in last st. Ch2 & turn. [13, (16, 19, 20, 23), (26, 27, 30, 33) sts].
28: Inc, DC in each st across. [14, (17, 20, 21, 24), (27, 28, 31, 34) sts].
Place M in st on hook to prevent from unraveling and set aside to work Right Front. No need to break yarn, we will use this yarn when we join to work back.
Right Front:
Beginning at the first st left unworked at the center neckline, you will work across the first 24, (27, 30, 32, 35), (38, 40, 43, 46) sts to shape the right front. Final 3 (3, 3, 4, 4) (4, 5, 5, 5) sts will be left unworked for underarm.
19: pull up a loop in the 1st st, ch2, DC2tog this st with next st, DC in eac h of the next 22 (25, 28, 30, 33) (36, 38, 41, 44). Ch2 & turn. [23, (26, 29, 31, 34), (37, 39, 42, 45) sts].
20: DC in each st to last 2, DC2tog. Ch2 & turn. [22, (25, 28, 30, 33), (36, 38, 41, 44) sts].
21: DC2tog, DC in each st across. Ch2 & turn. [21, (24, 27, 29, 32), (35, 37, 40, 43) sts].
22: DC in each st to last 2, DC2tog. Ch2 & turn. [20, (23, 26, 28, 31), (34, 36, 39, 42) sts].
Repeat rows 21-22 2 more times. [16, (19, 22, 24, 27), (30, 32, 35, 38) sts].
23: DC in each st across. Ch2 & turn.
24: DC in each st to last 2, DC2tog. Ch2 & turn. [15, (18, 21, 23, 26), (29, 31, 34, 37) sts].
Repeat rows 23-24 3, (3, 3, 4, 4), (4, 5, 5, 5) more times. [12, (15, 18, 19, 22), (25, 26, 29, 32) sts].
25-26: DC in each st across. Ch2 & turn.
27: Inc, DC across. Ch2 & turn. [13, (16, 19, 20, 23), (26, 27, 30, 33) sts].
28: DC in each st to last st, inc. [14, (17, 20, 21, 24), (27, 28, 31, 34) sts].
Break yarn leaving a tail to weave in later and set aside.
Back:
You will now continue on with the sts set aside after working the Left front. Remove M and put this st on your hook once more. Ch2 & turn.
Set Up Row: DC into each of the next 13 (16, 19, 20, 23) (26, 27, 30, 33) sts, inc next st, ch 18 (18, 18, 20, 20) (20, 22, 22, 22), careful not to twist chain, begin working into the sts for the Right front by inc in the first st at neckline edge, DC in each of the next 13 (16, 19, 20, 23) (26, 27, 30, 33) sts to end of row. Ch2 & turn.
1: DC into each st to the ch, DC into the 18 (18, 18, 20, 20) (20, 22, 22, 22) ch sts, DC into each st to end of row. [48, (54, 60, 64, 70), (76, 80, 86, 92) sts].
2: DC in each st across. Ch2 & turn.
Repeat row 2 11, (11, 11, 13, 13) (13, 15, 15, 15) more times.
3: DC in each st across, ch 4 (4, 4, 5, 5) (5, 6, 6, 6) & turn.
4: in 2nd ch from hook, slst, slst i n each of the next 2 (2, 2, 3, 3) (3, 4, 4, 4) chains, DC in each st across, ch5 (5, 5, 6, 6) (6, 7, 7, 7) & turn.
5: in 3rd ch from hook, DC, DC in each of the next 2 (2, 2, 3, 3) (3, 4, 4, 4) chains, DC in each st across. Ch2 & turn. [54, (60, 66, 72, 78), (84, 90, 96, 102) sts].
6-22: DC in each st across, ch2 & turn. On the last row, do not ch2 & turn.
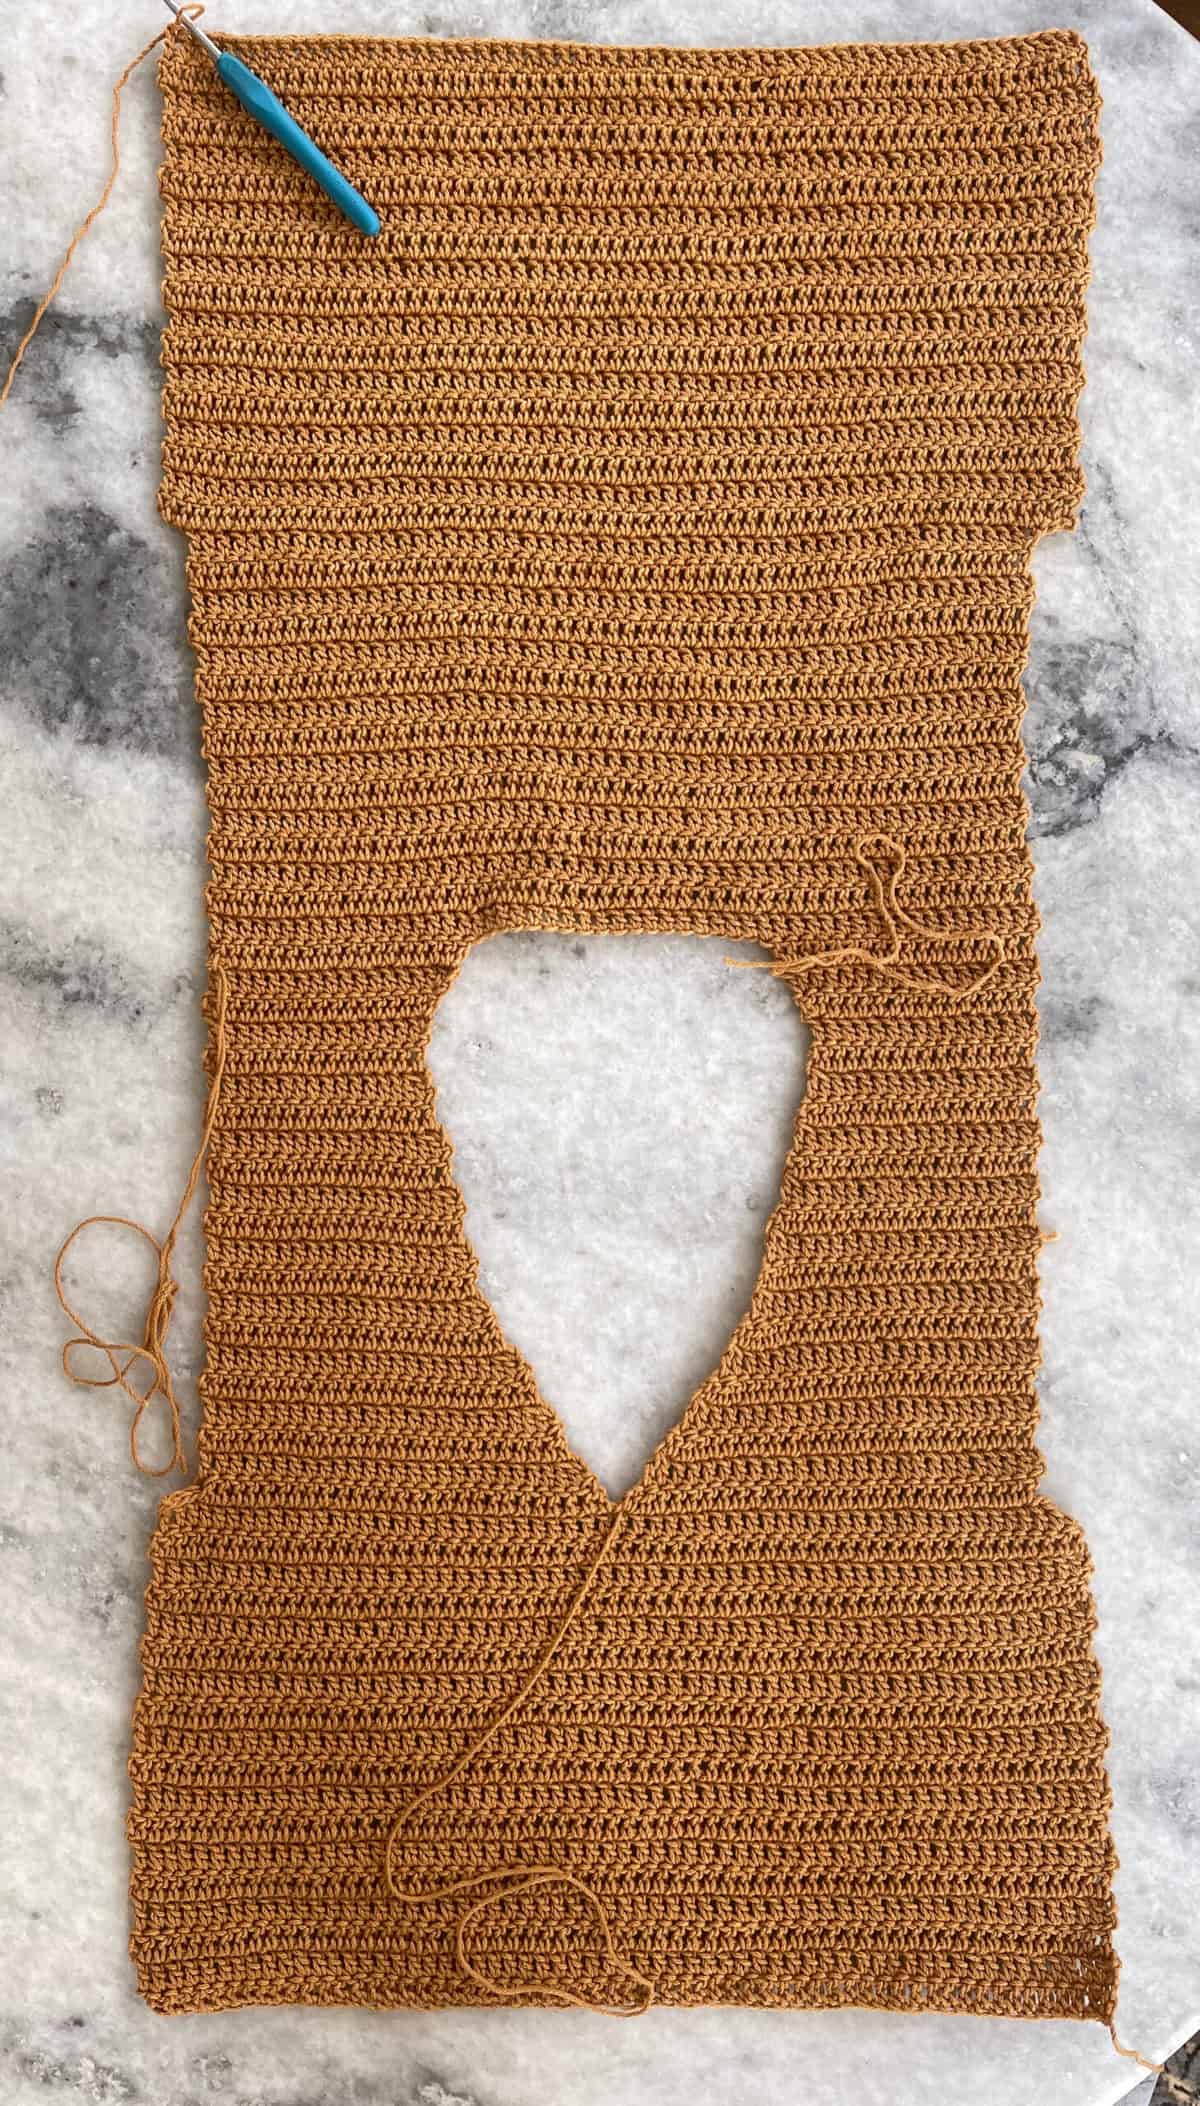
Bodice Join:
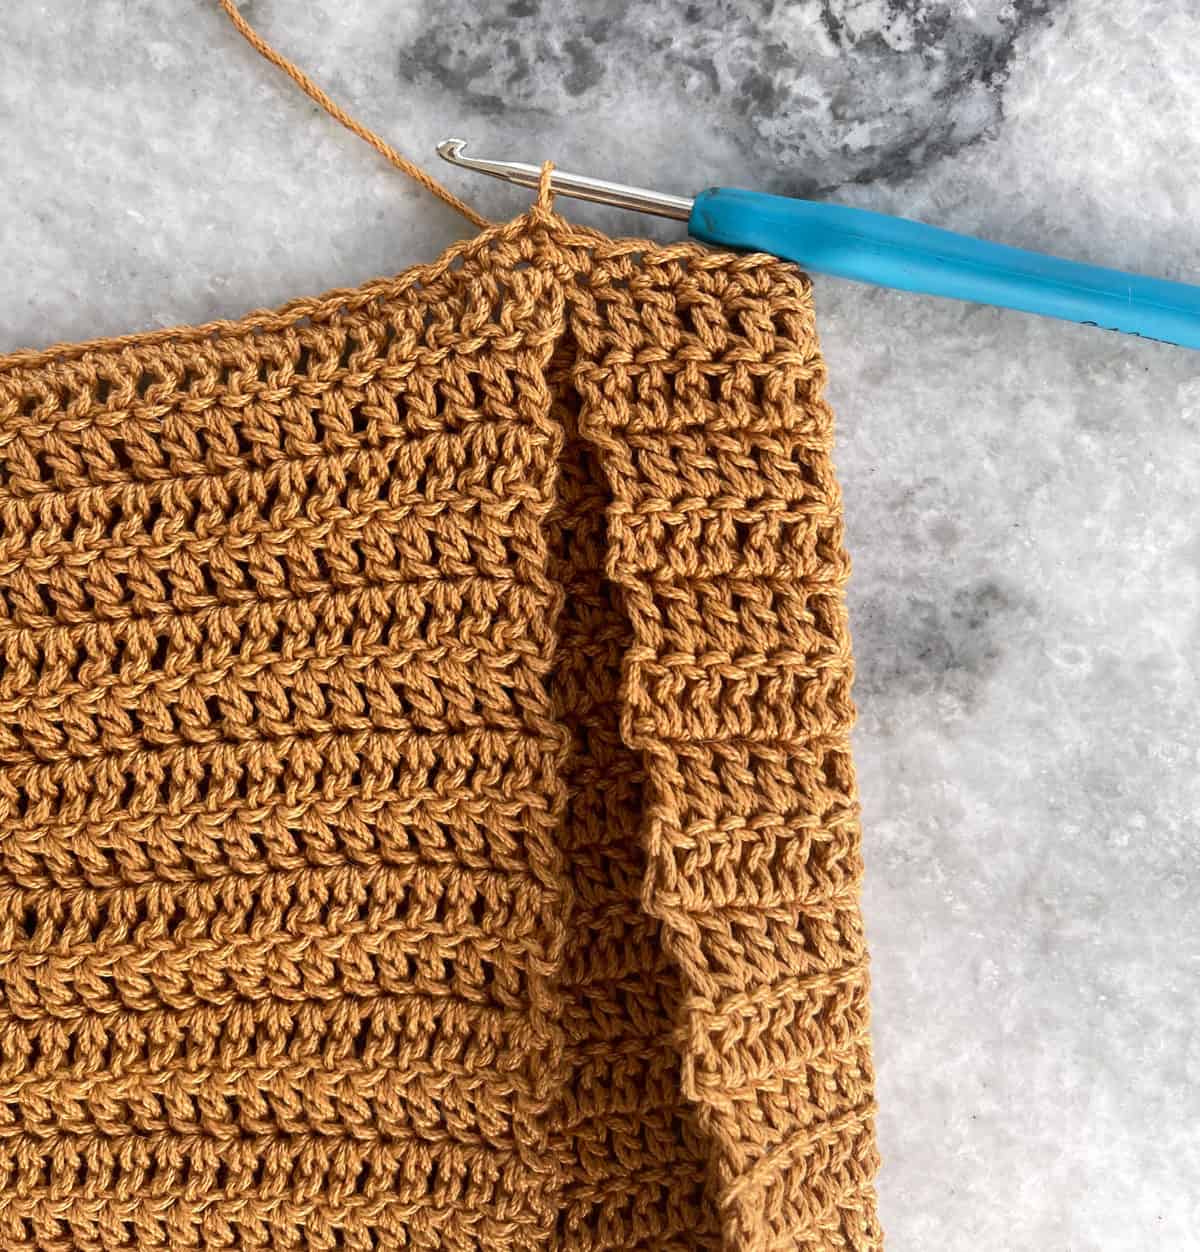
You will now join the front and back bodice pieces to be worked together, in the round. Fold back of the bodice over the front of the bodice so that the foundation chain edge and the row you just worked are aligned. Slst with the first foundation chain on the front bodice piece to join. Ch1, SC in to each of the 54 (60, 66, 72, 78) (84, 90, 96, 102) sts along bottom edge of the front bodice, when you reach the end, continue on and SC into each of the back bodice sts. Slst with 1st SC worked to join. You will now have all sts from both body pieces joined in the round. Ch1 & turn. [108, (120, 132, 144, 156), (168, 180, 192, 204) sts].
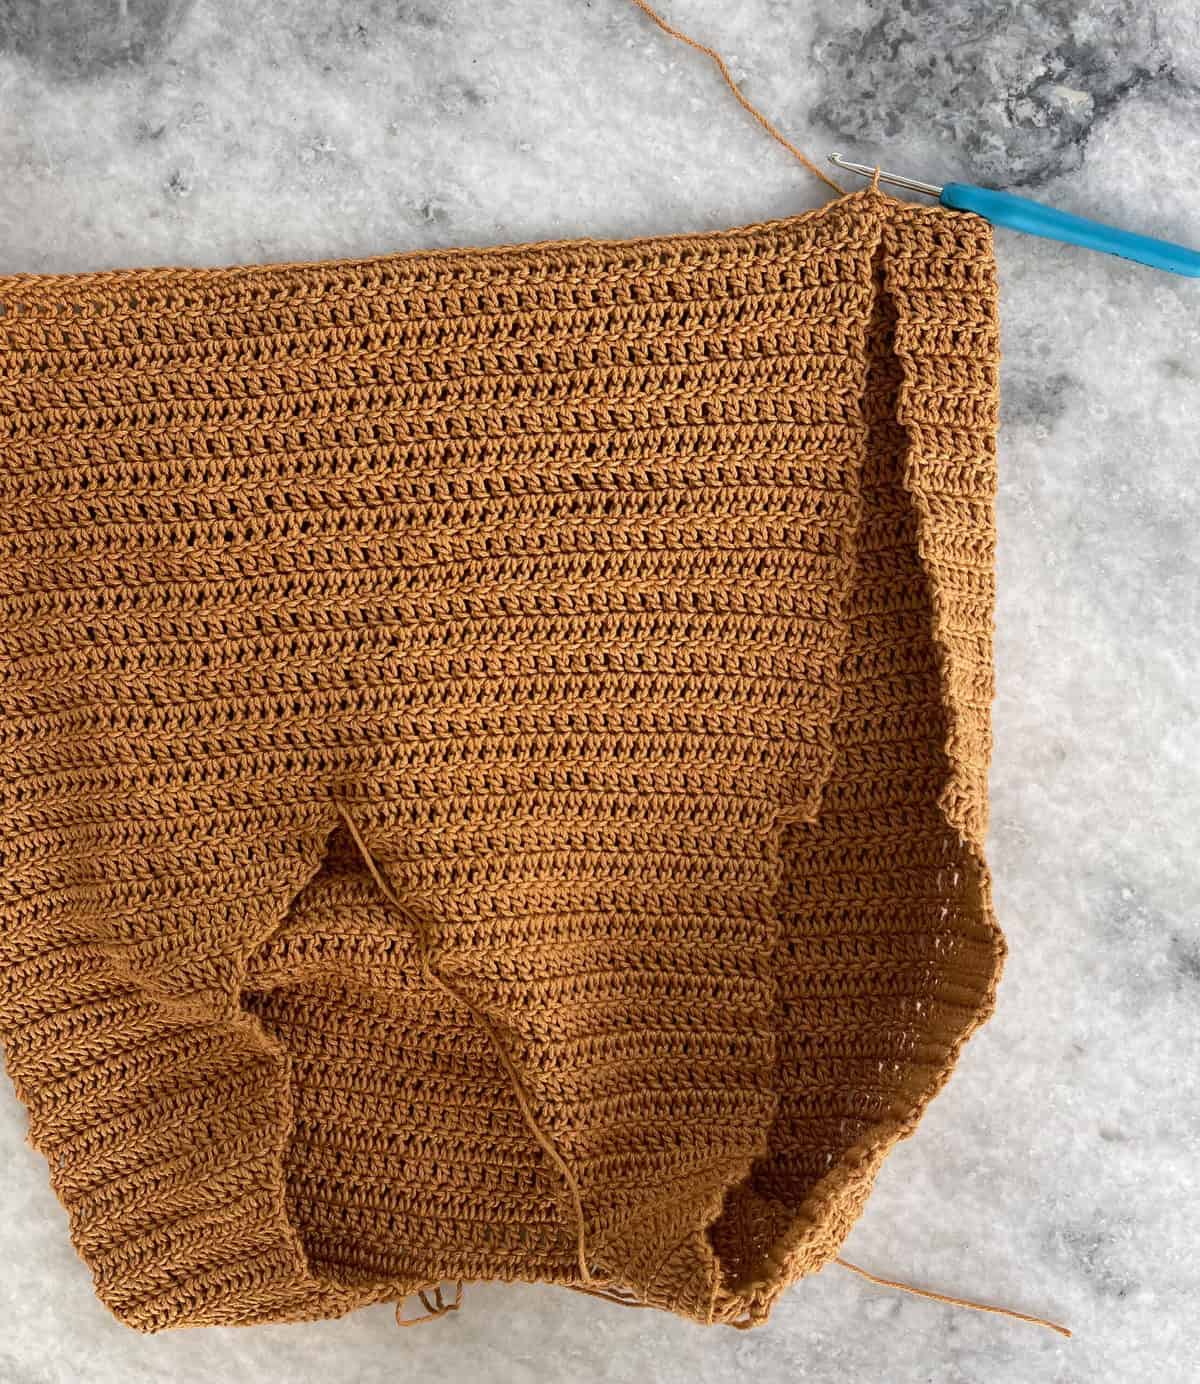
Skirt:
1: [SC, ch1, sk2, (DC, ch1, DC, ch1, DC) in next st, ch1, sk2] to end of round. Slst with first SC to join, ch2 & turn.
2: [sk3, SC, ch1, sk3, (DC, ch1, DC, ch1, DC) in next st, ch1] to end of round. Slst with first SC to join, ch2 & turn.
3: HDC in the next 2 sts, sk1, [SC, sk1, HDC in the next 5, sk1] to last 5 sts, SC, sk1, HDC in final 3 sts. Slst with first HDC to join, ch2 & turn.
4: [DC, inc in next st] to end of rd. Slst to join, ch2 & turn. [162, (180, 198, 216, 234), (252, 270,
288, 306) sts].
5-13: DC in each st around. Slst to join, ch2 & turn. On the last rd, ch1 & turn.
**NOTE: if you want to make your skirt longer/shorter, you must work more/less rows at this point. At this point, you will increase half of the length you want to add to your skirt. For example, if you want to make your skirt 1” longer (2 rows longer), work 1 additional DC row here and 1 additional DC row after round 26.
14-16: as rounds 1-3.
17: [DC in the next 2 sts, inc in next st] to end of rd. Slst to to join, ch2 & turn. [216, (240, 264, 288, 312), (336, 360, 384, 408) sts ].
18- 26: DC in each st around. Slst to join, ch2 & turn. On the last rd, ch1 & turn.
**NOTE: if making your skirt longer/shorter, work more/less rows here as done after round 13.
27-29: as rounds 1-3.
30: [DC in the next 3 sts, inc in next st] to end of rd. Slst to join, ch2 & turn. [270, (300, 330, 360, 390), (420, 450, 480, 510) sts].
31-32: as rounds 1-2.
33: [sk3, SC, ch1, sk3, (TR, ch1, TR, ch1, TR) in next st, ch1] to end of round. Slst with first SC to join, ch2 & turn.
34: SC in chsp, ch3, (SC in next chsp, ch3) 2x, [SC2tog in next 2 chsp, (ch3, SC in next chsp) 2x, ch3] to final chsp, SC in fi nal chsp, slst with first SC to join. Break yarn and pull through to secure. Weave in end.
Neckline:
Beginning at the right side of the back neckline, pull up a loop. Ch1, SC 20 (20, 20, 22, 22) (22, 24, 24, 24) across back neckline, SC 40 (40, 40, 42, 42) (42, 44, 44, 44) along edge of neckline to center front, SC 40 (40, 40, 42, 42) (42, 44, 44, 44) up along opposite edge of neckline, slst with first SC worked to join. Break yarn and pull through to secure.
Sleeves:
Seam each side of the body to join the front and back bodice.
Beginning at underarm, pull up a loop and SC 8 (8, 8, 10, 10) (10, 12, 12, 12) across underarm, SC 35 (35, 35, 40, 40) (40, 45, 45, 45) up arm opening to top of shoulder, SC 35 (35, 35, 40, 40) (40, 45, 45, 45) down arm opening to underarm. Slst with first SC to join. Ch1 & turn. [ 78, (78, 78, 90, 90), (90, 102, 102, 102) sts].
Work rows 31-34 as done for bottom of skirt.
Repeat for second sleeve.
Finishing:
Weave in all ends. Block by soaking in warm water or steaming and lay flat to dry.
Enjoy your crochet sun dress!