perfect crochet t-shirt main image

Perfect T-Shirt Crochet Pattern

Introducing: The Perfect Crochet T-Shirt — Free Crochet Pattern

This beginner friendly crochet pattern is worked in the round from the top, down. Crocheted quickly in linen stitch, this top is extremely comfortable and stylish.

The best part? It’s also super fun to make!

perfect crochet t-shirt main image

The Perfect Crochet T-Shirt is available as a free pattern and as a kit with Lion Brand Yarn. Scroll down to access the free pattern or continue reading to learn a bit about the design and some pointers to help you out!

Also check out the coordinating knitting pattern, the Perfect Knit T-Shirt!

**please note, some links may be affiliate links which will allow me to make a small commission on products purchased through my referral. This does not influence my opinion or the price of the item that you are purchasing in any way.

Perfect T-Shirt Design

It seems like I am always searching for the perfect, everyday tee. Very rarely do I come across one that is just ~perfect~ and when I do, I buy a handful!

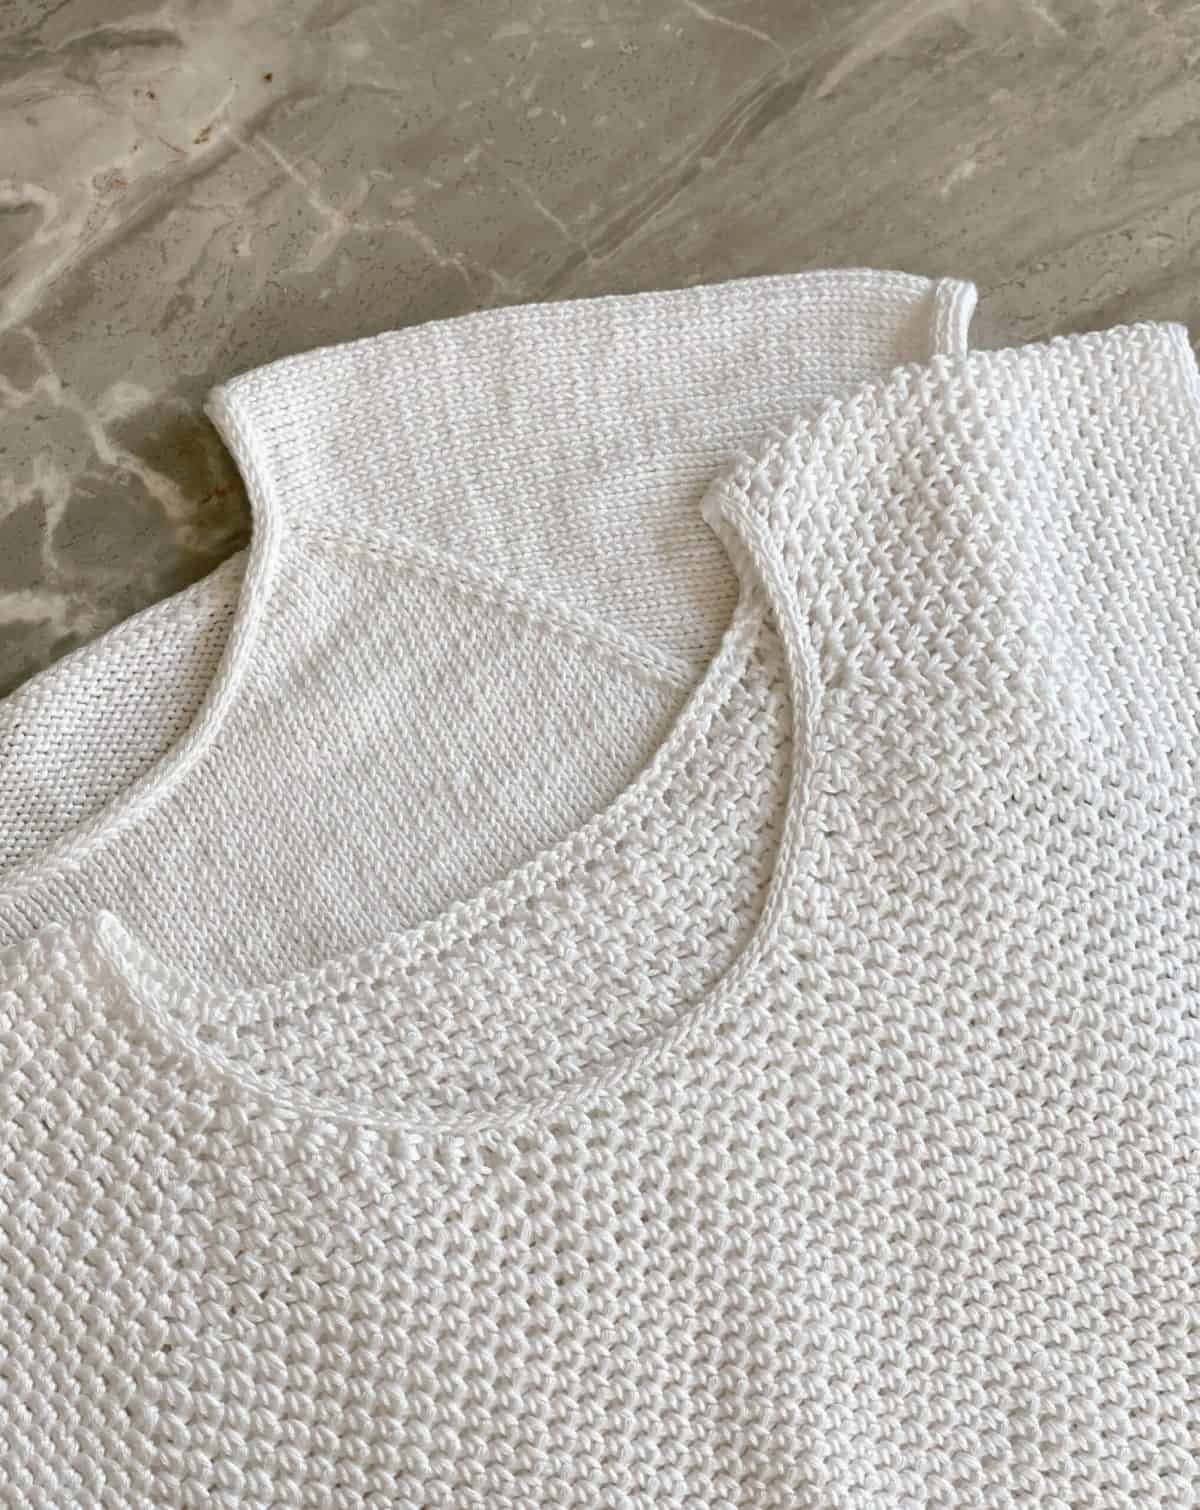
A perfect t-shirt, to me, needs to have a well shaped neckline. I love the look of a relaxed crew neck.

I don’t want a t-shirt that is too tight or too loose. I prefer around 4″ of positive ease for a relaxed fit that still looks polished.

Finally, comfort is KEY! I am not going to wear something that is uncomfortable, especially in the summer! I knew I needed to use this yarn to make a t-shirt that was soft, cool, and had beautiful drape.

crochet t-shirt detail image

The Crochet Pattern

I really wanted to be sure this pattern was fun and easy to make! I think summer is a time for relaxing and enjoying life so I wanted a pattern that fit right in with that vibe.

I used linen stitch (also called moss stitch) for this t-shirt. I love this stitch because it’s super easy and quick to work. You are crocheting into gap spaces between stitches so its very easy to do without looking or paying much attention!

This pattern is worked primarily in-the-round from the top, down. At the beginning, you will crochet a couple rows flat to shape the front neckline so that it sits a bit lower than the back neckline. Then, you will join to work in the round and shape the shoulders, body, and sleeves.

I’ve added some additional photos throughtout this pattern to explain the construction a bit more incase you’ve never made a top-down, raglan crochet sweater!

Yarn and Materials

As I mentioned above, I wanted to use a yarn for this t-shirt that was breathable, cool, and amazingly soft. Lion Brand Coboo is my favorite yarn and worked perfectly for this crochet pattern!

If you are interested in using this exact yarn, you might want to check out the crochet kit which contains all the yarn needed to make your size and a free copy of the pattern!

I will note that this yarn is plied and has a tendency to ‘split’ from your hook. I personally don’t find this to be an issue but if this is something that bothers you I have some great yarn substitutions listed below.

crochet tee image in front of water on model with hand in hair

Yarn Substitutions

Some other yarns that I recommend for this crochet t-shirt are:

  • Truboo from Lion Brand: a 100% bamboo yarn similar to Coboo but without the cotton! This yarn is a bit shinier and silkier than Coboo.
  • Comfy Cotton Blend: another favorite, this yarn is an acrylic cotton blend that I’ve used and loved many times!
  • CotLin from KnitPicks: this yarn is a cotton, linen blend so its very cooling and perfect for warm weather. Its not quite as soft as some of the others but I still love it because it has that high-end linen feel
  • Swish DK: a 100% merino wool yarn, perfect if you don’t want to use cotton but still prefer to use natural fibers! Just note, this yarn is wool so its a bit warmer than the other options.
  • Comfy Worsted: this yarn is labeled as a worsted weight but I strongly think that it is more of a DK weight. I am always impressed with this yarn and how unbelievable soft it is! Also check out Comfy Color Mist, the same yarn just with speckled colors instead of solids.

Perfect T-Shirt Crochet Pattern

© ORIGINALLY LOVELY 2021

This pattern and photographs of this garment are property of Kaitlin Barthold of Originally Lovely. This pattern, photos, and design are subject to copyright and are for personal use only. All commercial use is strictly prohibited. You may not reproduce or distribute this pattern under any circumstances.

The free version of this pattern must be viewed from the webpage.

Shop the kit with Lion Brand Yarn HERE

To purchase an ad-free, printable PDF of the Perfect Crochet T-Shirt on Ravelry, CLICK HERE

To purchase an ad-free, printable PDF of the Perfect Crochet T-Shirt on Etsy, CLICK HERE

perfect crochet t-shirt pattern

Skill Level

Easy +

Materials

3, (4, 4, 5, 5), (6, 6, 7, 8) skeins / 696, (928, 928, 1160, 1160), (1392, 1392, 1624, 1624) yards Lion Brand Coboo Yarn (shown in White)

Size US F-5 (3.75 mm) crochet hook

Removable Stitch Marker

Tapestry Needle to weave in ends

Notes

This raglan style t-shirt is worked from the top, down. After the first few rounds are worked flat to shape the front neckline, this t-shirt will be worked in the round.

Finished Dimensions

XSSMLXL2X3X4X5X
Bust/Chest Circumference323640444852566064
Length22.5232323.523.5242424.524.5
Measurements are finished sweater dimensions and are given in inches

XS, (S, M, L, XL), (2X, 3X, 4X, 5X)

Perfect T-Shirt crochet pattern is written for smallest size with changes for larger sizes in parenthesis. When only one number is given, it applies to all sizes. To keep track of your size, you may highlight or circle all numbers for your chosen size before you begin. 

Help Choosing Size

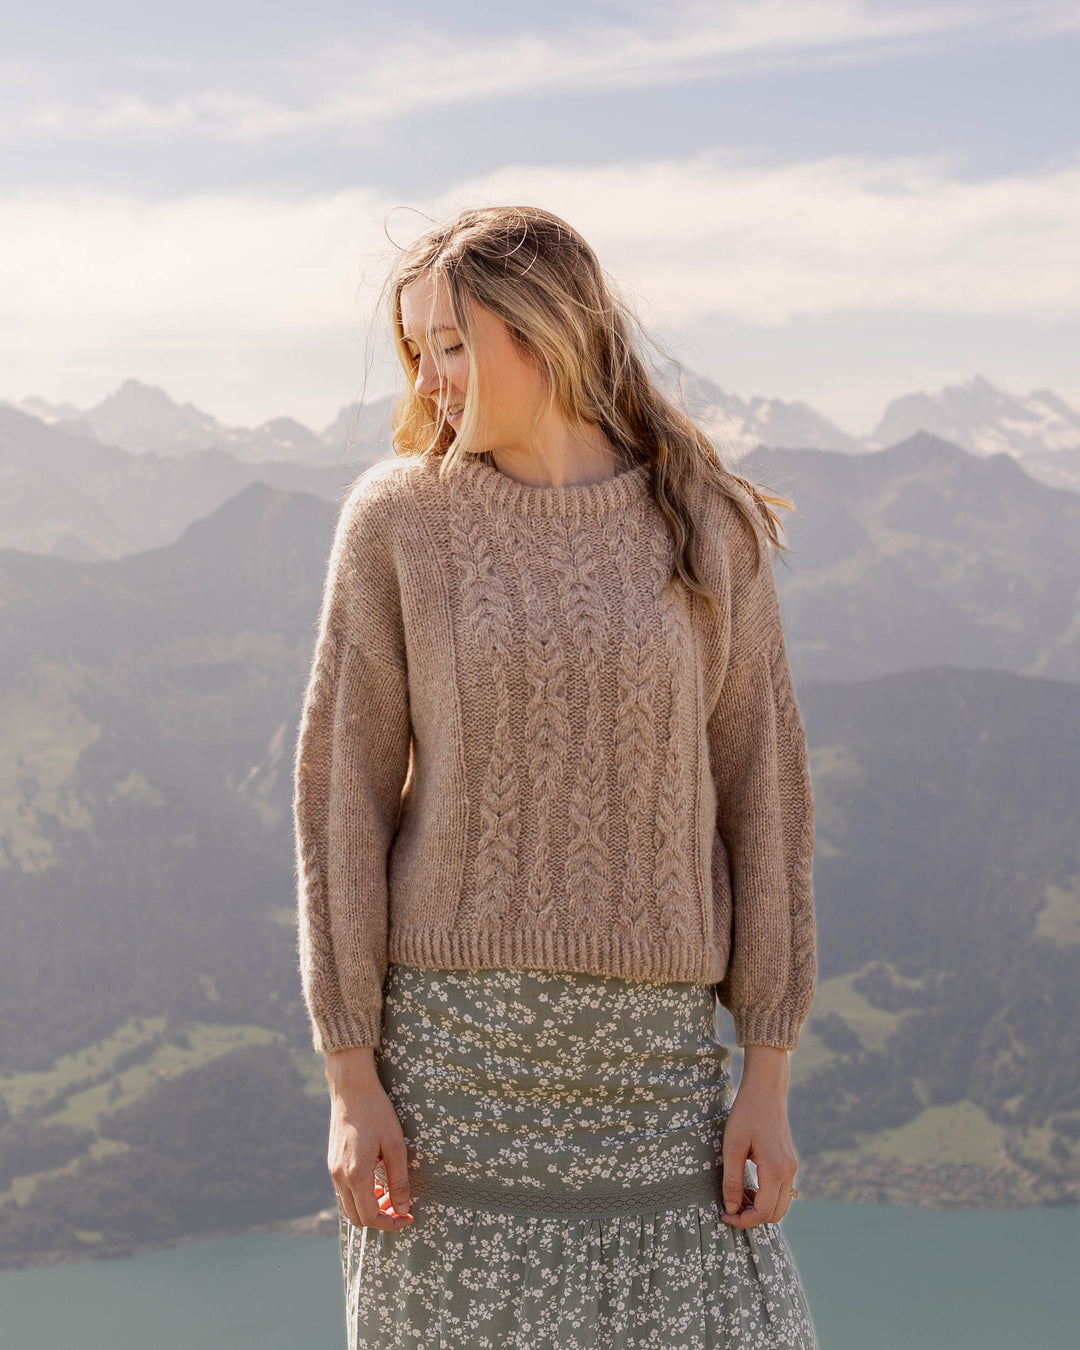
This top is designed to be worn with 0-4” of positive ease at the bust. Model is 6′ tall, has a 33” bust, and is wearing a size small with 3” of positive ease. For best fit, choose a size that is 0-4” larger than your corresponding bust measurement.

Gauge

19 sts and 17 rows = 4” in linen stitch

perfect knit t-shirt and perfect crochet t-shirt laying next to each other overlapping to show the similarities and differences

Abbreviations

This pattern is written using U.S. English Terminology

[ ] = work instructions within brackets as many times as directed.

( ) = work instructions within parenthesis as directed.

* = repeat the instructions following the single asterisk as directed.

BLO = back loop only

CH = chain stitch

GAP SP = gap space, this is referring to the gap that is created between each double crochet cluster

RD = round

RS = right side

SC = single crochet

SLST = slip stitch

SK = skip the next stitch

SP = space

ST = stitch

STS = stitches

WS = wrong side

Perfect T-Shirt Crochet Pattern

Ch 92 (92, 92, 92, 92) (92, 92, 92, 92) sts.

Set-up Row: beginning in 4th ch from hook, SC, ch2, SC, [ch1, sk1, SC] 11 (11, 11, 11, 11) (10, 10, 10, 10) times, ch2, SC, [ch1, sk1, SC] 20 (20, 20, 20, 20) (22, 22, 22, 22) times, ch2, SC, [ch1, sk1, SC] 11 (11, 11, 11, 11) (10, 10, 10, 10) times, ch2, SC, ch3, turn.

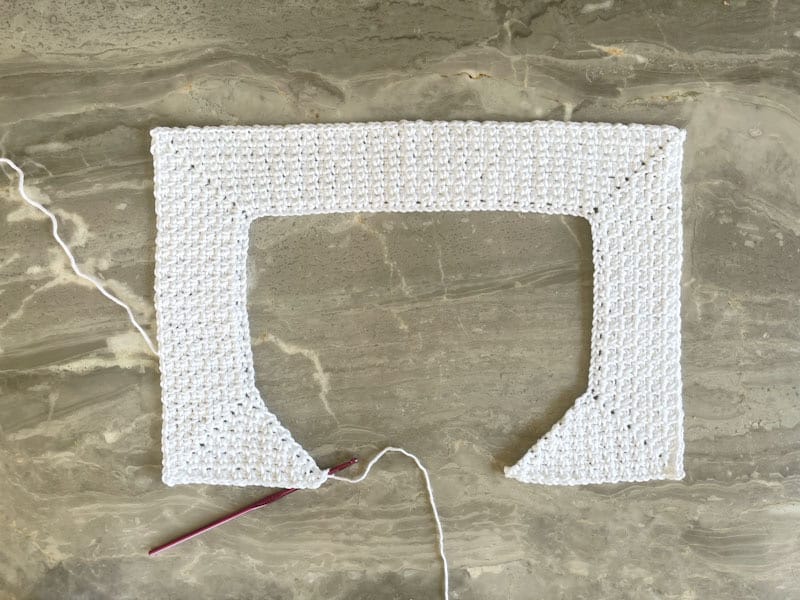
You will now begin shaping the raglans and neckline. Each ch2 sp worked in the previous row is a corner where the raglans will be increased.

Row 1: * [SC, ch2, SC] in ch2 gap sp, ch1, [SC, ch1], in each gap sp to next corner. Rep from * to final corner sp, [SC, ch2, SC] in corner sp, ch1, [SC, ch1, SC] in turning ch from previous row, ch3, turn.

2: * [SC ch1] in each gap sp to corner, [SC, ch2, SC] in corner sp, ch1. Rep from * three more times, [SC, ch1] until turning ch from previous row, [SC, ch1, SC] in turning ch, ch3, turn.

3-10: Rep row 2. On the final row, do not ch3 and turn.

You can see in this photo how the increases at each corner have begun to shape the raglans and the increasing at the beg/ends has shaped the neckline.

Neckline Join:

You will now join the neckline and begin working in the round.

Ch18 (18, 18, 18, 18) (22, 22, 22, 22), careful not to twist work, SC into turning ch sp on opposite end of neckline to join in rd.

You are going to be working in the round in a spiral with no distinct beg/end of each rd. You may place a st marker here to denote this point as the beg/end of each rd to better keep track of raglan increase rounds worked.

By working ch sts and joining with the opposite end, you have now joined the neckline.

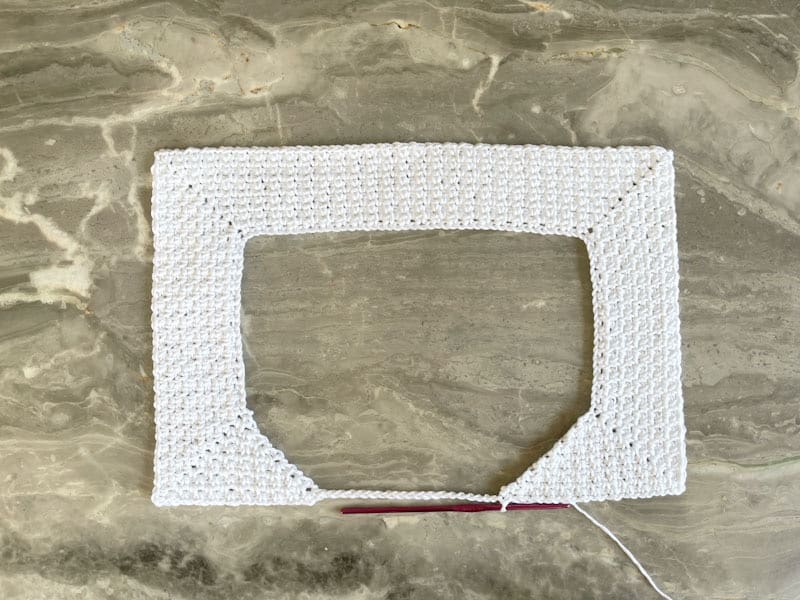
Set-up Round: * ch1, [SC, ch1] in each gap sp to corner, [SC, ch2, SC] in corner sp. Rep from * 3 more times, ch1, [SC, ch1] to front neckline ch, sk the first ch, SC into next ch, ch1, [sk next ch, SC into next ch, ch1] to end of rd.

Round 1: * ch1, [SC, ch1] in each gap sp to corner, [SC, ch1, SC] in corner sp. Rep from * 3 more times, [ch1, SC] in each gap sp to end of rd.

You will now be working in-the-round to continue shaping the raglans and shoulders. Do not worry about the little gap sp on the right side of the neckline, this will be filled in when you work the neckband.

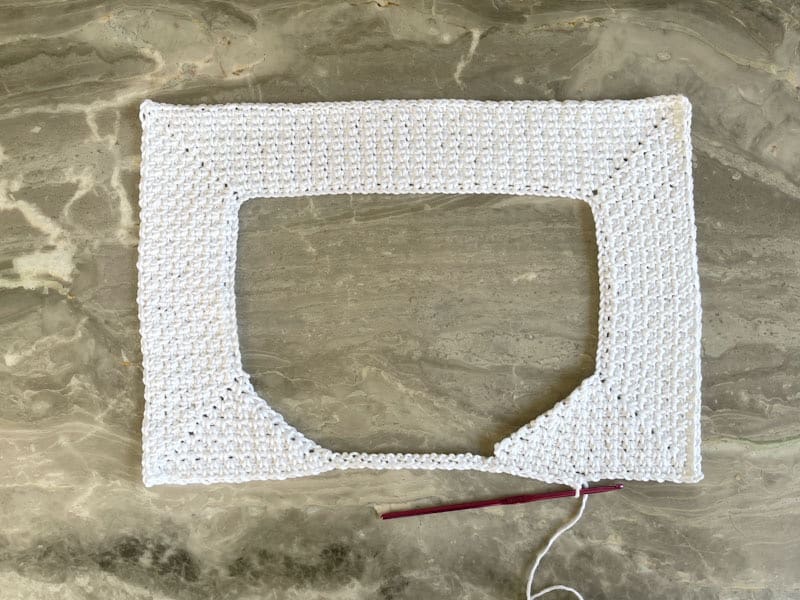
Repeat Round 1 3, (8, 12, 17, 22) (25, 29, 34, 39) more times. Counting only the SC sts, no t the ch sts, you will have 27, (32, 36, 41, 46), (47, 51, 56, 61) st for each sleeve and 36, (41, 45, 50, 55), (60, 64, 69, 74) sts for both the front and the back.
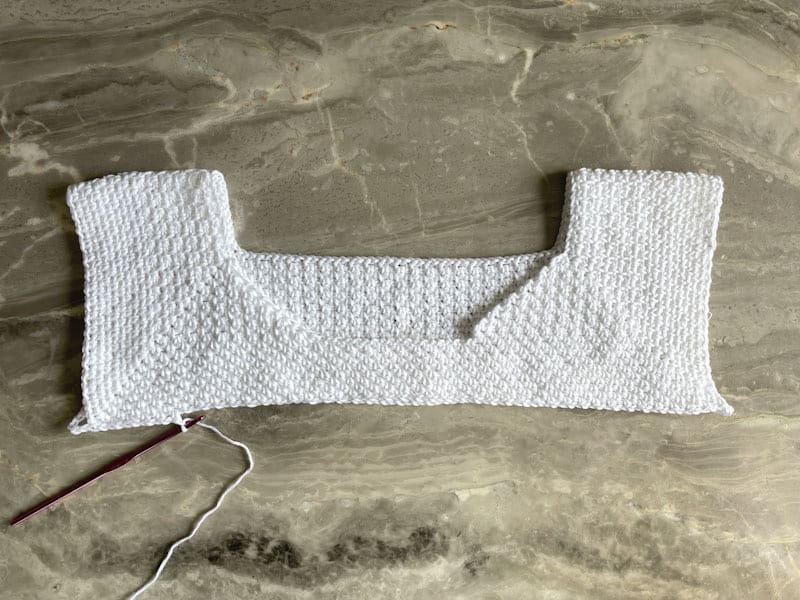
Your work will look like this when you are ready to separate the sleeves/body.

Separate for Body:

You will now separate the sleeves from the body and begin working the body in the round.

Next row: * Ch1, [SC, ch1] in each gap sp to corner, SC into corner sp, ch5, sk all sleeve sts to next corner sp, SC into corner sp. Rep from * once more. This will now be beg/end of each rd.

The lower part of the neckline that you shaped will be the front of your shirt and the 5 ch sts will be each underarm.

1: * ch1, [SC, ch1] in each gap sp to underarm ch sts, SC into first ch, [ch1, sk1, SC] 2x, ch1, rep from * once more.

You will now be working only the body pieces in-the-round. After you have completed the body, you will come back and work the sleeves.

Work even by [SC, ch1] in each gap sp until piece measures 14, (13.5, 13, 12.5, 12), (12, 11, 10.5, 10)” from underarm. You may work more/less at this point to make your top longer/shorter.

Final round: SC, [slstblo] in each st to end of rd. Cut yarn leaving a tail and pull the final st all the way through to secure. Weave in end.

Sleeves:

Beginning at the right side of one underarm, [SC ch1] into each of the 4 gap spaces at the underarm, [SC, ch1] around arm opening to underarm, slst with first SC to join. This will be beg/end of each round.

Work even by [SC, ch1] in each gap sp until piece measures. 1.5” from underarm. You may work more/less at this point to make your sleeve longer/shorter.

Final round: SC, [slstblo] in each st to end of rd. Cut yarn leaving a tail and pull the final st all the way through to secure. Weave in end.

Repeat for second sleeve.

Neckline:

Starting in the raglan gap at the left side of the back neckline, [SC, ch1] into the raglan gap, [SC, ch1] in each of the 11 (11, 11, 11, 11), (9, 9, 9, 9) gap sp to the next raglan, [SC, ch1] in the next 6 gap sp down the side of neckline, [SC, ch1] in the next 9 (9, 9, 9, 9), (11, 11, 11, 11) gap sp across center front neckline, [SC, ch1] in the next 6 gap sp up the other side of neckline, [SC ch1] in each of the next 12 (12, 12, 12, 12), (10, 10, 10, 10) gap sp to final raglan, [SC, ch1] into the final 20 (20, 20, 20, 20), (22, 22, 22, 22) gap sp across back.

Final round: SC, [slstblo] in each st to end of rd. Cut yarn leaving a tail and pull the final st all the way through to secure. Weave in end.

Finishing:

Weave in all ends to secure.

Block by soaking in warm water and lay flat to dry.

Enjoy!

For questions, please email support@originallylovely.com

I’d love to see your finished work! Share on social media using the hashtag #originallylovely or by tagging @originally.lovely and @lionbrandyarn on Instagram!

I hope that you’ve enjoyed this Perfect T-Shirt Crochet Pattern!

Looking for other free warm weather crochet patterns? Check out the Maria Top or read about the 20 Best Free Granny Square Patterns!

You can also check out the knit version of this pattern, the Perfect Knit T-Shirt!

perfect knit t-shirt and perfect crochet t-shirt laying next to each other overlapping to show the similarities and differences

Similar Posts

29 Comments

  1. Thank you for sharing your patterns on your blog. I’m presently on Row 2 of the Perfect Crochet T-Shirt. I’m wondering whether or not there should be a CH1 after the SC, CH2, SC in the corner.

    1. Hi Nancy! Yes there should. Thanks for catching that. I’ll update it 🙂

  2. Thank you so much for your t-shirt pattern. I’m using the recommended yarn and it has such a nice hand, light and soft. Thank you also for the photos, that helps me to ensure that I’m on the right path. I’m having difficulty with starting the sleeve though. The pattern states, “ Beginning at the right side of one underarm, [SC ch1] into each of the 4 gap spaces at the underarm,” I don’t see the 4 gap spaces at the underarm. Do you have a photo of that?

    1. Hi Wendy! So glad you like it. I don’t have a photo of that unfortunately. The gap spaces might not be as obvious as the gap sp worked throughout the pattern but basically, you are just SC into the pattern going the opposite direction so you should see little SCs between ch sts at the underarm, so work into the ch st spaces from where you joined the front and back!

  3. Thank you for this lovely pattern! I have a question- on the Set-Up row, I keep ending up with 2 extra chains leftover. Should there be a skipped chain at the “corners”? Should the instructions read “… ch2, {SK1}, sc…”?

    1. Hi Terri! I’ve tried to hard to figure out why you might have 2 extra chains. I even worked the first row to try and figure it out! I’ll try and explain it in a different way and see if that helps.

      So using the smaller size for example, to begin you are working in the 4th ch from hook, so 3 turning ch sts, then 1 SC (4 chains total used). Then, you work the first sleeve which is 11 repeats using 2 chains each and a SC at the beginning, (23 chains used for this part, plus the 4 so 27 used). Then the back, so again 20 repeats using 2 sts each and a SC at the beginning of these ( 41 chains used here, 68 used total). Now the other sleeve 11 repeats with a SC at beg (23 more chains used, 91 total used), then a SC in that final stitch, 92 chains used total.

      Let me know if that helps?? Sorry its throwing you off I know how frustrating that can be!

  4. Hi Kaitlin,
    Thank you so much for sharing this lovely pattern for free -it’s exactly the kind of top I’ve been looking for recently, and I can’t wait to get started!
    I just wanted to check something with you, as I’m using Coboo yarn but I’m struggling to make gauge – do I only count the scs when measuring for gauge, or do the chains also count as a stitch?
    Thanks very much in advance!
    Louise

    1. Hi Louise! Good question, so you’ll count both the SC sts and the chain sts. If you look at the row above or below, you’ll see that what is a chain stitch on one row will become a SC stitch on the next row so counting both the SC and ch sts gives a more accurate picture of the linen stitch! Hope that helps, let me know if you have any more questions 🙂

    1. Hi! I don’t have any video tutorials for this pattern, my apologies! Just remember the first few rows are worked flat to shape the neckline before its joined to work in the round. Hope that helps!

  5. Such a wonderful pattern. Thankyou so much for sharing. I am almost finished it and it looks so good. It’s the first crochet project that I am actually looking forward to wearing.

  6. Hi Kaitlin,
    I have been working in the round
    and as a result I can see a visible diagonal seam running down the front of t-shirt.
    I cannot figure this out. Can you please help me?
    Thank you
    Denise

    1. Hi Denise! Is the diagonal seam where you are increasing to shape the raglans? If yes, this is part of the design if you look closely in the photos, this is what shapes the sleeve and the body in one piece! Once you join to work the body, the beg/end of each round is moved to the underarm (you can see these directions in the first row under the section ‘Separate for Body’). Once the ‘seam’ (the beg/end of each round) will be at the underarm is moved to the underarm space, it should be pretty well camouflaged.

      Does this help answer your question? Let me know if you need any more help!
      -Kaitlin

  7. I’m enjoying the pattern. I have joined the neckline with the 18 chain stitches and have repeated row 1 3 times. I’m noticing that the lovely diagonal pattern at each of the corners seems to be curving. It seems that since we don’t turn, the diagonal line is now bending…if that makes sense. I think this will straighten out with blocking, but then wonder if I’m doing it right. Thank you.

    1. Hi Jennifer! I haven’t noticed much twisting with this stitch. When working here in-the-round, its worked in more of a spiral so there shouldn’t really be a diagonal line. Are you joining each row somehow?

  8. Hello. I’m loving the pattern so far and all of my stitch counts are adding up. I am at the ch 5, after the, “Separate for body,” part. It is WAY too tight under my armpits, so I’ve added a bunch of ch sts. I did ch 22 at each arm pit and it seems it may work. Have you had this comment before, that ch 5 is too tight? I am a size medium, 34 b and slender build, so I’m confused why I’ve had to add so many more stitches. Help, please?

    1. Hi! I haven’t had this comment or feedback yet, but that said everyones bodies are a bit different so the ‘standards’ aren’t always perfect for everyone. This stitch does grow a bit length-wise when blocked, so I’m thinking that might have played a part in it as I’m guessing you were trying it on pre-blocked? Regardless, it sounds like you were able to find a good modification that worked for you!! Let me know if you have any other questions!

  9. Hi, just checking if the instruction in Round 1 ([SC, ch1, SC] in corner sp.) shouldn’t read SC, ch2, SC?

Leave a Reply

Your email address will not be published. Required fields are marked *