Polo Sweater Knitting Pattern
Introducing: The Polo Sweater -- Free Knitting Pattern
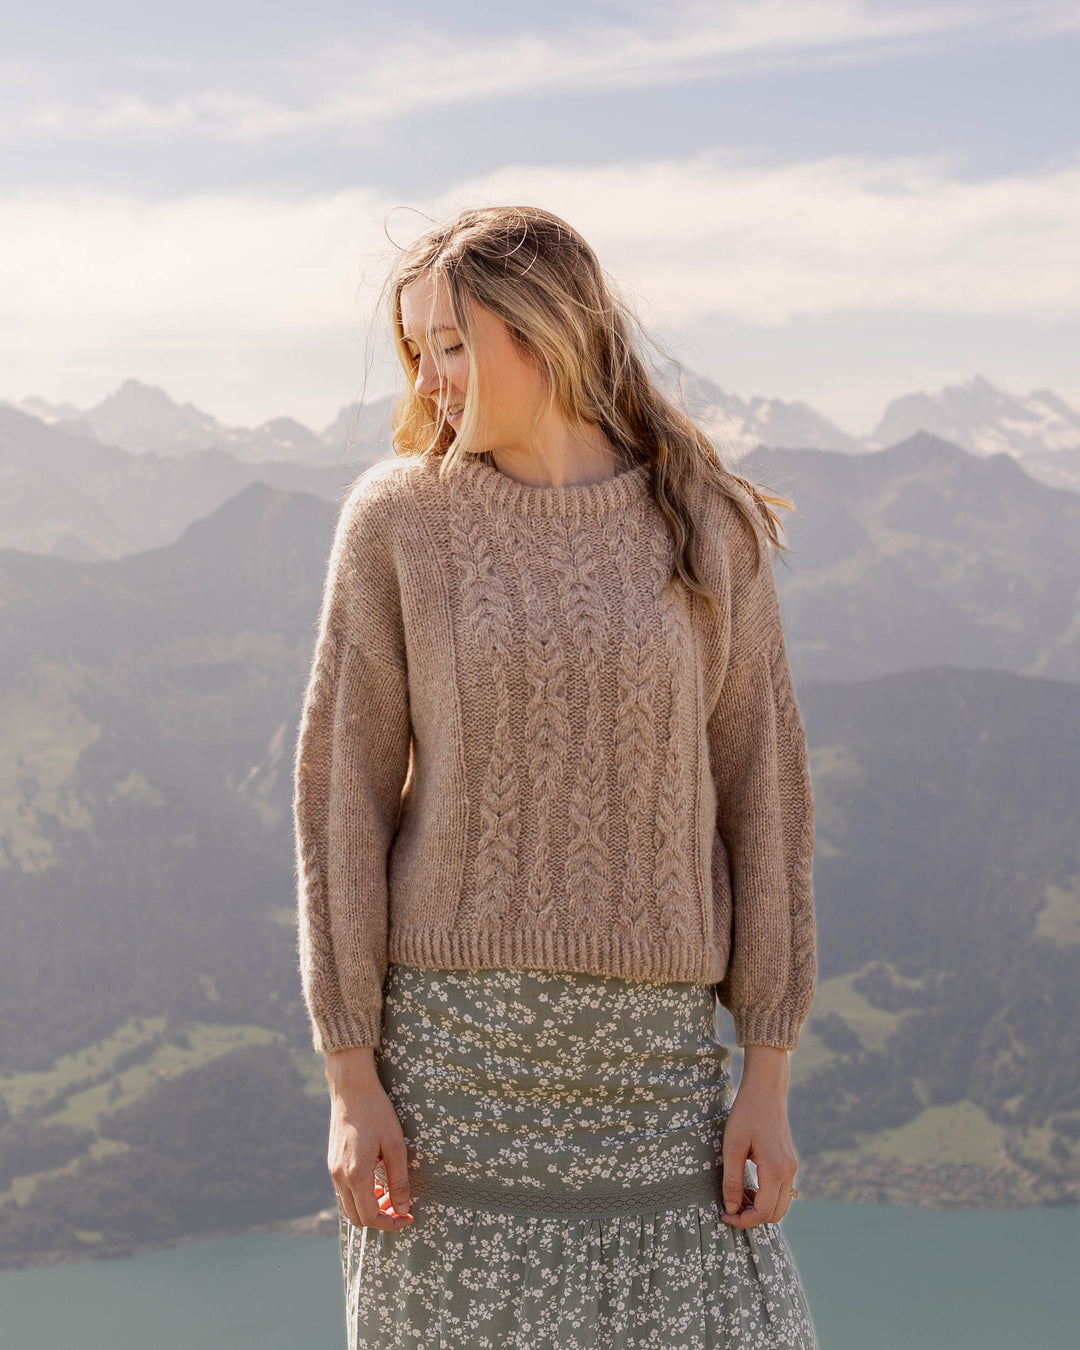
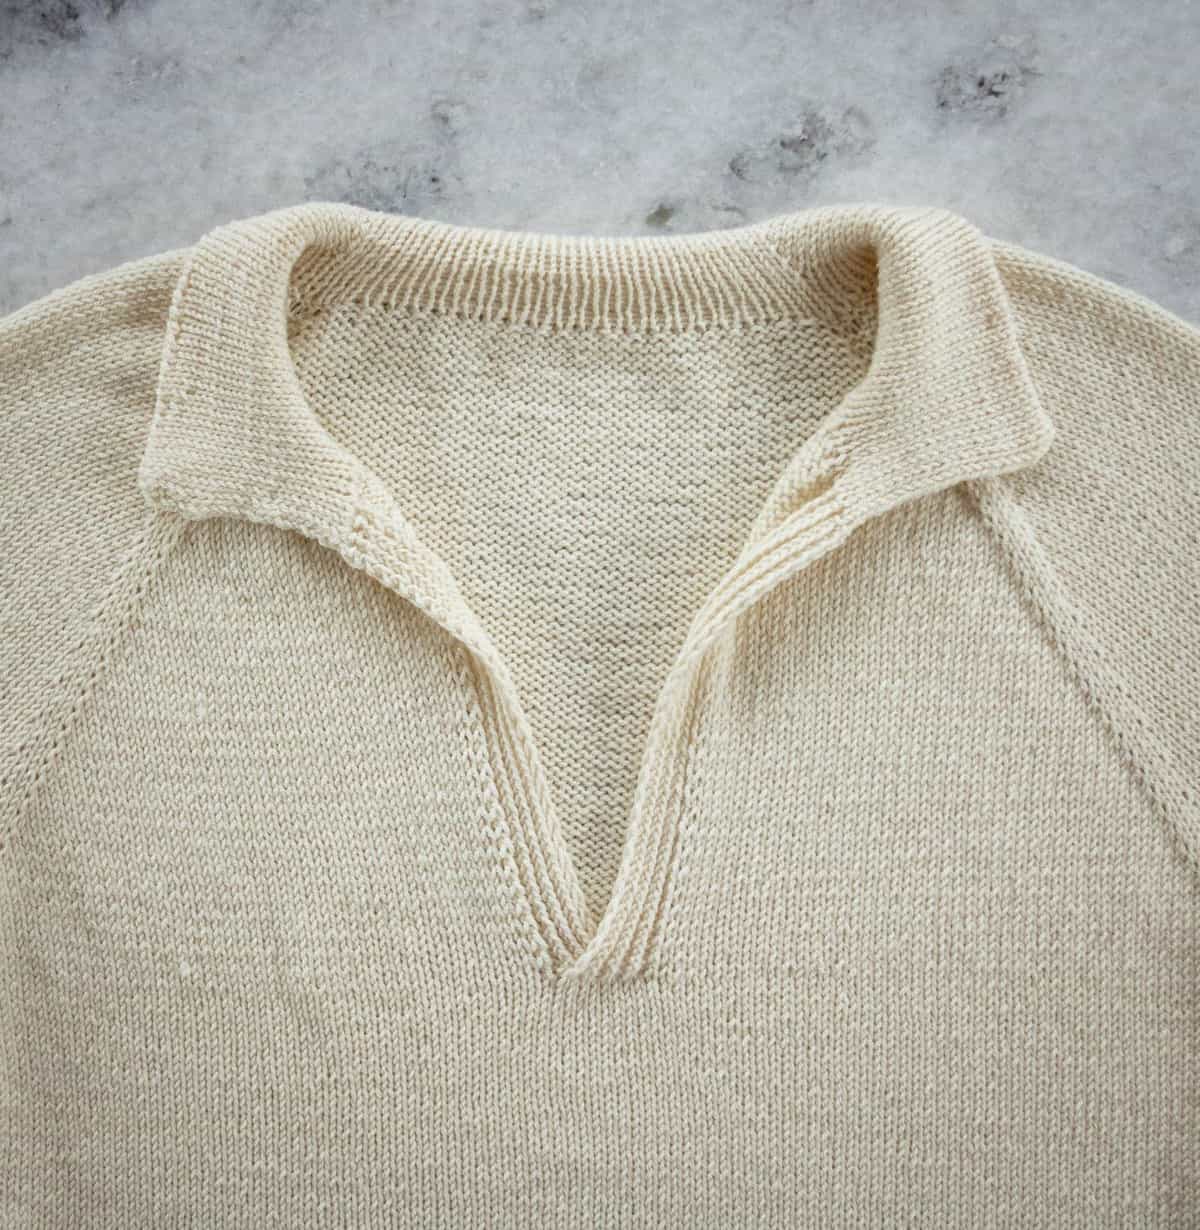
This sporty polo style sweater knitting pattern is a nod to classic, preppy style. Beautiful worn alone or as a base for layering, this sweater has a relaxed fight, a slight crop, a front placket for a classic look. Unique detailing such as a twisted rib neckline, double knit collar, and faux side seams come together to create a sweater that is both beautiful and functional.

Polo Sweater Knitting Pattern
© ORIGINALLY LOVELY 2021
This pattern and photographs of this garment are property of Kaitlin Barthold of Originally Lovely. This pattern, photos, and design are subject to copyright and are for personal use only. All commercial use is strictly prohibited. You may not reproduce or distribute this pattern under any circumstances.
The free version of this pattern must be viewed from the webpage.
To Purchase an ad-free, printable PDF of of the Polo Sweater on Ravelry, CLICK HERE
To Purchase an ad-free, printable PDF of of the Polo Sweater on Etsy, CLICK HERE
Skill Level
Intermediate
In this knitting pattern, you will need to know how to knit flat and in the round, increase, decrease, and pick up stitches. Neckline, sleeves, and hem are worked using a twisted rib stitch. Collar is worked by double knitting for a reversible look. Faux side seams are added at the end using a crochet hook, although no experience with crochet is required.
Materials
- 4, (4, 4, 5, 5), (5, 6, 6, 7) skeins / approx 1220, (1220, 1220, 1525, 1525), (1525, 1830, 1830, 2135) yards Lion Brand LB Collection Superwash Merino Yarn (shown in antique)
- Size US 6 (4.0 mm) 32” or longer circular knitting needles (for body)
- Size US 5 (3.75 mm) 32” or longer circular knitting needles (to work bottom hem)
- Size US 4 (3.5 mm) 32” circular knitting needles (to work sleeve cuffs and neckband)
- Size US 4 (3.5 mm) Double Pointed Needles (optional, to work sleeve cuffs)
- 5.0 mm crochet hook (to work faux seams)
- Cable Needle
- Stitch Markers
- Stitch holder or scrap yarn
- Tapestry Needle to weave in ends
Notes
The Polo sweater is worked from the top, down. First, you will work the yoke flat to shape the neckline and sleeves. Then, you will join to work in the round and separate to work the body and sleeves. Collar will be added at the end by picking up stitches and working flat. Since this sweater is worked in merino wool which has a tendency to ‘grow’ in size, we will be adding faux seams at the sides of the body and along the sleeves. These seams will help the sweater to hold its shape and to last longer. To do this, we will work one column of garter stitch along the sides of the sweater and add the seams after we have blocked the finished piece. We will add these seams using a crochet hook and a slipped stitch technique. No crochet experience is required.
Finished Dimensions
| XS | S | M | L | XL | 2X | 3X | 4X | 5X | |
| Bust/Chest Circumference | 37.5 | 42 | 45.5 | 50 | 53.5 | 58 | 61.5 | 66 | 69.5 |
| Finished Length | 20.5 | 21 | 21.5 | 21.5 | 22 | 23 | 24 | 25 | 26 |
| Sleeve Length | 17 | 17 | 17 | 17 | 17 | 17 | 17 | 17 | 17 |
XS, (S, M, L, XL), (2X, 3X, 4X, 5X)
Knitting pattern is written for smallest size with changes for larger sizes in parentheses. When only one number is given, it applies to all sizes. To keep track of your size, you may highlight or circle all numbers for your chosen size before you begin.
Help Choosing Size
This polo sweater knitting pattern is designed to be worn with 8-10” of positive ease. Model is 6’ tall, has a 33” bust, and is wearing a size Small with 9” of positive ease. For best fit, choose a size that is closest to 8-10” larger than your corresponding bust measurement. For example, if your bust is 50”, you would wear a size 2X. If you prefer your garments to fit looser or more snug, choose a size with less or more ease accordingly.
Gauge
22 stitches and 30 rows = 4” in stockinette stitch on size 6 needles
Notes on Gauge: Superwash merino wool tends to stretch quite a bit when blocked. Therefore, you will need to wet block your swatch to be sure you are reaching the proper gauge. Additionally, keep in mind that it may seem like the sweater is smaller than desired until you have blocked at the end.
Abbreviations
This pattern is written using U.S. English Terminology
BO = bind off
CO = cast on
K = knit
k1tbl = knit one stitch through the back loop
k2tog = knit 2 stitches together (right leaning single decrease)
M = stitch marker
PM = place stitch marker
p1tbl = purl one stitch throught the back loop
RM = remove stitch marker
RS = right side
sl1 = slip 1 stit ch purlwise with the working yarn in back
sl1kwyib = slip one stit ch knitwise with the working yarn in back
sl1pwyif = slip one stit ch purlwise with the working yarn in front
SM = slip stitch marker
SSK = slip slip knit (le ft leaning single decrease)
st = stitch
WS = wrong side
wyib = working yarn in back
wyif = working yarn in front
[ ] = work instructions within brackets as many times as directed
* = repeat the instructions following the single asterisk as directed
Polo Sweater Knitting Pattern
Using size 6 needles, cast on 96, (102, 102, 102, 104), (108, 110, 110, 110) sts using backwards loop cast on or other thin cast on method of choice.
Set Up Row: p2, PM, p2, PM, p23 (25, 25, 25, 25) (27, 27, 27, 27), PM, p2, PM, p38 (40, 40, 40, 42) (42, 44, 44, 44), PM, p2, PM, p23 (25, 25, 25, 25) (27, 27, 27, 27), PM, p2, PM, p2.
1 (RS): CO2 sts, [k to M, M1L, SM, k2, SM, M1R] 4x, k t o end of round. [106, (112, 112, 112, 114), (118, 120, 120, 120) sts].
2 (WS): CO2 sts, p across. [108, (114, 114, 114, 116), (120, 122, 122, 122) sts].
3-6: as 1-2. [132, (138, 138, 138, 140), (144, 146, 146, 146) sts].
7: CO4 sts, (k to M, M1L, SM, k2, SM, M1R) 4x, k t o end of round. [144, (150, 150, 150, 152), (156, 158, 158, 158) sts].
8: CO4 sts, p across. [148, (154, 154, 154, 156), (160, 162, 162, 162) sts].
9-10: as 7-8. [164, (170, 170, 170, 172), (176, 178, 178, 178) sts ].
11: CO7 (8, 8, 8, 9) (9, 10, 10, 10), k1tbl, [ p1tbl, k1tbl] 4x, [k to M, M1L, SM, k2, SM, M1R] 4x, k to end of round. [179, (186, 186, 186, 189), (193, 196, 196, 196) sts].
12: CO7 (8, 8, 8, 9) (9, 10, 10, 10), p1tbl, [k1tbl, p1tbl] 4x, p to last 9, p1tbl, [k1tbl, p1tbl] 4x. [186, (194, 194, 194, 198), (202, 206, 206, 206) sts].
13: sl1kwyib, [p1tbl, k1tbl] 4x, [k t o M, M1L, SM, k2, SM, M1R] 4x, k to last 9, p1tbl, [k1tbl, p1tbl] 4x. [194, (202, 202, 202, 206), (210, 214, 214, 214) sts].
14: sl1pwyif, [k1tbl, p1tbl] 4x, p to last 9, p1tbl, [k1tbl, p1tbl] 4x.
Repeat rows 13-14 7, (6, 7, 6, 8), (6, 9, 7, 8) more times. [250, (250, 258, 250, 270), (258, 286, 270, 278) sts].
15: sl1kwyib, [p1tbl, k1tbl] 4x, [k t o M, M1L, SM, k2, SM, k to M, SM, k2, SM, M1R] 2x, k to last 9, p1tbl, [k1tbl, p1tbl] 4x. [254, (254, 262, 254, 274), (262, 290, 274, 282) sts].
16: sl1pwyif, [k1tbl, p1tbl] 4x, p to last 9, p1tbl, [k1tbl, p1tbl] 4x.
17: sl1kwyib, [p1tbl, k1tbl] 4x, [k t o M, M1L, SM, k2, SM, M1R] 4x, k to last 9, p1tbl, [k1tbl, p1tbl] 4x. [262, (262, 270, 262, 282), (270, 298, 282, 290) sts].
18: sl1pwyif, [k1tbl, p1tbl] 4x, p to last 9, p1tbl, [k1tbl, p1tbl] 4x.
Repeat rows 15-18 6, (9, 11, 14, 15), (19, 19, 23, 25) more times. [334, (370, 402, 430, 462) (498, 526, 558, 590) sts].
On the next row: sl1kwyib, [p1tbl, k1tbl] 4x, k to last 8, stop. You will now join to work in the round by joining the rib sections at the front of the sweater.
Slip the next 8 sts onto a DPN or spare needle, hold in the back of the first 8 sts of the next round, insert your right needle into the first st on the front needle, insert your right needle into the first st on the back needle, knit these two stitches together as if they are one st. Work each of the remaining 7 sts held in the back in this way. [326, (362, 394, 422, 454) (490, 518, 550, 582) sts].
Separate Sleeves and Body: *k to M, RM, k2, RM, slip the next 65 (71, 77, 81, 87), (93, 99, 103, 109) sts onto scrap yarn, CO5 (5, 5, 7, 7) (7, 9, 9, 9) sts, RM, k2, RM. Rep from * once more, k to the first 5 (5, 5, 7, 7) (7, 9, 9, 9) CO sts at the opposite underarm, k2 (2, 2, 3, 3) (3, 4, 4, 4), PM. This will now be beg/end of each rd. [206, (230, 250, 274, 294) (318, 338, 362, 382) sts].
Body:
Round 1: k to CO sts at opposite underarm, k2 (2, 2, 3, 3) (3, 4, 4, 4), PM, k to end of rd.
2: knit.
3: p1, k to M, SM, p1, k t o end of rd.
Repeat rows 2-3 40, (36, 33, 29, 27), (25, 26, 24, 22) more times. Note: You should be able t o count 41, (37, 34, 30, 28), (26, 27, 25, 23) purl bumps along the garter st column.
On the next rd, switch to size 5 needles.
Knit 1 round.
Then, [k1tbl, p1] for 12 rounds total.
BO using the tubular bind off method.
Sleeves:
You will now begin knitting the sts se t aside to work the sleeves in the round.
Transfer the 65, (71, 77, 81, 87), (93, 99, 103, 109) sts set aside for one arm onto size 6 circular needles for ML or DPNs.
Set Up Round: Pick up 8 (8, 8, 10, 10) (10, 12, 12, 12) sts at the underarm, k around sleeve to 8 (8, 8, 10, 10) (10, 12, 12, 12) picked up sts, k3 (3, 3, 4, 4) (4, 5, 5, 5), PM. This will now denote beg/end of each rd. [73, (79, 85, 91, 97), (103, 111, 115, 121) sts].
1: k2tog, k to end of rd. [72, (78, 84, 90, 96), (102, 110, 114, 120) sts].
2: p1, k to end of rd.
3: knit.
Dec row: p1, k2tog, k to 2 before end of rd, ssk. [70, (76, 82, 88, 94), (100, 108, 112, 118) sts].
Repeat in patt as established in rows 2-3 decreasing every 16, (10, 8, 6, 6), (4, 4, 4, 4)th round 6, (9, 12, 14, 17), (19, 23, 24, 27) more times. [58, (58, 58, 60, 60), (62, 62, 64, 64) sts ].
Then, work rows 2-3 until you have worked a total of 114 sleeve rows (57 purl bumps down arm). You may work more or less at this point to make your sleeve longer/shorter.
On the next rd, switch to size 4 needles.
Knit 1 round.
Then, [k1tbl, p1] for 12 rounds total.
BO using the tubular bind off method.
Repeat for the second sleeve.
Polo Neckline:
You will now pick up sts around the neckline to work the collar. Collar will be worked flat.
Using size 4 needles, with RS facing you, pick up one stitch into the first V knitwise, pick up the next st in the second V purlwise. If you need help understanding how to pick up a st purlwise, check out this video.
Continue across neckline in this way picking up approximately one stitch in each V knitwise and then purlwise; 52, (56, 56, 56, 56), (60, 60, 60, 60) sts across right side, 38 (40, 40, 40, 42) (42, 44, 44, 44) along back of neckline, and 52, (56, 56, 56, 56), (60, 60, 60, 60) sts across left side to front. [142, (152, 152, 152, 154) (162, 164, 164, 164) sts].
Row 1: k1tbl, sl1pwyif, [k1, sl1pwyif] across to end of row.
2: k1tbl, [sl1pwyif, k1] 24 (26, 26, 26, 26) (28, 28, 28, 28) times, PM, [sl1pwyif, k1] 22 (23, 23, 23, 24) (24, 25, 25, 25) times, PM, sl1pwyif, [k1, sl1pwyif] to end of row.
3-12: as row 1.
13: k1tbl, [sl1pwyif, k1] to first M, M1R, SM, [sl1pwyif, k1] to next M, SM, M1L, [sl1pwyif, k1] to end of row. [144, (154, 154, 154, 156) (164, 166, 166, 166) sts].
14: k1tbl, sl1pwyif, [k1, sl1pwyif] to M, M1R, SM, [sl1pwyif, k1] to M, SM, sl1pwyif, M1L, sl1pwyif, [k1, sl1pwyif] to end of rd. [146, (156, 156, 156, 158) (166, 168, 168, 168) sts].
15-16: as row 1.
Rep rows 13-16 seven more times. [174, (184, 184, 184, 186) (194, 196, 196, 196) sts].
BO using the tubular bind off method.
Finishing:
Weave in all ends to secure to complete your polo sweater!
Block by soaking in warm water and lay flat to dry. Adjust your sweater so that it lays flat to the dimensions for your chosen size. Superwash merino wool has a tendency to grow so be sure not to overstretch. Adjust collar so that it lays nicely while the sweater dries to help hold its shape.
Adding Faux Seams
Once your polo sweater is completely dry, we will work the faux seams along the sleeves and sides of the body. You will work the seams using a crochet hook and working a slipped stitch. You will use the purl bumps in the columns of garter stitch as your guide for adding these seams. Remember to work these stitches loosely or your sweater may tighten up. If your seams are too tight, increase your crochet hook size.
1. Begin at the underarm and work downwards to the hem. Insert your crochet hook into the stitch between the first purl bump and the picked up sts at the underarm.
2. Hook the yarn for the seam and pull through to create a loop.
3. Insert your hook in the space between the next two purl bumps.
4. Pull up a loop as done in step 2.
5. Pull this second loop through the first loop so that you have one stitch on your needle. You have completed your first slip stitch!
6. Once more, insert your hook in the space between the next two purl bumps as done in step 3.
7. Pull up a loop.
8. Pull this second loop through the first loop.
Repeat steps 6-8 until you have worked down the length of the seam. Stop once you reach the ribbing at the hem. On your last slip stitch, cut your yarn leaving a tail and pull it all the way through to secure.
Weave in ends.
Repeat for the opposite side and for each sleeve.
I hope that you've enjoyed this Polo Sweater Knitting Pattern!