Perfect T-Shirt Knitting Pattern
Introducing: The Perfect Knit T-Shirt — Free Knitting Pattern
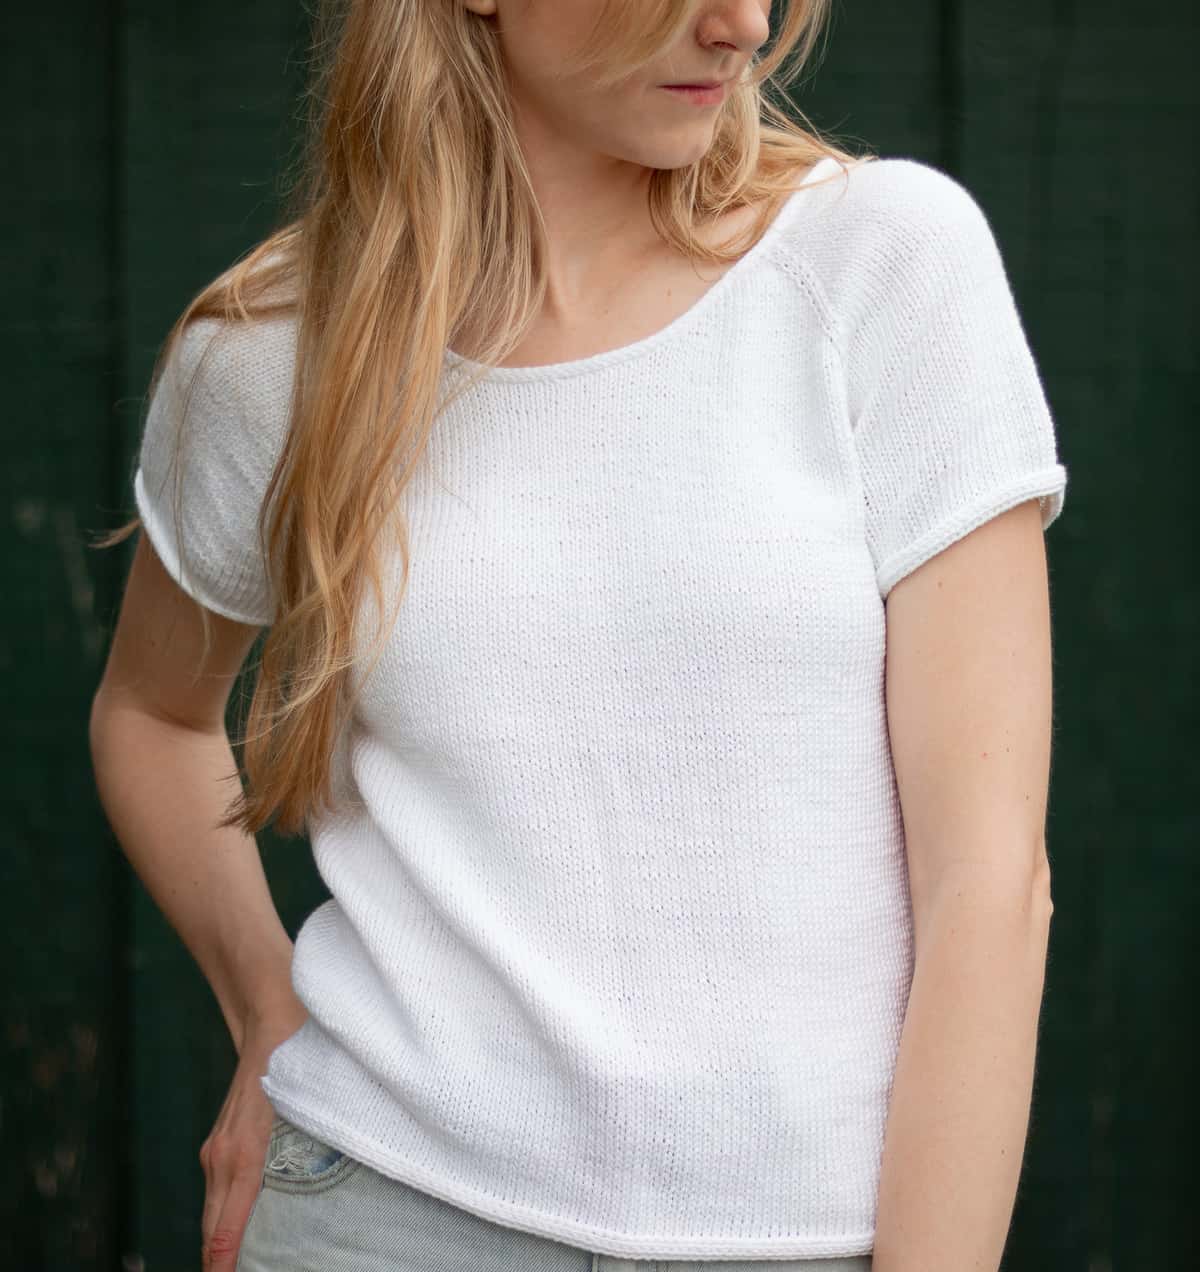
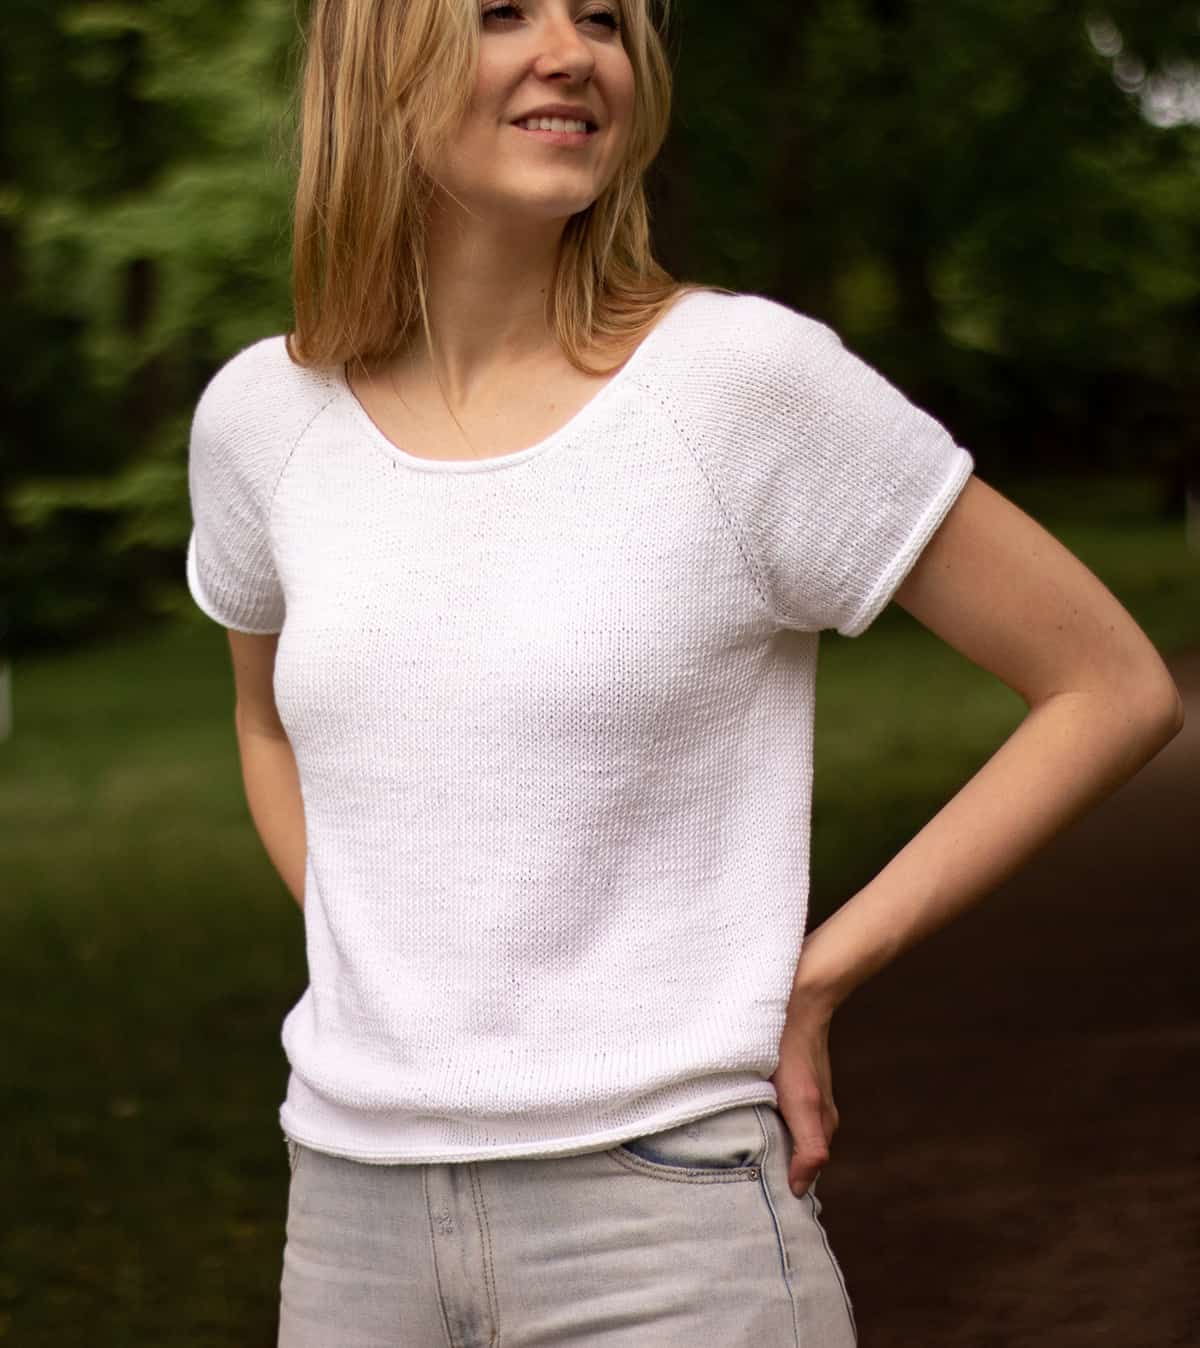
This beginner friendly knitting pattern is worked in the round from the top, down. Both fun to make and wear, this top is designed to be the perfect, everyday knit t-shirt!
Available both as a free knitting pattern and as a kit with Lion Brand Yarn. Scroll down to access the free pattern or continue reading to learn a bit about the design and some pointers to help you out!
Also check out the coordinating crochet pattern, the Perfect Crochet T-Shirt!
**please note, some links may be affiliate links which will allow me to make a small commission on products purchased through my referral. This does not influence my opinion or the price of the item that you are purchasing in any way.
The Design
It seems like I am always searching for the perfect, everyday tee. Very rarely do I come across one that is just ~perfect~ and when I do, I buy a handful!
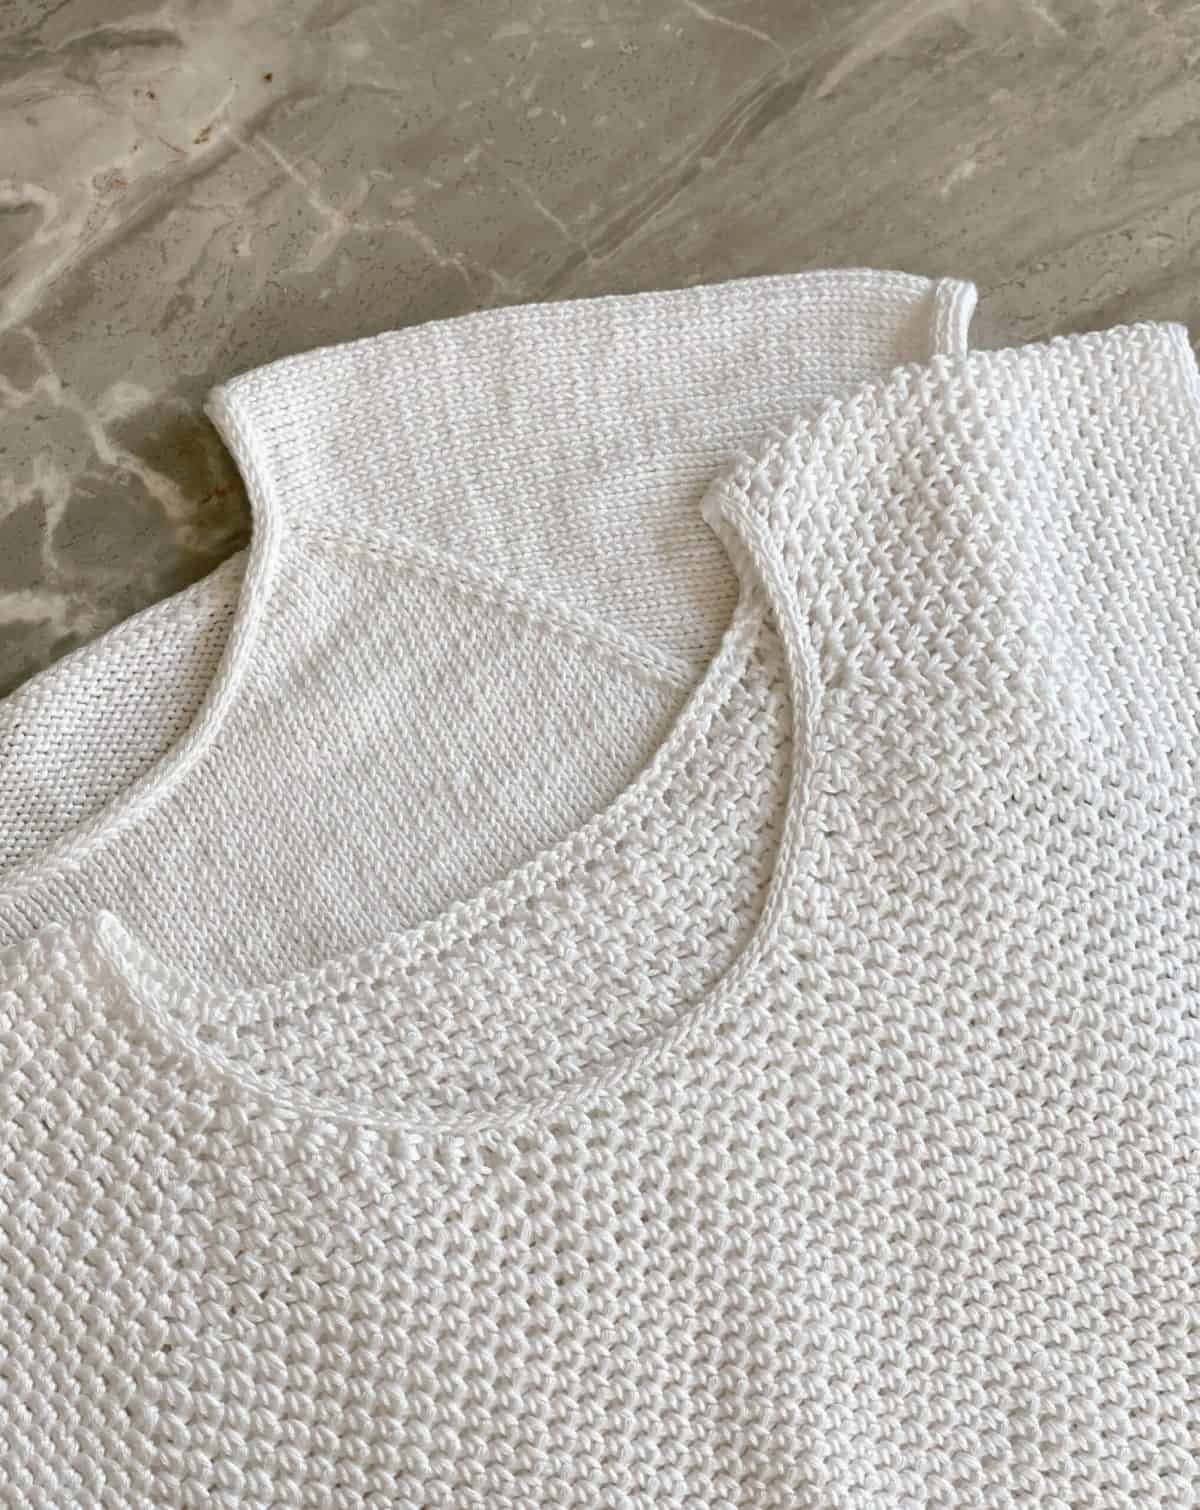
In my mind, a perfect t-shirt needs to have a good neckline. I prefer crewneck but not a tight crewneck.
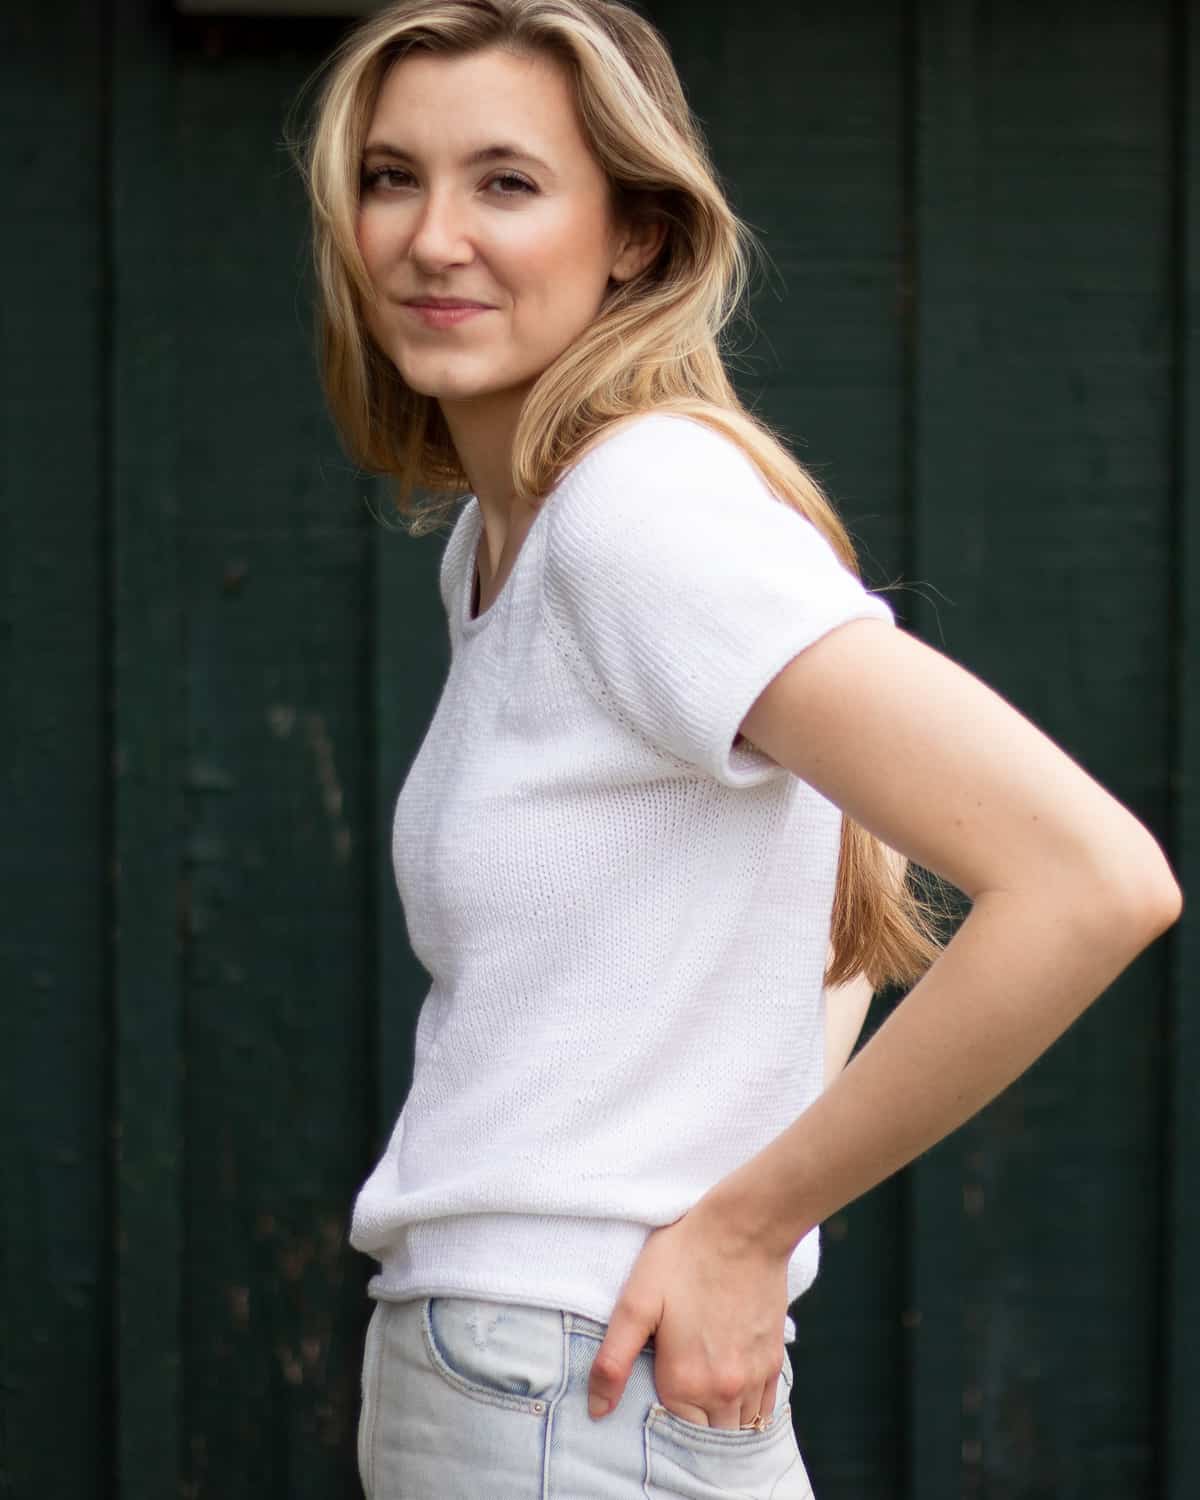
I also want it to be well fitting. I find that around 4″ of positive ease looks best on my body and gives that fitted but not tight look.
Finally, it NEEDS to be comfortable. Most importantly, the fabric has to be soft and cool with nice drape. I knew I needed to use this yarn from Lion Brand!
The Knitting Pattern
Another thing I was certain about when designing this pattern is that I wanted it to be fun and easy to make! Summer is an easygoing time for relaxing and I wanted this pattern to be one that was enjoyable to make for this time of year.
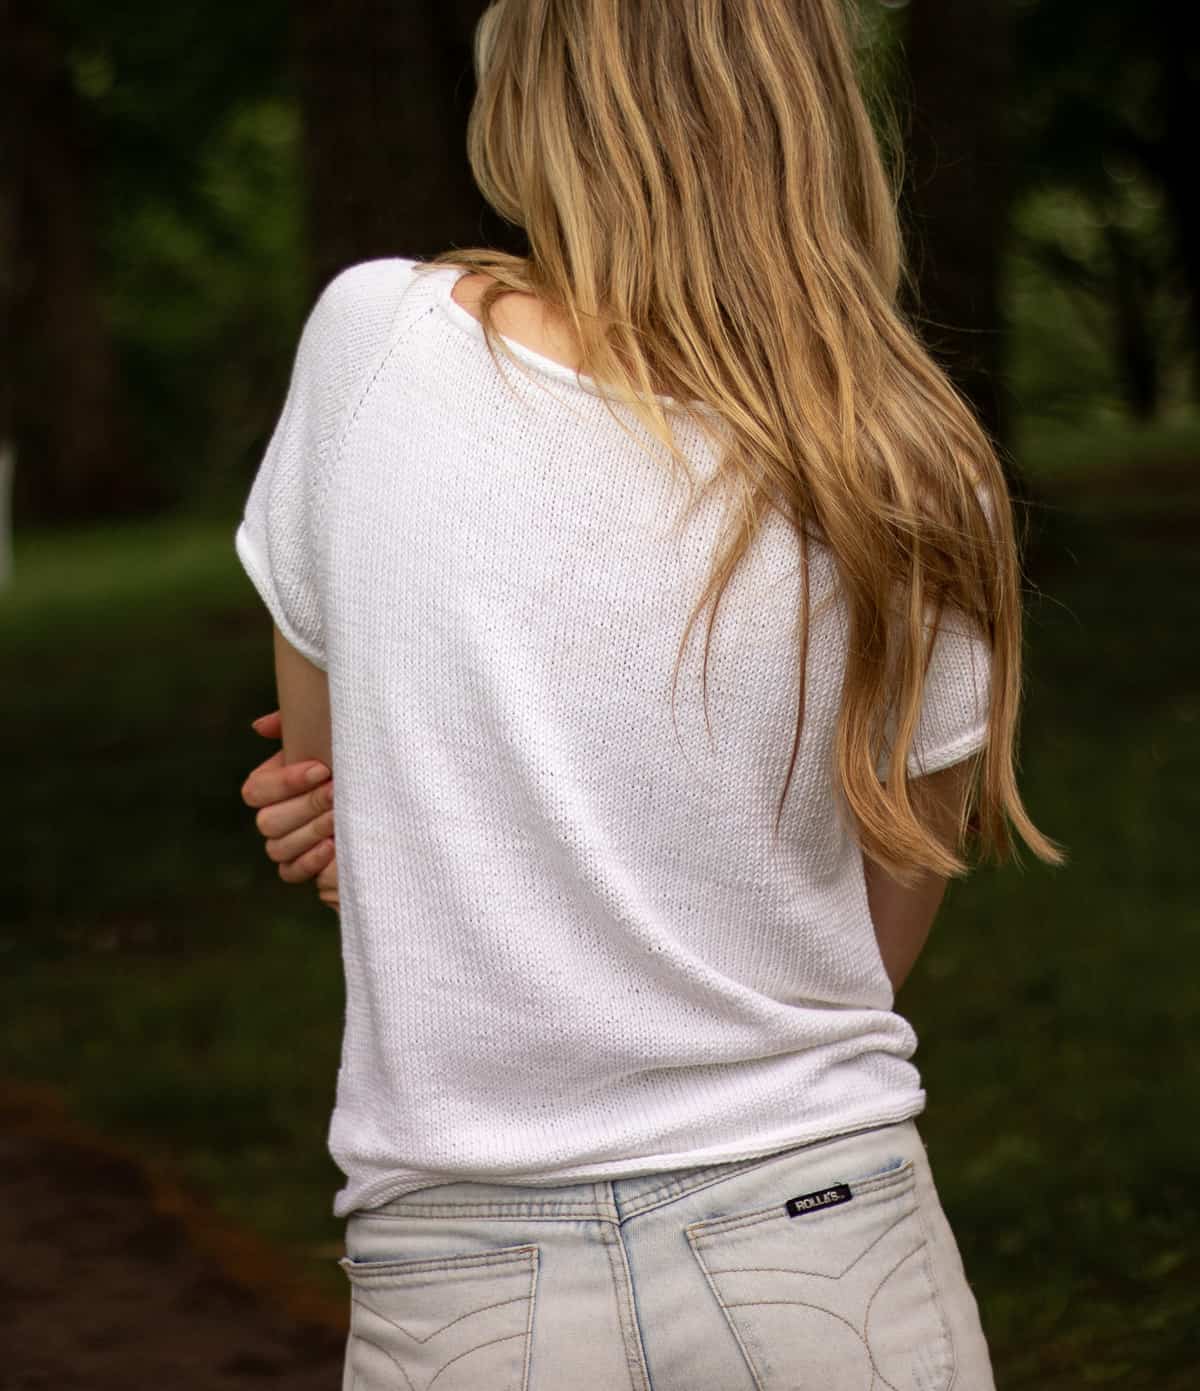
This pattern is worked primarily in-the-round from the top, down. At the beginning, you will work a couple rows flat to shape the front neckline so that it sits a bit lower than the back neckline. Then, you will join to work in the round and shape the shoulders, body, and sleeves.
If you’ve never knit a top-down, raglan style sweater, check out my Sunday Morning Rib Stitch Sweater Pattern! Its a beginner pattern with tons of photos to help walk you through the process.
Yarn and Materials
The yarn I chose for this sweater is Lion Brand Coboo. This is my number one favorite yarn of all time. Its a true DK weight and is made of 50% bamboo and 50% cotton. These natural materials make a yarn that is breathable, cool, and amazingly soft.
If you are interested in using this exact yarn, you might want to check out the knit kit which contains all the yarn needed to make this top and a free copy of the pattern!
I will note that this yarn is plied and has a tendency to ‘split’ between your needles. I personally don’t find this to be an issue but if this is something that bothers you I have some great yarn substitutions listed below.
Yarn Substitutions
Some other yarns that I recommend for this knit t-shirt are:
- Truboo from Lion Brand: a 100% bamboo yarn similar to Coboo but without the cotton! This yarn is a bit shinier and silkier than Coboo.
- Comfy Cotton Blend: another favorite, this yarn is an acrylic cotton blend that I’ve used and loved many times!
- Cotton Jeans Yarn: this cotton yarn looks just like denim when knit up!
- CotLin from KnitPicks: this yarn is a cotton, linen blend so its very cooling and perfect for warm weather. Its not quite as soft as some of the others but I still love it because it has that high-end linen feel
- Swish DK: a 100% merino wool yarn, perfect if you don’t want to use cotton but still prefer to use natural fibers! Just note, this yarn is wool so its a bit warmer than the other options.
- Comfy Worsted: this yarn is labeled as a worsted weight but I strongly think that it is more of a DK weight. I am always impressed with this yarn and how unbelievable soft it is! Also check out Comfy Color Mist, the same yarn just with speckled colors instead of solids.
Perfect T-Shirt Knitting Pattern
© ORIGINALLY LOVELY 2022
This pattern and photographs of this garment are property of Kaitlin Barthold of Originally Lovely. This pattern, photos, and design are subject to copyright and are for personal use only. All commercial use is strictly prohibited. You may not reproduce or distribute this pattern under any circumstances.
The free version of this pattern must be viewed from the webpage.
Shop the kit with Lion Brand Yarn HERE
To purchase an ad-free, printable PDF of the Perfect Knit T-Shirt on Ravelry, CLICK HERE
To purchase an ad-free, printable PDF of the Perfect Knit T-Shirt on Etsy, CLICK HERE
Skill Level
Easy +
In this pattern, you will need to know how to knit flat and in the round, increase, and pick up stitches. The neckline, sleeve cuffs, and hem are all finished using an I-Cord Bind Off.
Find help with this bind of method here: https://youtu.be/xZvfXSQaF-8
Materials
3, (4, 4, 5, 5), (6, 6, 7, 8) skeins / 696, (928, 928, 1160, 1160), (1392, 1392, 1624, 1624) yards Lion Brand Coboo Yarn (shown in White)
Size US 6 (4.0 mm) 32” circular knitting needles
Size US 6 (4.0 mm) double pointed needles or small circular needle to work sleeves and neckline
Stitch holder or scrap yarn
Tapestry Needle to weave in ends
Notes
This raglan style t-shirt is worked from the top, down. After the first few rounds are worked flat to shape the front neckline, this t-shirt will be worked in the round.
Finished Dimensions
| XS | S | M | L | XL | 2X | 3X | 4X | 5X | |
| Bust/Chest Circumference | 32 | 36 | 40 | 44 | 48 | 52 | 56 | 60 | 64 |
| Length | 22.5 | 23 | 23 | 23.5 | 23.5 | 24 | 24 | 24.5 | 24.5 |
XS, (S, M, L, XL), (2X, 3X, 4X, 5X)
Perfect T-Shirt knitting pattern is written for smallest size with changes for larger sizes in parenthesis. When only one number is given, it applies to all sizes. To keep track of your size, you may highlight or circle all numbers for your chosen size before you begin.
Help Choosing Size
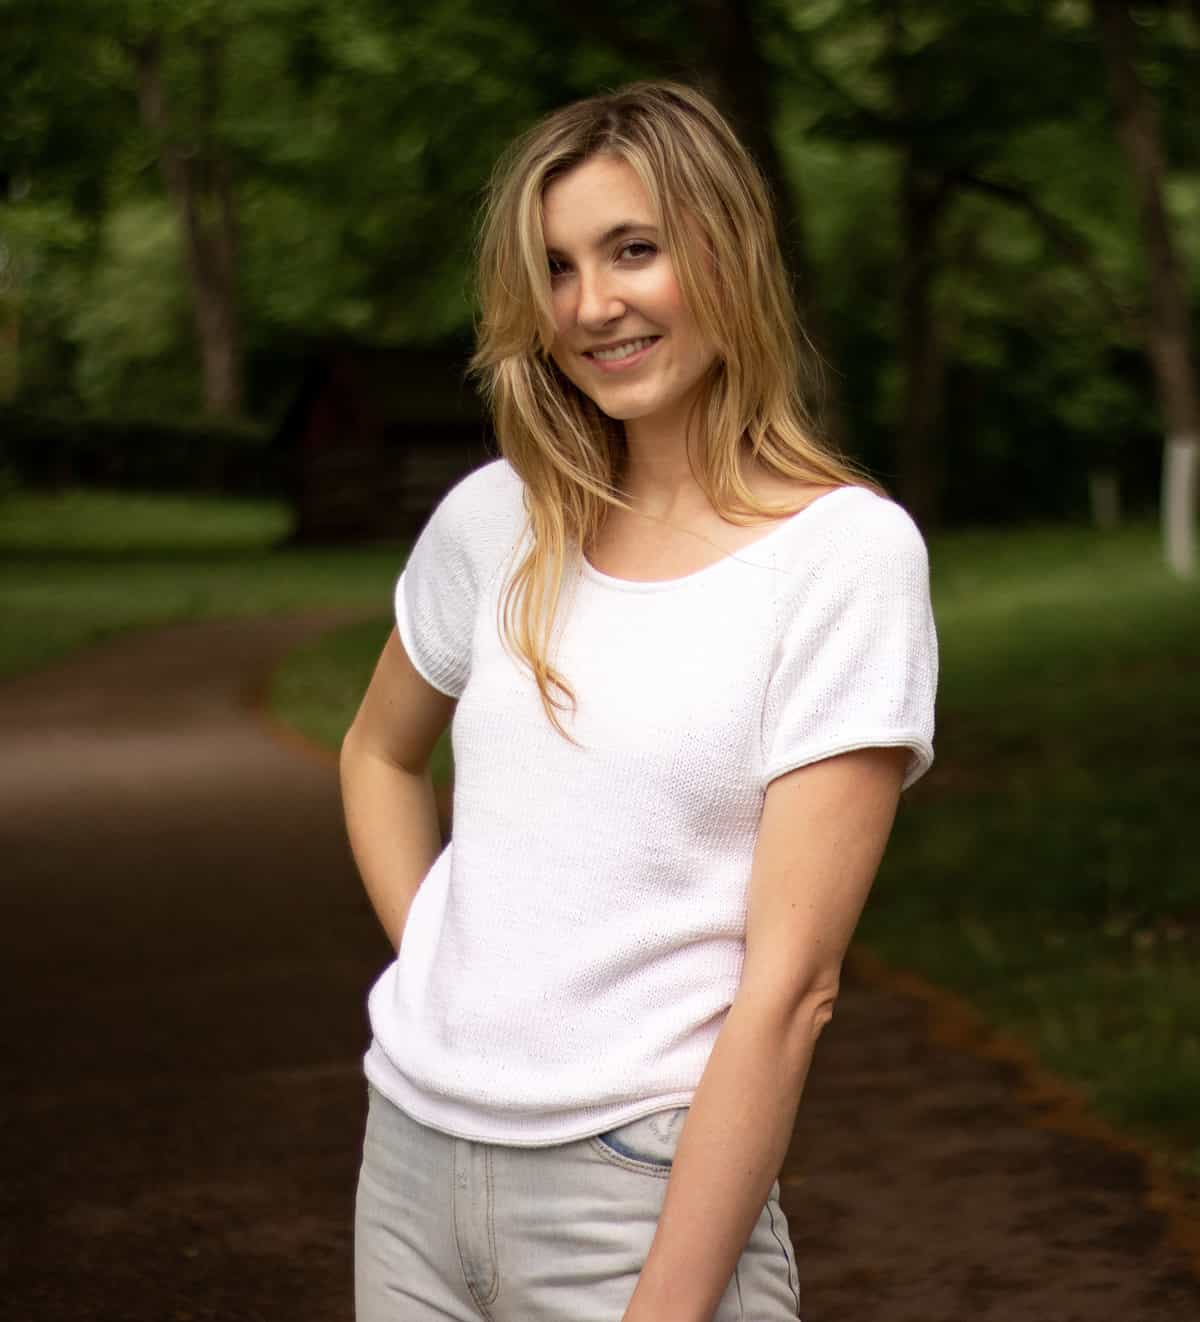
This top is designed to be worn with 0-4” of positive ease at the bust. Model is 6′ tall, has a 33” bust, and is wearing a size small with 3” of positive ease. For best fit, choose a size that is 0-4” larger than your corresponding bust measurement.
Gauge
22 stitches and 28 rows = 4” in stockinette stitch
Abbreviations
This pattern is written using U.S. English Terminology
BO = bind off
CO = cast on
K = knit
M = stitch marker
M1L = make one left. Pick up the bar between the stitch you just knit and the one you are about to knit with your left needle from front to back, knit through the back.
M1R = make one right. Pick up the bar between the stitch you just knit and the one you are about to knit with your left needle from back to front, knit through the front.
PM = place stitch marker
RS = right side
SM = slip stitch marker
SSK = slip slip knit (left leaning single decrease)
st = stitch
WS = wrong side
[ ] = work instructions within brackets as many times as directed
* = repeat the instructions following the single asterisk as directed
Perfect Knit T-Shirt Pattern
Cast On 94, (94, 94, 94, 96), (96, 96, 96, 96) stitches.
Set-Up Row: p2, PM, p2, PM, p20, PM, p2, PM, p42 (42, 42, 42, 44) (44, 44, 44, 44), PM, p2, PM p20, PM, p2, PM, p2.
Row 1 (RS): k1, M1L, [k to M, M1R, SM, k2, SM, M1L] 4x, k t o last st, M1R, k1.
Row 2 (WS): purl, slipping Ms as you pass.
Rep rows 1-2 eight more times. Then, repeat row 1 once more.
Neckline Join:
You will now join the neckline and begin working in the round.
Cast on 18 (18, 18, 18, 20) (20, 20, 20, 20) sts at the end of the row you just worked. Do not turn, with RS facing you and careful not to twist your work, join to work in round. PM to denote beg/end of each rd. [212, (212, 212, 212, 216), (216, 216, 216, 216) sts total].
Round 1: knit, slipping Ms as you pass.
2: [k to M, M1R, SM, k2, SM, M1L] 4x, k t o end of rd.
Repeat rounds 1-2 9, (13, 20, 25, 30), (35, 41, 46, 52) more times. [292, (324, 380, 420, 464), (504, 552, 592, 640) sts total].
Work even (knitting every row) until piece measures 7, (7.5, 8, 9, 10), (11, 12, 13, 13.5)” from original CO edge.
Separate for Body:
You will now separate the sleeves from the body of the tee and begin working the body in the round.
Next round: removing Ms as you pass, k to 1st M, remove M, k1, place next 62, (70, 84, 94, 104), (114, 126, 136, 148) sts on st holder or scrap yarn, CO 6 sts, k next 84, (92, 106, 116, 128), (138, 150, 160, 172) sts, place next 62, (70, 84, 94, 104), (114, 126, 136, 148) sts on to st holder or scrap yarn, CO 6 sts. Continue knitting body sts to join in round. PM to denote beg/end of each round.
You now have your body sts joined in the round and your sleeve sts on scrap yarn. [180, (196, 224, 244, 268), (288, 312, 332, 356) sts total].
Work the body sts even in stockinette stitch until piece measures 13.5, (13.5, 13, 12.5, 11.5), (11, 10, 9.5, 9)” from underarm CO sts.
BO using a 6 stitch I-Cord bind off.
An I-Cord Bind Off gives this simple t-shirt a beautiful finished edge! This is my favorite tutorial for the i-cord bind off:
Sleeves:
Using double pointed needles or shorter circular needle, slip the 62, (70, 84, 94, 104), (114, 126, 136, 148) sts set aside for a sleeve onto your needle. Pick up and knit 9 sts at the underarm, k around arm opening even in stst until sleeve measures 1.5”. End the final row at the center of the underarm.
BO using a 6 stitch I-Cord bind off. Repeat for second sleeve.
Neckline:
1: beg at left side of back neckline, pick up and knit 23 sts along left sleeve, 12 sts along left side of front neckline, 19 (19, 19, 19, 21) (21, 21, 21, 21) sts across the center front, 12 sts up the front neckline, 23 sts along right sleeve, and 43 (43, 43, 43, 45) (45, 45, 45, 45) sts along the back center.
BO using a 4 stitch I-Cord bind off.
Finishing:
Weave in all ends to secure.
Block by soaking in warm water and lay flat to dry.
Enjoy!
For questions, please email support@originallylovely.com
I’d love to see your finished work! Share on social media using the hashtag #originallylovely or by tagging @originally.lovely and @lionbrandyarn on Instagram!
I hope that you’ve enjoyed this knitting pattern!
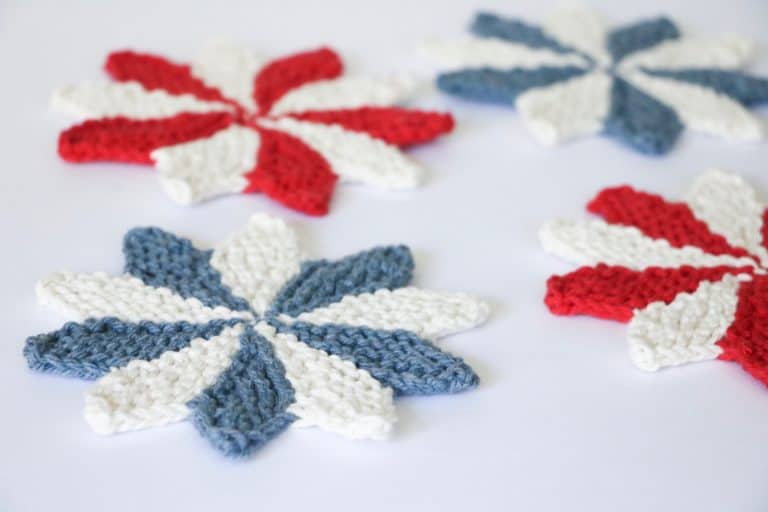
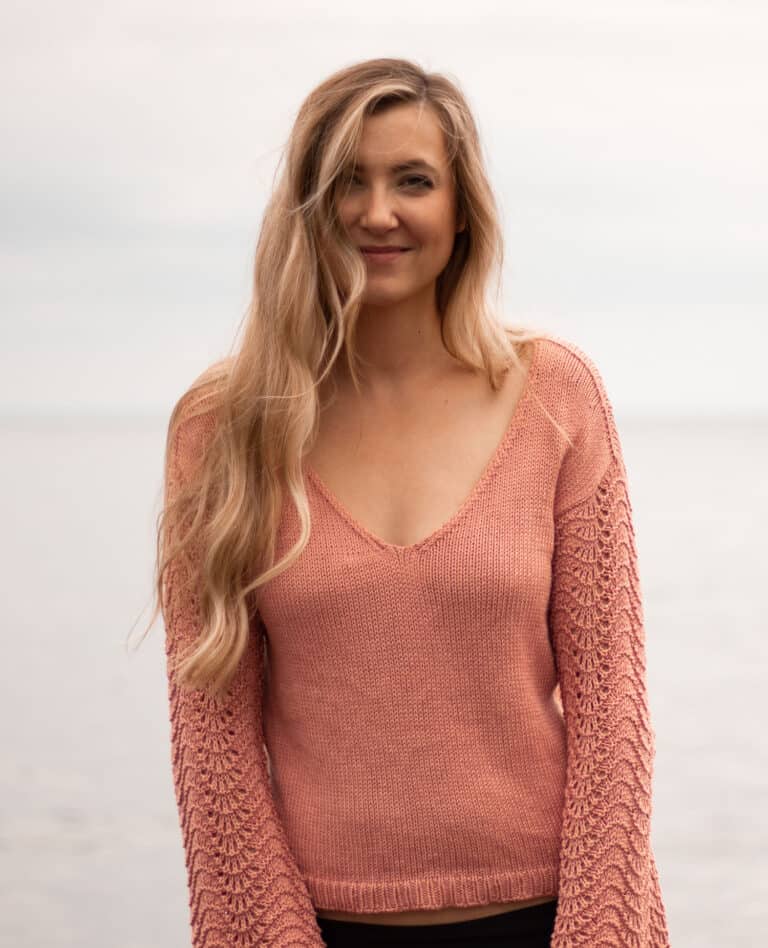
Looking for other free warm weather knitting patterns? Check out the Aria Sweater, this Argyle Sweater Vest, or the Diamond Lace Kimono!
You can also check out the crochet version of this pattern, the Perfect Crochet T-Shirt!


Thank for this Perfect T Shirt pattern. It looks lovely + comfortable.
Thank you! So glad you like it 🙂
What does Ms mean in this pattern? Not on the abbreviation list???
Hi Deborah! The Ms refer to the markers! In the abbreviation list it is listed as “M”, but Ms is just the plural of that, indicating you will be working with multiple markers. Let us know if you have any other questions. (:
Dear Kaitlin
Lovely,,, lovely t shirt,,, ideal to wear anywhere. Alas, though when I attempt to print it,,,, it just aint workin please advise Thanks so much A fan from Dixie Helen
Hi Helen! The free version is to be viewed from the webpage. A printable version is available for purchase on Ravelry or Etsy!
Hi Kaitlin, I have finally understood the pattern and was able to finish the row perfectly. Thank you.
Thank you so much for this great pattern! I have knitted & blocked 2 swatches already as I’m having trouble making gauge! You must be a tight knitter 🙂
Is your gauge from your pre-blocked shirt? I’m about to pull out my number three needles just to try again!
Hi! So glad you like it. My gauge is taken from my blocked swatch. What yarn are you using, and are you stretching your swatch too tight when you block? The gauge is pretty close to the listed gauge for this yarn. Everyone has different tension though!
Kaitlin – you’re amazing for giving such a quick response! Thanks.
I think I may be stretching it too much. I bought the kit with the Coboo White. Really excited to get this going! I’m halfway through a swatch with my US3 needles. I’ve never been this off with gauge, but this is my first time with this fiber blend and I may be stretching too much😬. I’ll get there! -JT
Yes I’m thinking its the stretch! A friend of mine pointed out that this yarn doesn’t have much ‘memory’ meaning it doesn’t bounce back much after its blocked. I would just block it and lay it flat how it naturally wants to lay, not stretch or pin at all 🙂
Thank you so much for making this pattern available!! I have a question in your instructions you state:
Work even (knitting every row) until piece measures 7, (7.5, 8, 9, 10), (11, 12, 13, 13.5)” from original CO edge.
which CO edge? the added stitches added during the join? or the CO stitches (96) which were worked flat?
I am a relatively new knitter
Thanks again
Hi! The original cast on edge means the very beginning cast on edge you made. So this would be the ones where you cast on and worked flat a few rows. This very beginning edge is the back of the neck so measure from that point 🙂 you should be pretty close after you finish the raglan increases and only work a few more rounds to get to this measurement
Hello Kaitlin, I am working this tee shirt with KnitPicks CotLin yarn in their special reserve, Reflections. My question is regarding the 6 stitch i cord. I am only finding informational videos on 3 or 4 stitch i cord. Is the suggestion for a 6 stitch so that it provides extra weight? How does one work with the 6 stitches, work the five live and then pick up the 6th from the top? Please help ! Thanks
PS I originally was doing the free version but decided that I liked this so much at I bought your pattern. Thanks for the options.
Hi Susan! Yes, the 6 stitch i-cord adds a bit more weight than a 3 or 4 stitch i-cord. An i-cord bind off doesn’t completely stop curling like rib stitch does so having a heavier, thicker i-cord across the bottom helps to keep it from curling and makes it lay flat! So yes you are correct in the way that you work it, whereas a 4 stitch i-cord would be 3 live stitches and one at the hem, a 6 stitch i-cord is 5 live stitches and a 6th worked along the hem. Hope that helps! -Kaitlin
Hi, love this t-shirt sweater but I am at loss in round two when you say
“ Row 2 (WS): purl, slipping Ms as you pass.” what exactly do you mean
Any help would be greatly appreciated.,
Thank You so much.
Muriel
Hi! This just means you purl across that entire row and when you come to a stitch marker don’t remove it (because you’ll need them on the knit rows!) so just slip the marker so it stays in its place
I’m not sure about the instructions as to the neckline. I’m at the part where you are knitting in the flat and now you instructions say you will join and knit in the round. You say to cast on stitches, but it is not clear as to how to connect the fabric you have on your needles.
Can you help me? Thanks.
Hi Sandy! At the end of the row, you cast on the amount of stitches noted and then you start knitting what was the beginning of the round you just worked. So basically instead of turning you just start working on the other side. Be careful not to let your cast on sts twist though! After a few rows you will see it start to form 🙂
Love this pattern. For the medium, how close to the full 4 skeins of Coboo are used? Wondering if it’s safe to buy just 4 or if I need a 5th just in case!
You should be fine using 4! Technically for a size M you’ll use about 3.3 balls. I’m always sure to round up or add an extra ball if its close because some people knit using more yarn 🙂
Hi! Lovely pattern! I’m having a great time working it so far. I have a question though… it says to continue knitting in round for 8 inches (I’m working a medium) from CO edge. There is a back edge and a front edge, both are different heights at this point. Which should I be basing the 8 inch measurement on?
Hi Tabetha! This is from the back neckline (the higher portion). This is the ‘original cast on edge’ because its what is cast on at the beginning. Depending on your size (and your row gauge), this could be anywhere from no additional rows, to just a couple rows, or even a handful of rows! Basically, this just assures that the top isn’t too snug at the underarms, because who wants that?! Hope that helps 🙂
1st, THANK YOU for thinking about plus sizes. My question is, what happens to the rows that are knitted flat before the join? There are unjoined ends for the rows above the join.
Hi Diane! So glad you like the pattern, I am a big advocate for size inclusivity so always try to be sure my patterns work for as many as possible 🙂
Regarding the rows knitted flat before the join: they are knit back and forth so no un-joined ends! When you go to pick up the stitches to work the neckline, it basically all is joined together and the seams are ‘hidden’ on the wrong side. This results in one nicely shaped, seamless neckline. The rows worked flat before the join are what makes the neckline fit nicely and have a nice shape that is shorter in front, higher in back. Hope that helps. Happy Knitting!
Loving the knitting of the t-shirt. I’m getting ready to do the 6 stitch I cord at the bottom of the body. Making the medium, is it really 13 5 inches from underarm CO or 9 5? Seems it would be too long at that size.
Hi! So glad you are liking it. Yes, 13.5″ from underarm is correct. The reason it is longer for smaller sizes and shorter for larger sizes is because the yoke is longer on larger sizes so making it the same size or longer for these sizes would end up with a much longer top (most often, an increase in sizes doesn’t always mean an increase in height)! This is the per the ‘standards’ according to Craft Yarn Council. That said, everyones bodies are different! One of the best parts of knitting is custom tailoring pieces to fit, if you feel like 13.5″ from the underarm is too long, definitely make it shorter! Hope this helps 🙂 -Kaitlin
Hi Kaitlin,
Love this pattern! I’m new to sweater knitting and am excited to see the shaping coming along. I just tried my piece on after separating for the body. The size seems right but the neck line opening is just shy of slipping off my shoulders. I do have gauge and I rechecked my stitch count, so I don’t think that’s the problem. Is the I cord bind off meant to make the neck opening a bit smaller? I’m not sure what else could be causing the large neck opening. Any ideas?
Thank you!
I purchased this pattern with the recommended yarn by Lion Brand. It turned out so well I am knitting another. It is the perfect tee for dressing up or dressing down (jeans)…it is enjoyable to create. Thank you.
Thanks Cynthia! I’m so happy to hear 🙂
Hello Kaitlin,
I am brand new to knitting. My husband bought me a set of round needles as a gift, so I found this lovely pattern as a 1st project. However, I am already lost at the 1st section. Instructions say “Repeat rows 1-2 eight more times. Then repeat row 1 once more.” Does that mean each row 1 & 2 are repeated 8 times, or or that both rows are repeated 4 times for a total of 8 more rows? I’m ending with too many stitches. Thank you for the clarification.
Hi Wendy! When it says ‘repeat rows 1-2 eight more times’, this means you’ll knit rows 1 and then row 2, then you’ll repeat these two rows again, 8 more times total, for 16 total repeated rows. So this would be the first way you mentioned. Then, after you’ve completed the repeats you’ll work row 1 once more. Hope this helps!
Beautiful pattern! Do you think I could get away with 29 inch circulars? I’d be making size S.
Hi Debra! Yes you definitely could use 29″ circulars. They might be quite squished at the end of the yoke rows but once you separate the sleeves from the body it will work great. Hope that helps!
I just finished my third one and will be onto a 4th. How do you deal with the variations in the dye lots? I try to check, but it’s hard when you order online. I’m trying to ignore the slight color differences. On the third one, I tried the “change balls every few rows” deal.
Hi Colleen! Yay! I’m so happy to hear you like the pattern!
That is frustrating about the dye lots. I haven’t noticed any differences in dye lots with Coboo, but if you are using hand dyed yarn or variegated colors I know the differences can be huge! Knitting with two balls and alternating yarns each row helps some but I find that with some yarns, the differences are pretty unavoidable and I just try not to choose those yarns… Sorry I can’t be of more help!
-Kaitlin
What a lovely pattern. When you cast on the additional 18 stitches before joining in the round, which cast on method do you use. Thank you for your help!
Hi Jane! Thank you so much!
I like to use backwards loop cast on method for the neckline join! I know some knitters prefer to use a more substantial cast on edge such as the chain cast on, but I think that since you are picking up the stitches later a thinner cast on like the backwards loop keeps it from being too bulky!
Hope that helps, happy knitting!
-Kaitlin
Hi Kaitlin, looking forward to making this one! I’m stuck on the first neckline shaping row. Could you please help? I’m not sure how many stitches are increased with M1L & M1R for this row. The edges have a knit stitch and M1 increase? There are increases on each side of double marker? Appreciate your insight. Thanks!
Hi Michelle!
For row 1, you will increase 10 stitches. One stitch at the beginning and end (which will be either side of the neckline) and one stitch on either side of the ‘raglan stitches’. So yes, you will be increasing on either side of the double markers (which indicate the raglan stitches), and after the first stitch and before the last stitch (to shape the neckline).
Hope that helps! Let me know if you have any other questions
-Kaitlin
So as I read this, it’s increasing 10 stitches 9 times.That’s 90. For a size L, that’s 94 + 90 = 184. Then at the join, increase 18 stitches. That makes 202 stitches, not 212. What am I missing?
I just saw it said repeat row 1 again, so I got to 212. I’m sorry.
No need to be sorry! Glad you figured it out! Let us know if you have any other questions (:
Love this pattern! I am well into the pattern in the L size but am finding the neckline too wide. Gauge is accurate, using Coboo yarn as suggested. Saw a question earlier asking if the icord bind off will narrow the neck enough to fit, but didn’t see a response. Any suggestions, maybe casting on fewer stitches, but then how to adjust to fit my size? If you’ve already responded, I apologize!
Hi Tricia! Yes, the i-cord bind off will make the neckline fit and be the correct shape, without it the combination of the yarn curling, stretchiness, and weight pulling it to the sides makes it really big and relaxed. If you wanted, you could work the I-cord bind off before moving onto the rest of the piece if you wanted a more accurate representation when you tried it on 🙂
I am confused with row 1. When you are repeating the(4times)are you adding more markers than the set up row and is it a print mistake after the 4 times repeat it says k t o to last st m1r,k1. Are you to k all remaining stitches after the repeats
Hi Connie! If I am understanding your question correctly, you won’t be adding any stitch markers in Row 1, just the set up row. After you repeat the part in [ ] 4 times, you will knit until the last stitch in the row, M1R, and then knit the last stitch. Does this help answer your question? If not, please let me know and I can try to clarify anything that still feels unclear!
Hi Kaitlin! Thank you so much for sharing this pattern. This is my second of yours and I am really enjoying it.
One question for you – I’m to the point where I separate out the sleeves, but my stitch numbers are a little different from what you specified (must have gotten off track somewhere!), so it’s hard to plan which to set aside.
You say to k to 1st M, remove M, k1, place next 62, (70, 84, 94, 104), (114, 126, 136, 148) sts on st holder or scrap yarn. Is this removing to the next marker, or one stitch before or after it?
Thanks!
So currently at this point you have 8 markers placed, one on either side of the two raglan stitches, and four raglan stitches total. The part where you cast on the stitches to join in the round is the front and the side opposite this is the back. That leaves the large sections on either end which are the sleeves. When you are slipping stitches onto the scrap yarn for the sleeves, you’ll slip up until the next marker, then remove that marker, and slip one more stitch.
So basically, each ‘raglan’ has two stitches, and one of these stitches goes to the front/back body pieces, and one stitch goes to the sleeve. Does that help?
thank you for offering this pattern for free. It was my very first attempt to read an English pattern (I am Dutch) and it worked great. I made a few now and am now eager to play with it, adding more interesting stitches. Thank you very much. I now am certain I am able to try more English patterns.
Hi,
this is a beautiful pattern and I’d love to try it as my first tee (I only knitted socks, scarfs, etc.). The one thing is I’d like to have a smaller neck opening – could you recommend how to do this or should I find another pattern for that?
Hi Lukas! I am excited to hear you are wanting to knit your own tee! As a policy we don’t offer help modifying patterns, since we can’t assure accuracy and quality, especially since modifications won’t go through the besting process. Sorry I couldn’t be of more help. Happy knitting!!
Hello, I’m a new knitter and this is my first project. My question is after you cast on your 18 stitches for the neckline do you then put on a stitch marker or you join then put on a stitch marker? Thank you.
Hello! Great question – you will place the stitch marker before you join in the round! When you do join, just make sure your stitches aren’t twisted (I have made this mistake many times!) Enjoy the pattern! (:
Hi Kaitlin. I have just started this knitted T shirt pattern.
I have completed the Set-Up Row and now doing Row 1. I have done K1, M1L, knitted to M, M1R but don’t understand what SM means.
I can see the explanation in the Abbreviations, but (unless I have done something wrong) I have 2 stitches before I get to the next marker.
Hoping you can help me.
Thank you
Bev
Hi Bev! If I am understanding your question correctly, I think you did the set up round correctly. The SM means slip marker, so after you knit to the marker (K to M) and make 1 right (M1R), then you will slip the marker and continue with the pattern. The SM doesn’t do anything to any stitches, it just moves the marker from one needle to the other. If you are still having issues or have additional questions, feel free to send a photo of your project to our support email and we can take a look at it! (:
Hi! this is such a lovely pattern and I am making my second one. Thank you for sharing such a beautiful pattern. I have a small doubt, in my second one the joining in the round comes in the front of the tee. But I don’t remember doing this in the first one. I also would prefer the join to be at the back or under the armhole. Is there something I am doing wrong this time? please help! Thank you!
Hi Raakhee! You join at the neckline, but then when you work that first round after the join, the beginning/end of each round moves to be at the underarm. Let us know if you have any additional questions!
Thank you! Its in the front for me, i will have to figure out where i have gone wrong. Will try again and pay more attention this time to the joining in the round. Thank you!
I just joined and hope to make this size XS for my granddaughter. I was so excited to get started that I went to your link to buy the Caboo yarn before I saw the link to include the free written pattern. Can you help me get the whole pattern so I don’t have to read it on my computer? The Caboo yarn was purchased this morning! Ah!
Not sure what “website” means below. I don’t have a website, but I am on ravelry as BerkeleyDee. Thanks!!!
Hi Dee! The free pattern is only available on our Originally Lovely website (https://www.originallylovely.com/knitting/perfect-t-shirt-knitting-pattern/). Otherwise, you can purchase a PDF copy of the pattern on Ravelry. Hope this helps! Let us know if you have any other questions!
Thank you for this pattern. My question is in regards to the sleeves at the step to pick up the underarm stitches. The tutorial states to pick up 9 stitches. In the step where the body is separated, only 6 stitches are cast-on in the underarm. Is there a trick or do you have a tip on where to pick up these stitches since they don’t correlate?
Hi Jane! For this, you are picking up stitches your stitches in the V of each stitch. Since you are picking them up in the opposite direction from where they were initially worked, this will end up being between the original stitches, so 6 stitches, between each one gives you 7. Then, pick up one more on either side to prevent any holes. Hope this helps. Let us know if you have any other questions!
Thank you for this beautiful pattern. I am so much looking forward to wearing my new tee. I am Danish so I might have run into some translation issues:) However, I hope you can help me solving out my problem about my missing stitches. Will you count with me please? I knit a size S. I cast on 94. I knit Row 1 introducing the raglan that’s 8 stitches. I do 8 more rounds of Row 1 + an extra that’s 9 x 8 raglans in each RS row. All in all that will be 10 Rows x 8 stitches? Then I cast on 18 more stitches to join the neck. As I have understood the pattern this would be 94 + 80 + 18 = 192 stitches. Acc to the pattern I am supposed to have 212 st. I am stuck… I would be happy to receiving some guidance. Thank you in advance.
Hi Suca! It looks like the issue might be with round 1. You will cast on those 94 stitches, and then there should be 10 new stitches created in row 1 (the first m1L, 8 new stitches from the directions in the [ ], and then one new stitch from the final m1R at the end of the row. I think that is where the issue might be! If that doesn’t work, please let me know. You can always send a photo to our support email (sometimes it is a bit easier for us to see stitch counts in a photo!) if you are still having trouble! (:
Thanks for this nice pattern. Love the look of the crocheted version but I don’t crochet, so I’m going to try using seed stitch instead of stockinette to give it a little more texture. I know you can’t provide guidance, but do you think that would work?
Hi Robbie, unfortunately we don’t give feedback on any modifications as those modifications wouldn’t have gone through the testing process, but you could certainly give it a try! I would just recommend making sure you gauge swatch to make sure your gauge matches and you like the fabric if you do make any stitch modifications. Hope it turns out great! (:
After joining at the neckline, I did not move the beginning/end of each round to the underarm. How does that impact my project? I am almost finished with the body.
This shouldnt affect at all! At this point, the BOR just indicates where you will begin your i-cord bind off. Simply begin this near the underarm so any visible seam or bulk from the beginning of this is disguised on the edge of your work.
Hi! I’ve been really enjoying this pattern, thank you for making it!
For the first section (the part knitted flat) I saw in the comments that “k t o last st, M1R, k1” means to knit all stitches except for the last one, M1R, and then knit the last stitch. I thought k t o means knit all stitches except for the last one. However, in the Neckline Join section, it says “k t o end of rd.” Does that mean to just knit the rest of the round? What does k t o mean? (I googled it but couldn’t find an answer. Sorry if this is a silly question!)
Hi Violetta! No worries at all – the “knit to” instructions will differ depending on what part of pattern you are working on (in other words, whenever “knit to ___” shows up in the pattern, it may be knit to the marker, knit to the end of round, etc). The k is shorthand for knit (as shown in the abbreviations) and what may be throwing you off a little bit is the space between the t and the o. It should just say “k to” and then whatever the pattern has you knitting to. Does that make sense/answer you question?
Ohhh that makes sense, sorry about the silly question! Thank you for the help!
No questions are silly! That is what we are here for! (: Enjoy!
What cast-on did you use at the very beginning? (Edited to correct the spelling of my email address.)
Hi Bev! I like backwards loop cast because it is thin, using a thin cast on method is preferred because you will be picking up these sts later. Hope this helps!
Hi,Imup to 212stitches for size M sweater.
Now doing Round 1 Knit
Round 2to M,M1R,SM K2 SM,M1L(4 times)
Can’t get to 380 stitches since I count 8stitches more in each second row.
What am I doing wrong ?
Thank you
Hi Anita! You will repeat round 2 20 more times, so 21 total increase rounds in this section. 21*8=168. 168+212=380. Hope this helps! (:
Quick question – in the Separate for Body section, it says, “Work the body sts even in stockinette stitch until piece measures 13.5, (13.5, 13, 12.5, 11.5), (11, 10, 9.5, 9)” from underarm CO sts.” How come the measurements get smaller in the parenthesis rather than bigger like in all the other size substitutions?
Hi! These get smaller to account for the increase in yoke size. Just because a size gets larger, doesn’t necessarily mean that the garment needs to be longer, so these numbers are calculated after taking into account the yoke size to get the desired total length.
I need instructions for the 6 i-cord bind off as in the pattern, all tutuorials on YouTube are for 3.
Hi Willie! We don’t have a tutorial for an i-cord bind off we can sent to you, but you would work the 6 stitch bind off in the same way you work the 3 stitch bind off, just with more stitches!
I am not sure how to end the I cord bind off. I am at the end of the BO and have 6 sts left on my needle. How do I get these 6 sts bound off?
Thank you
Hi! You can bind off these 6 sts as normal and then seam them to the beginning of your i-cord bind off to ‘seal’ them together. Hope that helps!
Hi Katlin,
I love this pattern. I am making size L 44″ bust. When I added the 18 stitches to make the sweater in the round I only have 208 stitches in total not the 212 noted in the pattern. Where did the additional 4 increases come in? I have calculated all the increases and still come up with the same answer. Could you please clarify this for me.
Thanks so much,
Karin Berg
I figured out my mistake was not counting the first 2 and last 2 stitches, only the increases. It would have been helpful to know how many stitches were in between the raglans. In the case of size large it was 22, 2, 40, 2, 62, 2, 40, 2, 22 +18 = 212. Thanks so much for this pattern, Karin Berg
Glad you figured it out and thanks for the feedback on the pattern! We can certainly take a closer look at it (: Let us know if you have any other questions.
I’m having issues with joining the neckline. The last flat row is done on the RS. So when I cast on the addt stitches I’m working on the WS. So I’m not sure how I’m supposed to be on the RS. Do I just purl another row so that I’m on the RS? I’m confused and frustrated.
Hi Angel! Could you send some photos of your work to our support email? That will allow us to take a closer look to see what might be going on!
Hi.
I really like the pattern. It is my first time knitting anything.
I was wondering that in «Abbreviations» it says SSK. But I can not find that anywhere in the pattern..?
And in the pattern under «Sleeves» it says k in stst. What is stst?
Hello Amy! So exciting to hear this is your first time knitting something! You are correct in that SSK doesn’t show up in the pattern anywhere, so you don’t need to worry about that abbreviation! Stst is an abbreviation for stockinette stitch! Let us know if you have any other questions!
Hello, I’m considering knitting this,is there a video available as this will be the first time I knit a shirt ,thanks
Hi Bess! No, we do not have a video walking you through the pattern, but if you have any questions you can always reach out to our support email and we can try to help! If there are specific techniques that are new to you, there are alot of great resources from other knitters/designers on YouTube that you could reference!